Make Halloween cookies using my rich and flavorful chocolate sugar cookies as the starting point. Once your cookies have cooled, have fun decorating them for Halloween using royal icing or an easy glaze icing. Feel free to leave the icing white or tint it festive colors. This post shows many different ways to decorate the cookies based on skill level, so this is definitely something beginners can accomplish too!

Decorated Halloween Cookies
Today’s post brings a few published recipes together to show you fun ways for decorating Halloween-themed cookie cutter sugar cookies. The recipe below is my chocolate sugar cookies, which has its own page if you ever want to read more about them. You can, of course, use my plain sugar cookies instead or your own recipe for sugar cookies with these fun decorating ideas! I love these chocolate sugar cookies because they’re flavorful and if you don’t accidentally over-bake them, they’ll remind you of brownies.
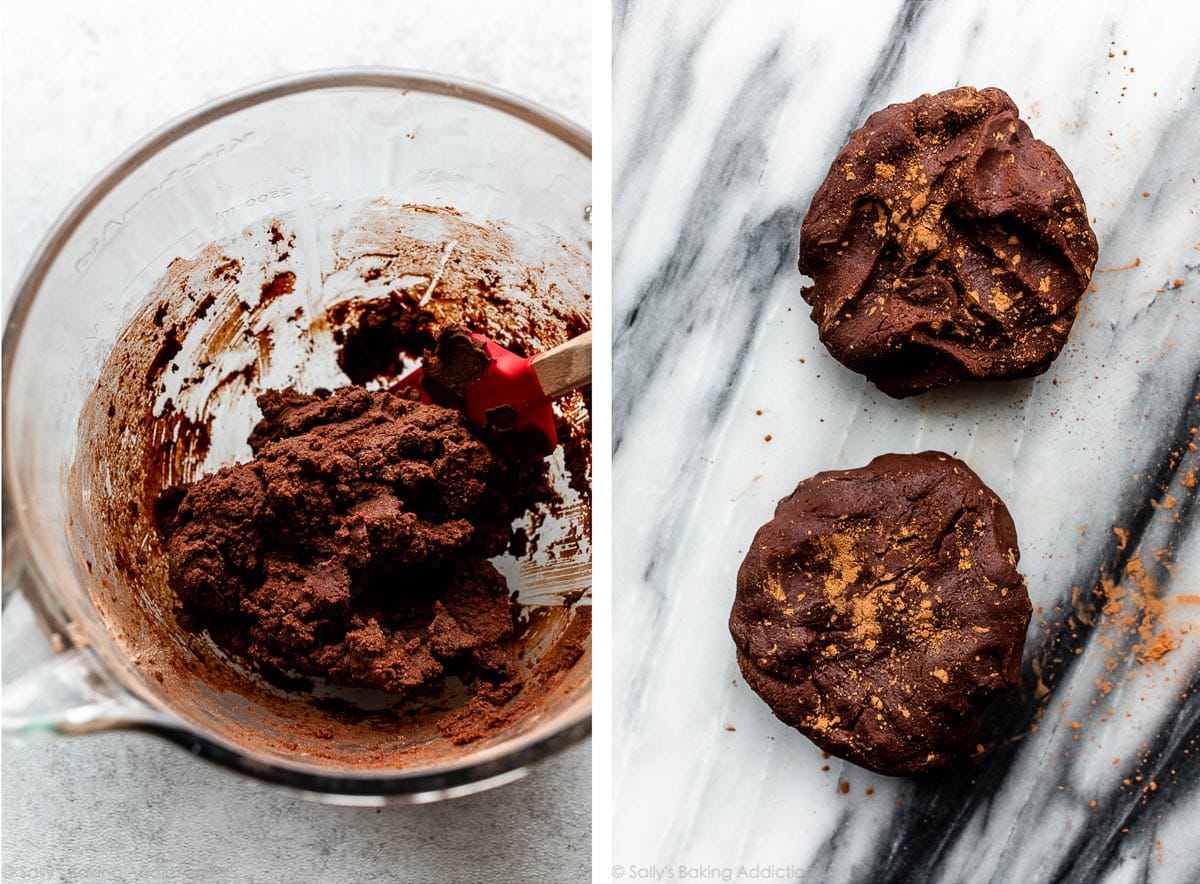
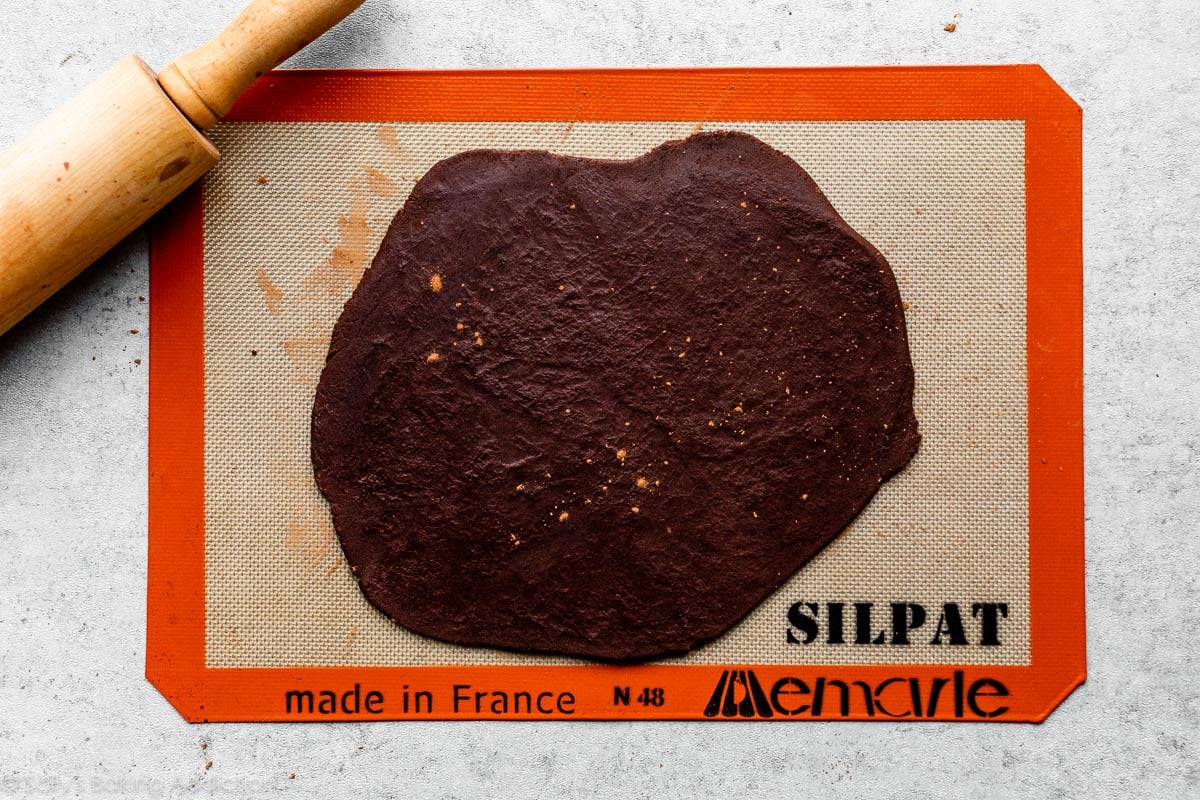
Carefully follow the order of steps in the printable recipe below. The dough is sticky and you can use cocoa powder when rolling/handling the dough. (I use it instead of flour for shaped chocolate cookies!) To prevent the cookies from over-spreading, the cookie dough must chill in the refrigerator. Roll out the dough right after you prepare it, and then chill the rolled-out dough. (Because at this point the dough is way too soft to cut into shapes.) Don’t chill the cookie dough and then try to roll it out because it will be too cold and impossible to roll. I divide the dough in half before rolling it out because smaller sections of dough are simply more manageable.
- Another trick! Roll out the cookie dough directly on a silicone baking mat or parchment paper so you can easily transfer it to the refrigerator. If you don’t have enough room for two baking sheets in your refrigerator, stack the pieces of rolled out dough on top of each other.
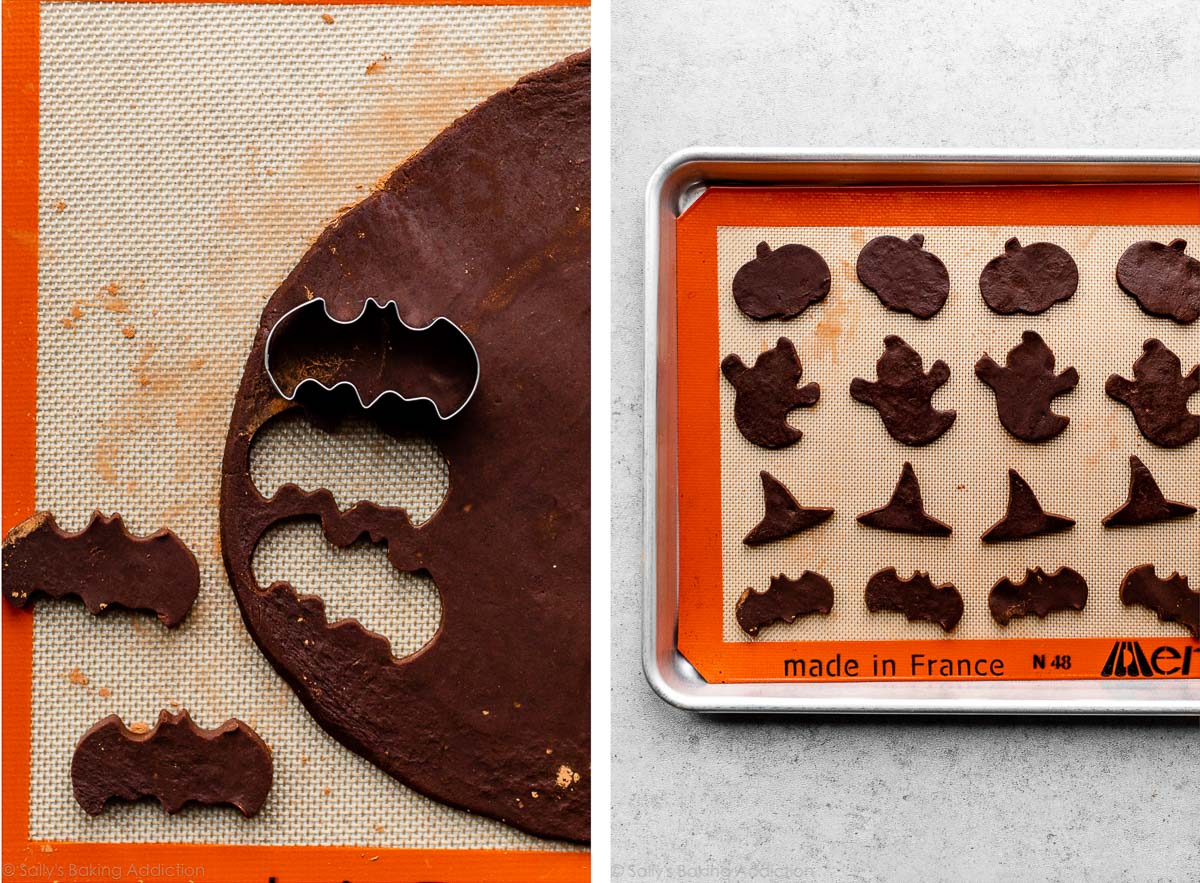
Some quick pictures of the process:
Choose Royal Icing or Easy Glaze Icing
The pictures in this post show chocolate Halloween cookies decorated with 2 icing options. Let me explain both options and then you can choose which you’d like to use. And, of course, you don’t have to use either if you have another sugar cookie icing you love more!
- Royal Icing: I have a separate post for royal icing where you can find many FAQs, make-ahead instructions, and a video tutorial. It’s simply too much to include here and I don’t want to leave anything out, so hop over to that printable recipe to learn how to make it. Meringue powder is an essential ingredient. Royal icing dries quickly and because it’s so sturdy, you can pipe sharp detail. This is ideal for intermediate or advanced cookie decorators. If you’ve made my Valentine’s Day cookies, Easter cookies, or watermelon sugar cookies, you’ll be familiar with decorating with royal icing.
- Easy Glaze Icing: I have a separate post for easy cookie icing. I LOVE this icing because you don’t need meringue powder or a mixer. It’s like a very thick glaze. This icing takes awhile to dry, about 24 hours, and you can’t pipe detail very well (like a Jack-O-Lantern face). But if you’re a beginner and want simple decoration, this is your recipe!!
The picture at the top of this post shows the cookies decorated with royal icing. Here is that photo again, as well as a photo of Halloween cookies decorated with the easy glaze icing:

Royal Icing Decorating Video
This following video shows me decorating each Halloween cookie with royal icing. You can use the easy cookie icing for these same looks with the exception of the Jack-O-Lantern’s face. (Almost impossible to pipe layers & sharp detail with that glaze icing.)
Decorating Tools For Halloween Cookies
No matter which icing you choose, here are some helpful decorating tools you need. I am not associated with any of these brands—I personally use and love all these items! Some of the following links are affiliate links.
- Rolling Pin: If you have difficulty evenly rolling out dough, try this adjustable rolling pin instead—it’s incredibly handy!
- Parchment Paper or Silicone Baking Mats: You need either for rolling, chilling, and baking the cookie dough.
- Halloween Cookie Cutters: The cookie cutters I used are no longer available, but this 5-piece Halloween set has some of the same shapes I used in the photos in this post. The mini ghosts you see in the royal icing photo are actually upside-down mini tulips! Here is the set it came from.
- Piping Tips: I use Wilton piping tip #4 for outlining and flooding the cookies with icing. This is a wonderful basic piping tip to have in your collection. (Wilton piping tip #5 works for this too, but it’s a little larger.) For piping royal icing in fine detail, such as the Jack-O-Lantern’s face and leaves, I use a thinner round tip Wilton piping tip #2.
- Gel Food Coloring: Tinting the icing different colors is completely optional. No matter which icing you use—royal icing or the easy glaze icing—if you want to tint it different colors, use gel food coloring because liquid food coloring will alter the consistency. I used the Orange, Super Black, and Mint Green on the cookies in these photos.
- Disposable Piping Bags or Reusable Piping Bags
- Couplers: Couplers are needed if you’re switching around your piping tips and icing colors. For example, if you’re flooding a bat cookie with black icing, but then you need a smaller tip for black icing detail on a Jack-O-Lantern cookie. Or if you only have one piping tip #4 but want to use this tip for multiple colors of icing. A coupler makes it easy to switch tips between bags of icing.
- Toothpick or Needle Scriber Tool: A toothpick or needle scriber is helpful if you need to spread/move/smooth icing. You can see me using a toothpick to create neater icing edges in the video above.
- Eyeball Candies & Sprinkles: I used orange and green nonpareils on the royal icing witch hats and chocolate sprinkles on the royal icing bats. The ghosts decorated with easy glaze icing had the black balls from this Halloween sprinkle mix as eyeballs. (That sprinkle mix also has eyeballs!) On the cookies pictured below, I used sprinkles from the brand Neon Yolk.
For even more recommendations, see this full list of my favorite cookie decorating supplies.
PS: If you plan to make Halloween cupcakes, you’ll use many of these tools again!
Coloring Success Tip: As Icing Sits & Dries, It Darkens
As icing sits in a piping bag before using AND as it dries on a cookie, its color darkens. This is the case with most colors, particularly red and black. When I make black icing, it’s usually blue-ish gray in the bowl and piping bag and then as it dries, it darkens into a black shade. Don’t go overboard on food coloring because the color will deepen as the icing dries.
Can I Use Natural Food Coloring For Cookie Icing?
Yes, absolutely! I am not affiliated with it, but I’ve used the brand Supernatural and they have a line of natural powdered food coloring that’s available in a few colors. You need to dissolve the coloring in a little water before using, so make sure that you very slightly reduce the amount of water needed in either icing recipe. (Note: If you ever need to thicken the icing back up after adding the coloring, you can whisk/beat in a little more confectioners’ sugar.)
Wilton piping tip #4 is my go-to for outlining and flooding:
Can Beginners Make These Halloween Cookies?
Yes. You do not need to be an advanced cookie decorator to get started. (Experts had to start somewhere, right?!) Your Halloween cookies do not have to look exactly like these pictures—the decorated cookies can be as ornate or simple as you wish. Here are some tips if you’re a beginner.
- Skip The Tips & Use Buttercream: You can skip the piping tips, bags, and icings and decorate these cookies with vanilla buttercream (feel free to tint it) or chocolate buttercream using a knife. Top with festive sprinkles if desired.
- Use Easy Glaze Icing and Squeeze Bottle: If you choose the easy cookie icing, you do not have to use piping bags/tips—I often use squeeze bottles when decorating with that icing. (Note: I did use piping tips in today’s pictured cookies.)
- Decorate with Sprinkles: Pipe either icing on the cooled cookies and top with Halloween sprinkles as pictured below. (I used easy glaze icing on the pictured cookies below, but this look also works with royal icing.) Feel free to tint the icing your desired color or leave white. This look is what I usually do when I’m decorating cookies with children. It’s easy, fun, manageable, includes sprinkles, and perfect for beginners:


Halloween Chocolate Cookies
- Prep Time: 2 hours
- Cook Time: 12 minutes
- Total Time: 3 hours, 30 minutes (plus icing setting time)
- Yield: 24 3-4 inch cookies
- Category: Dessert
- Method: Baking
- Cuisine: American
Description
This is a recipe for chocolate sugar cookies shaped and decorated for Halloween. You can use either icing recipe linked below or your favorite sugar cookie icing instead.
Ingredients
- 1 and 1/2 cups (188g) all-purpose flour (spooned & leveled)
- 3/4 cup (62g) unsweetened natural cocoa powder (or dutch process), plus more as needed for rolling and work surface
- 1 teaspoon baking powder
- 1/8 teaspoon salt
- 3/4 cup (12 Tbsp; 170g) unsalted butter, softened to room temperature
- 1 cup (200g) granulated sugar
- 1 large egg, at room temperature
- 1 teaspoon pure vanilla extract
- Royal Icing or Easy Cookie Icing
- optional: gel food coloring for tinting icings
Instructions
- Make the cookie dough: Whisk the flour, cocoa powder, baking powder, and salt together in a medium bowl. Set aside.
- In a large bowl using a hand mixer or a stand mixer fitted with a paddle attachment, beat the butter and sugar together on high speed until completely smooth and creamy, about 2 minutes. Add the egg and vanilla and beat on high speed until combined, about 1 minute. Scrape down the sides and up the bottom of the bowl and beat again as needed to combine.
- Add the dry ingredients to the wet ingredients and mix on low until combined. Dough will be soft. If the dough seems too soft and sticky for rolling, add 1 more Tablespoon of flour.
- Roll the dough: Divide the dough into 2 equal parts. Dust 2 large pieces of parchment paper or 2 silicone baking mats with cocoa powder (or flour). Place a dough half on each. With a rolling pin lightly dusted with cocoa powder (or flour), roll the dough out to about 1/4-inch thickness. Use more cocoa powder/flour if the dough seems too sticky. The rolled-out dough can be any shape, as long as it is evenly 1/4-inch thick.
- Chill the dough: Lightly dust one of the rolled-out doughs with cocoa powder or flour. Place a piece of parchment on top. (This prevents sticking.) Place the 2nd rolled-out dough on top. Cover with plastic wrap or aluminum foil, then refrigerate for at least 1-2 hours and up to 2 days.
- Preheat oven & shape cookies: Once chilled, preheat oven to 350°F (177°C). Line 2-3 large baking sheets with parchment paper or silicone baking mats. Carefully remove the top dough piece from the refrigerator. Using cookie cutters (here is a 5-piece Halloween set that includes many of the shapes you see in these photos), cut the dough into shapes. Re-roll the remaining dough, using more cocoa powder or flour to lightly dust your work surface and rolling pin, and continue cutting the dough until all is used. Work quickly so the dough doesn’t become too warm or soft. If it does, stop what you’re doing and place any unused dough back in the refrigerator for 10 minutes to stiffen up again. Repeat cutting into shapes with 2nd half of dough. (Note: It doesn’t seem like a lot of dough, but you get a lot of cookies from the dough scraps you re-roll.)
- Bake & cool: Arrange shaped cookies on baking sheets 3 inches apart. Bake for 11-12 minutes or until edges are set. If your oven has hot spots, rotate the baking sheet halfway through bake time. Allow cookies to cool on the baking sheet for 5 minutes and then transfer to a wire rack to cool completely before decorating.
- Make either icing: Prepare the royal icing or easy cookie icing. Divide the icing into separate bowls if you wish to tint it different colors using gel food coloring. I divided the icing into 4 equal portions, left 1 portion white, and tinted the other portions of icing orange, black, and green. When tinting icing, only use 1-2 drops at first, stir it in, then add more as needed to reach your desired color. I usually need quite a few drops to make black icing. (Remember, color darkens as icing dries.)
- Decorate the cookies: Read this step completely before starting and see recipe notes for recommended decorating tools. Spoon icing into piping bags fitted with Wilton Piping Tip #4. If you kept the icing white or are only using 1 color of icing, you just need 1 piping bag. Slowly pipe icing border around the cookies, and then fill the center with more icing. Keep the icing a thin layer so it dries faster. You can also decorate the cookies how I do in the video tutorial, including sprinkle stripes on the witch hats and sprinkle body on the bat. (These looks work with royal icing or the easy glaze icing.) No need to let the sprinkle stripes/sprinkle body dry before piping icing on the other parts of the cookie. You also do not have to wait for the orange icing to dry before piping the green stem on the pumpkin. If piping green leaves and a face on the pumpkin to make a Jack-O-Lantern, use royal icing and make sure the orange icing sets before adding these additional layers. (Royal icing is best for fine detail/layers.) I did quite a few royal icing Jack-O-Lantern looks in the picture above and the easiest is slanted semi-circles for eyes, triangle nose, and a curved zig-zag smile. If you ever need to thicken royal icing because it has thinned out while you’re decorating or you want thicker icing for piping fine detail, you can beat 2-3 extra Tablespoons of confectioners’ sugar into it to help it thicken up. If adding eyeballs to the cookies, pipe a tiny dot of icing on the back of the eyeball before gently pressing onto the iced cookie. As always, take your time icing the cookies and know that each and every one won’t be perfect.
- Let icing dry/set: Royal icing dries in about 2 hours and easy glaze icing dries in 24 hours. No need to cover the decorated cookies as you wait for the icing to set. If it’s helpful, transfer cookies to a baking sheet and place them in the refrigerator to help slightly speed up the icing setting.
- Enjoy cookies right away or wait until the icing sets to serve them. Once the icing has set, these cookies are great for gifting or for sending. Plain or decorated cookies stay soft for about 5 days when covered tightly at room temperature. For longer storage, cover and refrigerate for up to 10 days.
Notes
- Freezing Instructions: Plain or decorated sugar cookies freeze well up to 3 months. Wait for the icing to set completely before layering between sheets of parchment paper in a freezer-friendly container. To thaw, thaw in the refrigerator or at room temperature. You can also freeze the cookie dough for up to 3 months before rolling it out. Prepare the dough through step 3, divide in half, flatten both halves into a disk as we do with pie crust, wrap each in plastic wrap, and then freeze. To thaw, thaw the disks in the refrigerator and then bring to room temperature for about 1 hour. Roll out the dough as directed in step 4 and then chill rolled out dough in the refrigerator for 45 minutes—1 hour before cutting into shapes and baking.
- Special Tools (affiliate links): Glass Mixing Bowl | Whisk | Electric Mixer (Handheld or Stand) | Rolling Pin or Adjustable Rolling Pin | Baking Sheet | Parchment Paper or Silicone Baking Mats | Cookie Cutters | Cooling Rack | Wilton Piping Tip #4 (for outlining and flooding icing) | Wilton Piping Tip #2 (for fine detail if using royal icing) | Piping Bags (Disposable or Reusable) | Couplers | Squeeze Bottles (if using cookie icing) | Toothpick or Needle Scriber | Eyeball Candies | Orange, Super Black, & Mint Green Gel Food Coloring
- Icing: Use royal icing or my easy cookie icing. See post above to read about the differences.


I’ve made this recipe many times and I love it! I’ve found that a lot of cut out cookie recipes are dry and bland but this one is delicious and chocolatey. You can’t go wrong with this one. Thank you Sally for sharing it with
This recipe is so good!!
Made these this weekend and didn’t frost them. Honestly, they didn’t need the frosting. They are delicious just plain! I ran out of time and energy, sugar cookies are just not my thing. Good thing they are yummy just plain.
Would it be ok to add liquid food coloring to the cookie dough itself? I was thinking of dying them orange or purple 🙂
Hi Janine, if using food coloring to color the dough, you can use our regular sugar cookie dough instead. Liquid food coloring will work, but gel food coloring is recommended. Liquid food coloring can change the consistency of the dough (if too much is used), and gel food colorings are much more vibrant. Hope you enjoy the cookies!
Thank you!
I thought this recipe was great. It’s a nice change up from the usual (but still delicious) sugar cookie. I will make this one again and again.
Hi! I want to use this recipe for my kid and his friends. One kid is vegan. Do you know if I can replace butter with vegetable oil?
Hi Valeria, butter is key for these cookies. You could try replacing it with coconut oil (you’ll want a fat that is solid at room temperature), but we haven’t tested it ourselves to be sure of the results. Let us know if you try it!
May I please ask you to add “Halloween” as an option in your seasonal list of recipes. Thank you!
Hi Gail! You’ll find Halloween under Occassion.
Hi Sally. I’ve loved every recipe of yours that I’ve tried! Could I use this recipe to make the cut out numbers for a “number cake”? I want to try one for my husband’s birthday?
Hi Amy! We haven’t tested making cookies that large with this dough, but it should work just fine – let us know how it goes!
I love your recipes. I wish you had an app so I can access your recipes on my phone. I’d even pay for it.
I just want to make cute little Halloween cut out cookies and don’t want to meddle with any icing. Do you think these cookies are sweet enough on their own?
Yes, absolutely!
These cookies are delicious!! So fun to have a chocolate cookie instead of the normal vanilla. My husband said, “these taste like Halloween” 🙂 I just did the easy glaze frosting and used a knife to apply since I didn’t have any piping bags or condiment bottles — not the neatest look but it worked and they still taste amazing!
to make these cookies softer, what shall i add. i dont want to change the recipe but i do want something soft and chewy instead of crunchy and ‘snappy’ thank you
Hi Sheerya, you shouldn’t have to change anything. When rolled thick enough and not over-baked, the cookies are soft and thick with slightly crisp edges. Enjoy!
We made these this week with Hanukkah cookie cutters & used marshmallow buttercream- so, so good!!
Tasted great, and worked well using gluten-free flour. Thank you!
I just made these for my granddaughters’ Halloween party. They were so easy and your royal icing is no fail every time! I sent them pictures of the decorated finished product and they are so excited. (If they last that long as my husband keeps sneaking them!)
Thanks Sally for a great recipe!
Hi Sally! Can this be made into a “gingerbread house” haha! My kids dont like the taste of ginger 🙂
Hi Rica! We’ve actually tested it before and YES it does work, but you need 2 batches of dough (double the recipe or make separate batches). You’ll have leftover dough to make some cookies on the side. (Or just make a smaller house.) The cookie houses pieces are heavy, so you need lots of royal icing to construct it. Use my gingerbread house tutorial and template.
Can this recipe be made with black cocoa?
Hi Danielle, Is your cocoa a dutch cocoa powder? See the section above called “Choosing the Right Ingredients: Natural Cocoa Powder or Dutch-Process?” It should be just fine, just with a slightly different flavor.
I’d never attempted fancy decorated cookies before, but I saw this post just after I’d spent time with my grandkids and decided to try my hand at these. Your detailed instructions were easy to follow. While my first royal iced cookies weren’t as neat as I’d hoped, I improved with practice and by the end I did much better. For my pumpkins, I was able to spread the icing and smooth the edges. Adding colored sugar and other sprinkles helped, too! Thanks for inspiring me!
We’re so glad you gave these fun Halloween cookie designs a try, Marlene! Practice certainly does help when working with icing. Hope you enjoyed it!
PS—I made half the royal icing recipe and still had some leftover after decorating 21 cookies!
Hey Sally! Could I freeze the dough after I’ve rolled and cut it out? Trying to see if I could have shaped cookies ready to bake at any time!
Sure can, Carolyn! No need to thaw first – just bake right from frozen and add an extra minute or two to your bake time. Enjoy!
Made these today with my little guy, they were great and I added black gel food colouring to the dough to make it extra black!
If you freeze them already decorating, do they thaw okay without messing up the frosting or making the icing sticky?
Hi Katie, you can certainly freeze these after decorating. Just make sure the royal icing or glaze is completely dry before wrapping and placing them in the freezer.
I’m on my way to get the ingredients for these, they look amazing!
I know this is really off topic about cookies, but would you ever consider making a recipe for candy corn? I asked my daughter the other day if she wanted to make some with me and her response was, ” No, only if the recipe is by Sally..” lol,
thank you for making me and my daughter bake / make treats more together!
Hi Bree, your daughter’s response is hilarious! What a fun idea. I’ve made a lot of homemade candy but never candy corn. If I ever do, I’ll be sure to post about it!
Wow Sally!
These are so beautiful! So much work and effort has gone into creating this incredible recipe. That video of you icing the cookies is mesmerising. I have no doubt that you’ve thought of everything to make this recipe has helpful as possible to your readers. You are an inspiration!
Thank you so much for your kind feedback!
Yay! Thank you so much! These cookies (and this entire post!) was a lot of fun to create. 🙂
Thank you, Sally, for knowing what we want even before we ask for it. ❤️
If I use the easy glaze for the base, can total icing be used on top for details? Wondering if the glaze is too sticky to support it or if the royal icing would bleed because the glaze is thinner????
Hi Bryn, yes you can pipe royal icing detail on top of dried easy glaze icing. It will not bleed, especially if the easy glaze icing has completely dried.
Thank you for replying. Have a fantastic day
Agree about the gorgeous piping
Hey Sally! I was wondering if I could use bottles with the Royal Icing instead of piping bags? I’d prefer the sharper details from Royal but my personal preference for control is bottles….
Hi Brittany, Yes we use them often with royal icing! You can see the exact squeeze bottles we use in this post on hosting a cookie decorating party. Have fun!
I was just scrolling your page to find spooky chocolate cut outs for Halloween! You read my mind, thank you!!
I was JUST about to start my sugar cookie dough for Halloween cookies and was feeling a little sick of making the same vanilla almond flavored cut out dough because I make it for all holidays (even though they taste delicious), so the chocolate flavor is such a welcome change! And in perfect timing. Thanks for knowing what your readers love!