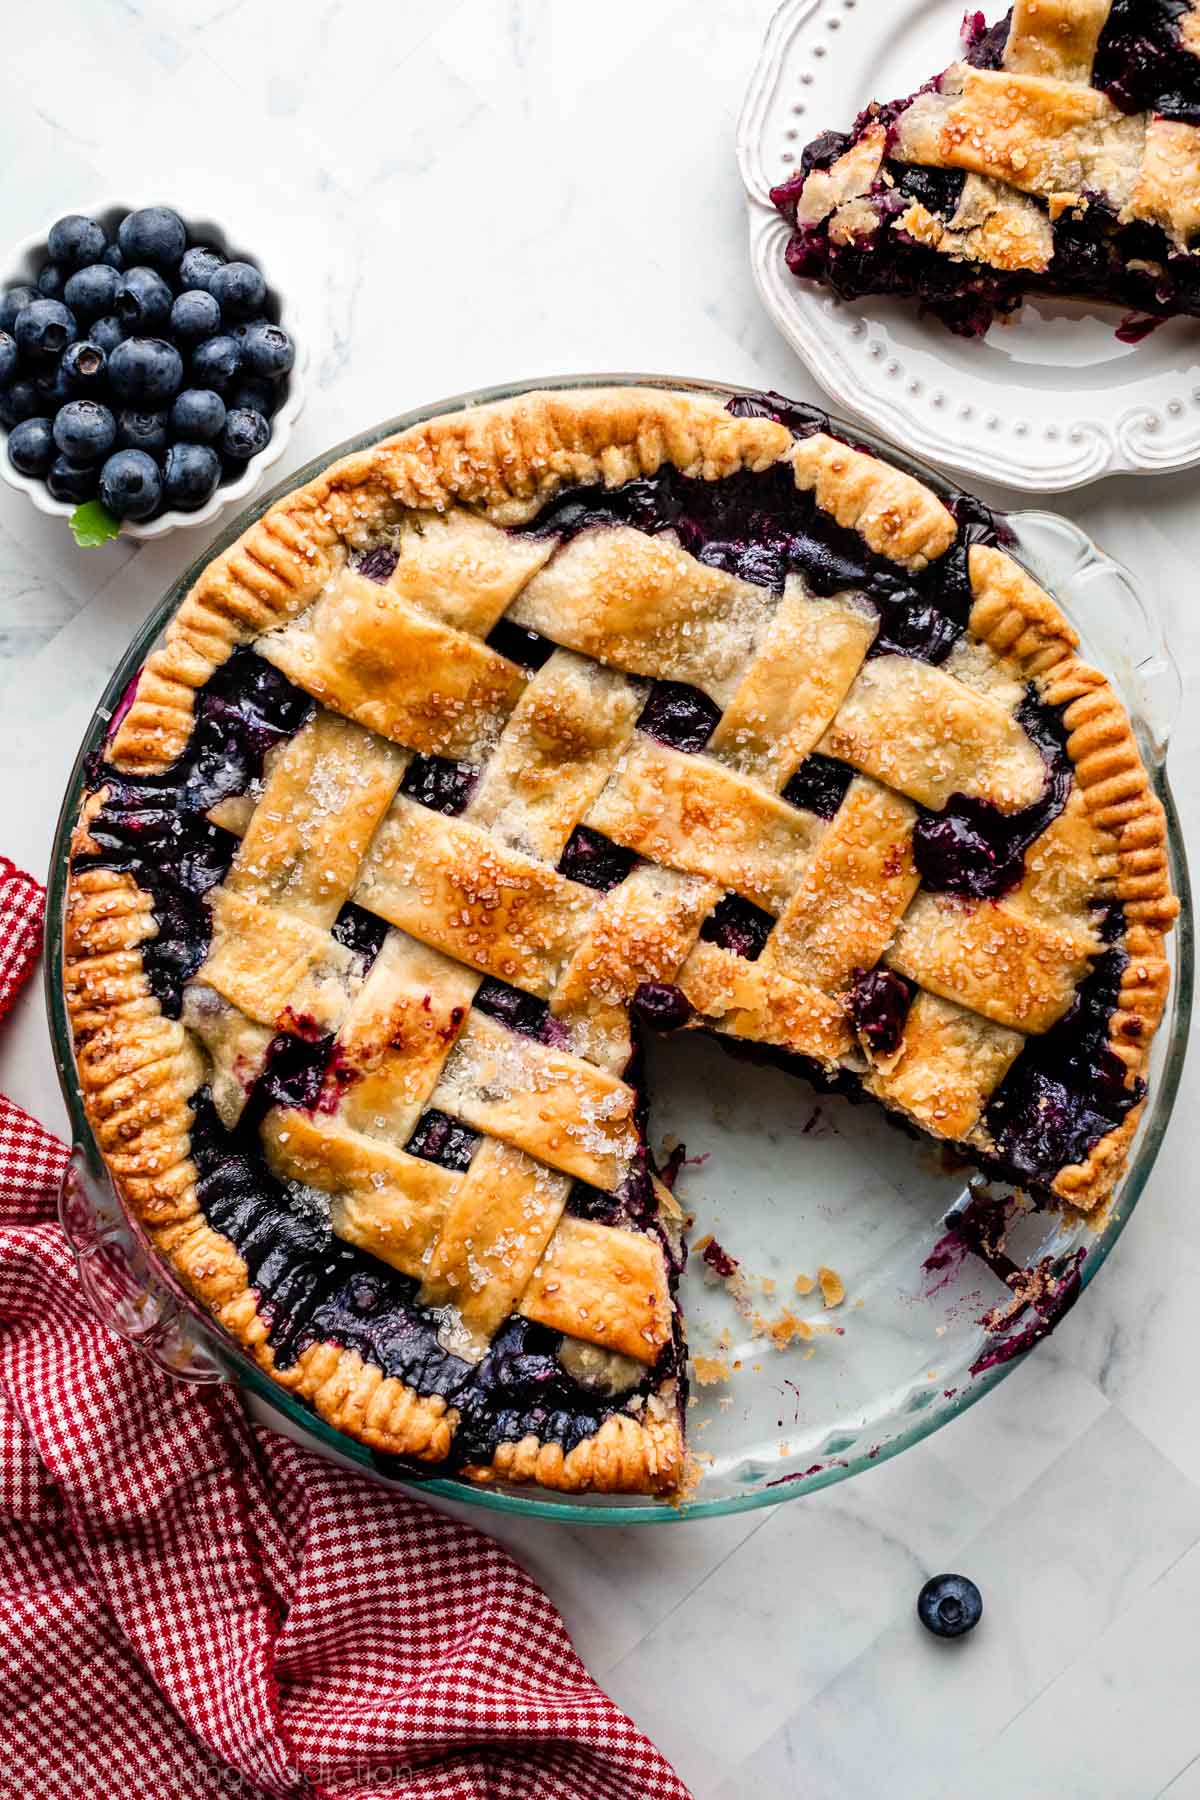
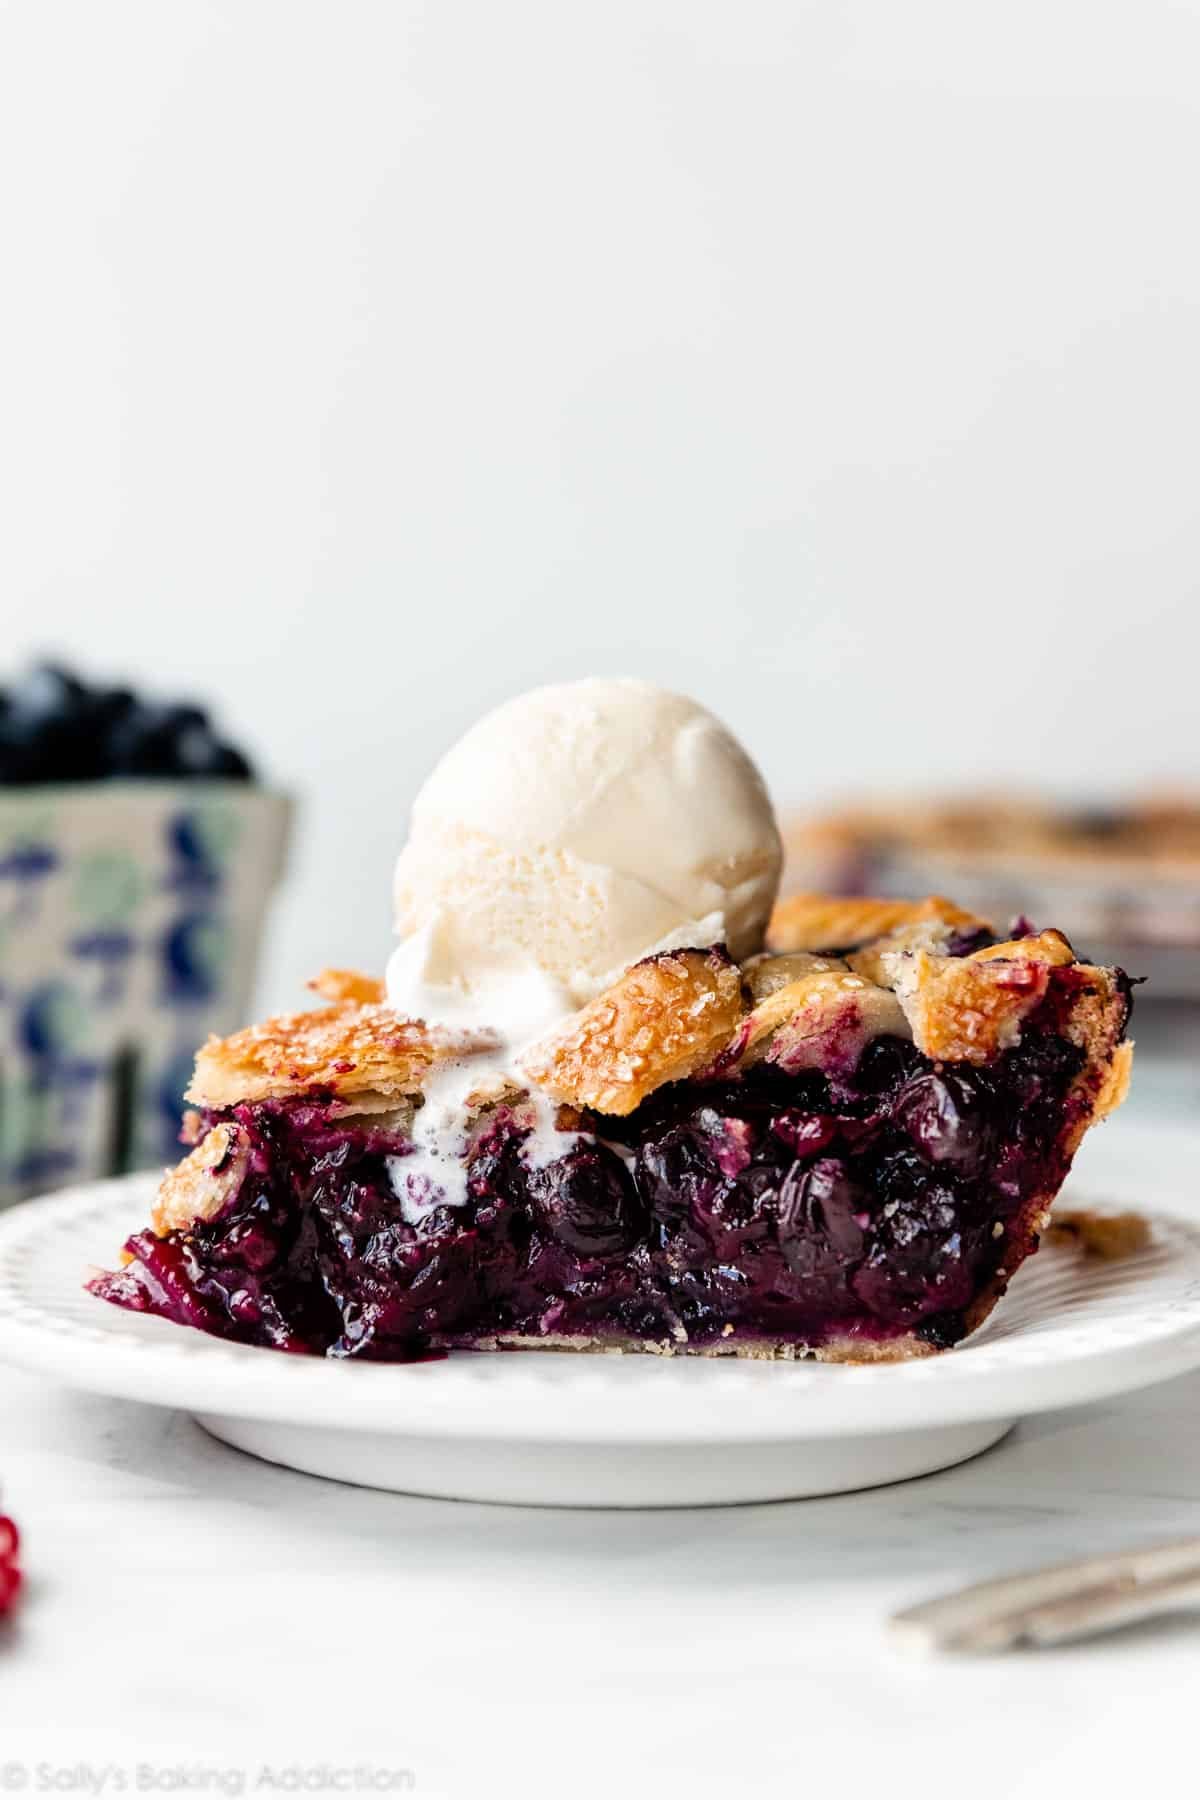
My homemade blueberry pie is better than ever and bursting with sweet juicy blueberries that sit in a golden-brown buttery, flaky pie crust. Follow my precise baking instructions for a filling that sets perfectly and is neither runny nor soupy. From-scratch pie can be hard work, so my team and I made sure to repeatedly test this recipe so the results are completely worth your time and effort.
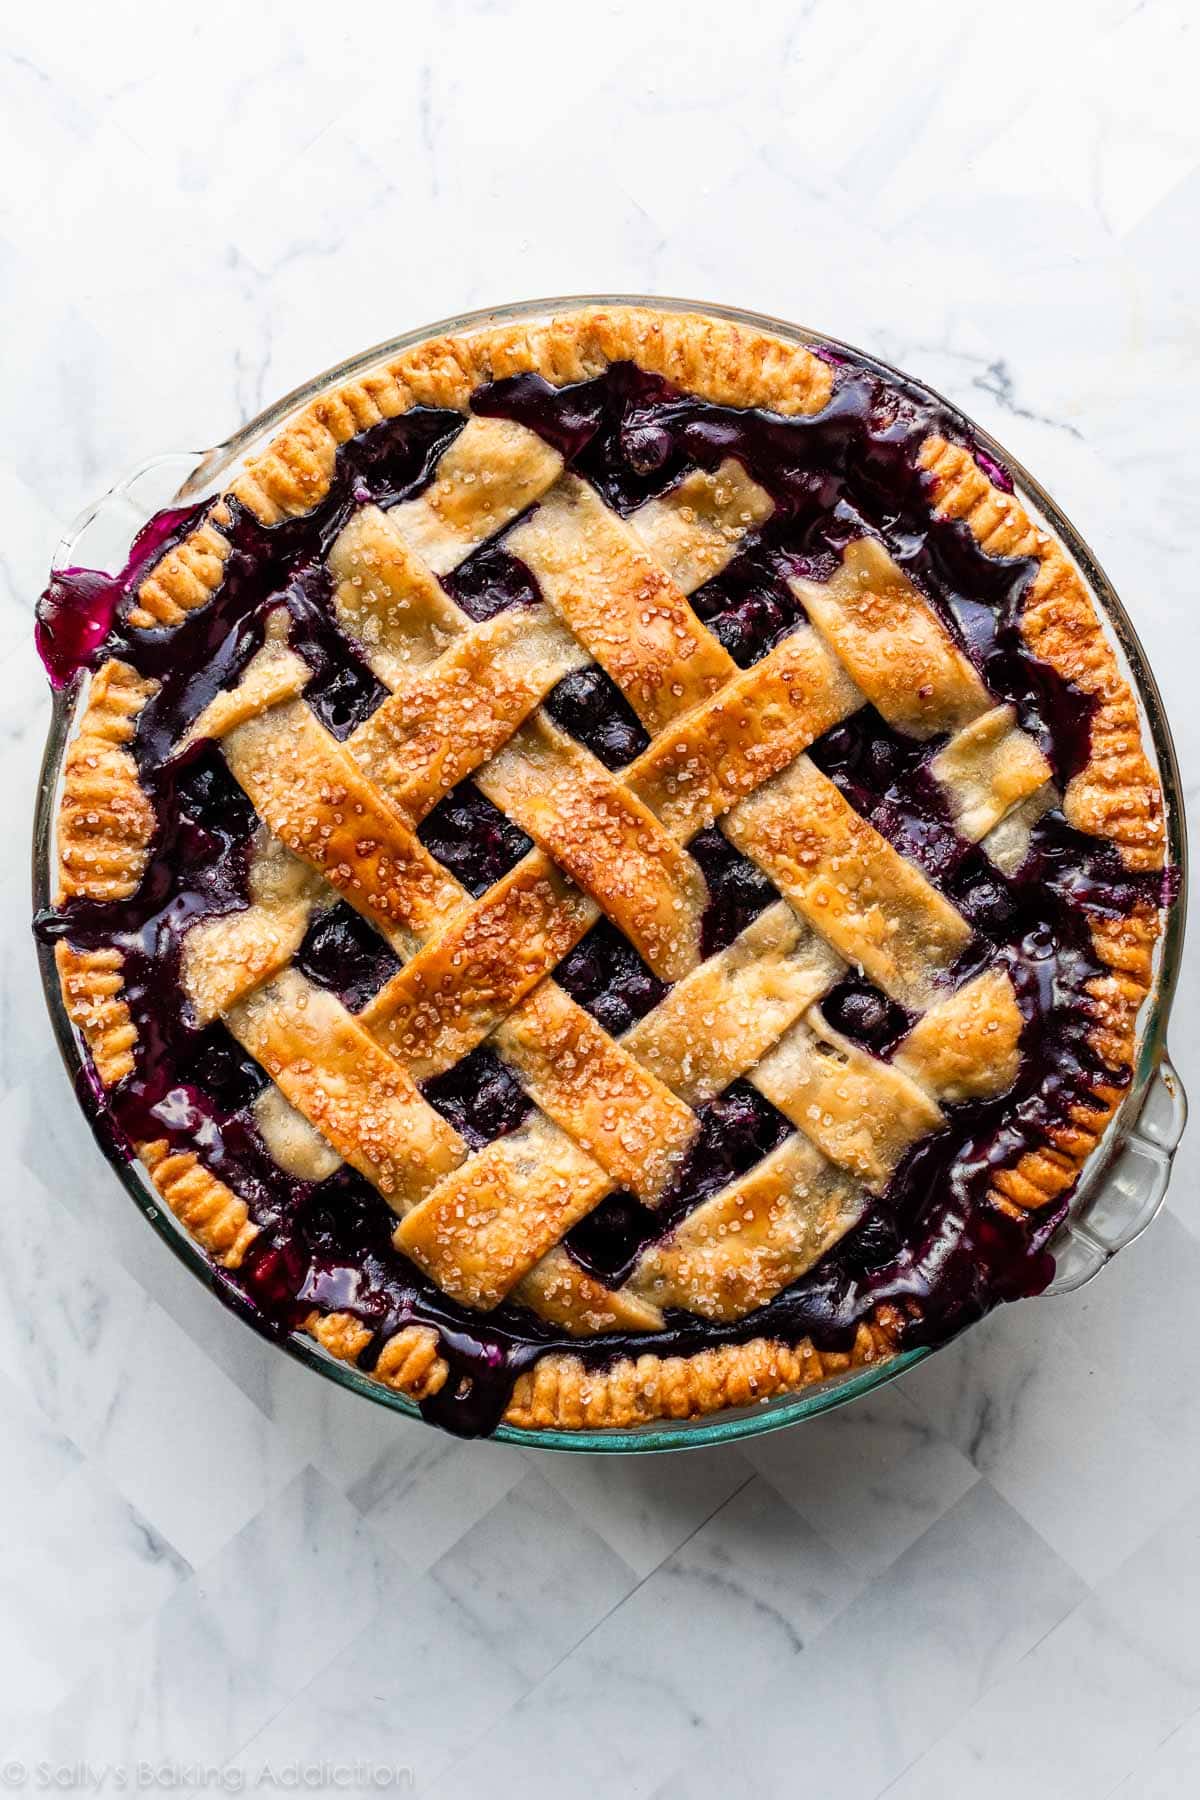
This slightly updated recipe produces a better-than-ever blueberry pie. Reader reviews reporting a soupy, runny filling inspired me to rework the baking instructions on my original 2016 recipe and make a slight change to the filling ingredients. My team and I tested a LOT of blueberry pies in the last few weeks. We searched for the magic trick to a perfectly flavorful, non-runny blueberry pie.
So what’s the verdict? What’s the magic trick to a perfect blueberry pie? Drumroll please…
The magic trick is: patience.
Here’s Exactly Why This Blueberry Pie Recipe Works
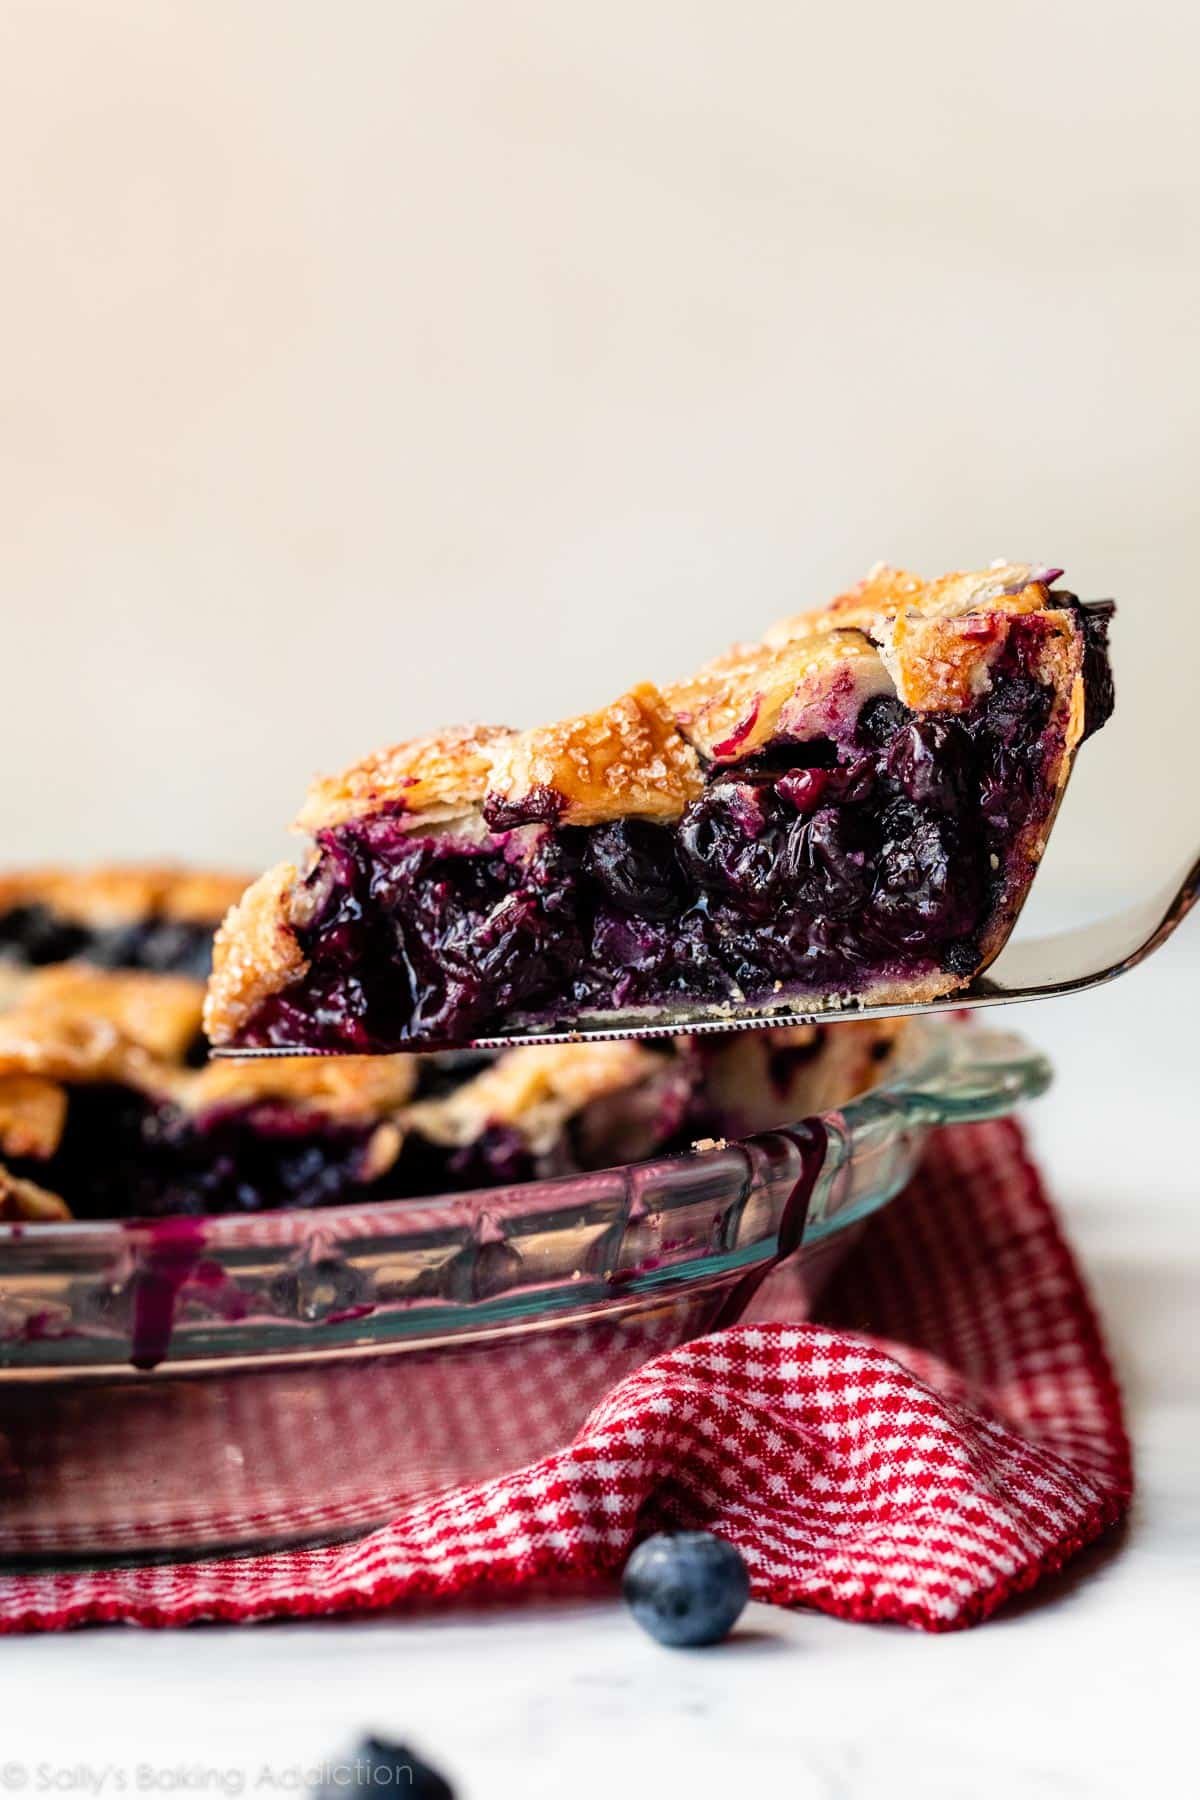
It turns out that you need to (1) really work the filling ingredients together, (2) bake the pie for longer than I thought, (3) embrace a bubbling juicy messy pie filling, and (4) let it cool completely in order for the filling to fully set up. Just like peach pie, blueberry pie takes several hours and is undoubtedly a delayed-gratification dessert. But I promise you, they are both worth it. Get ready for the most incredible, juicy-yet-sliceable blueberry pie experience:
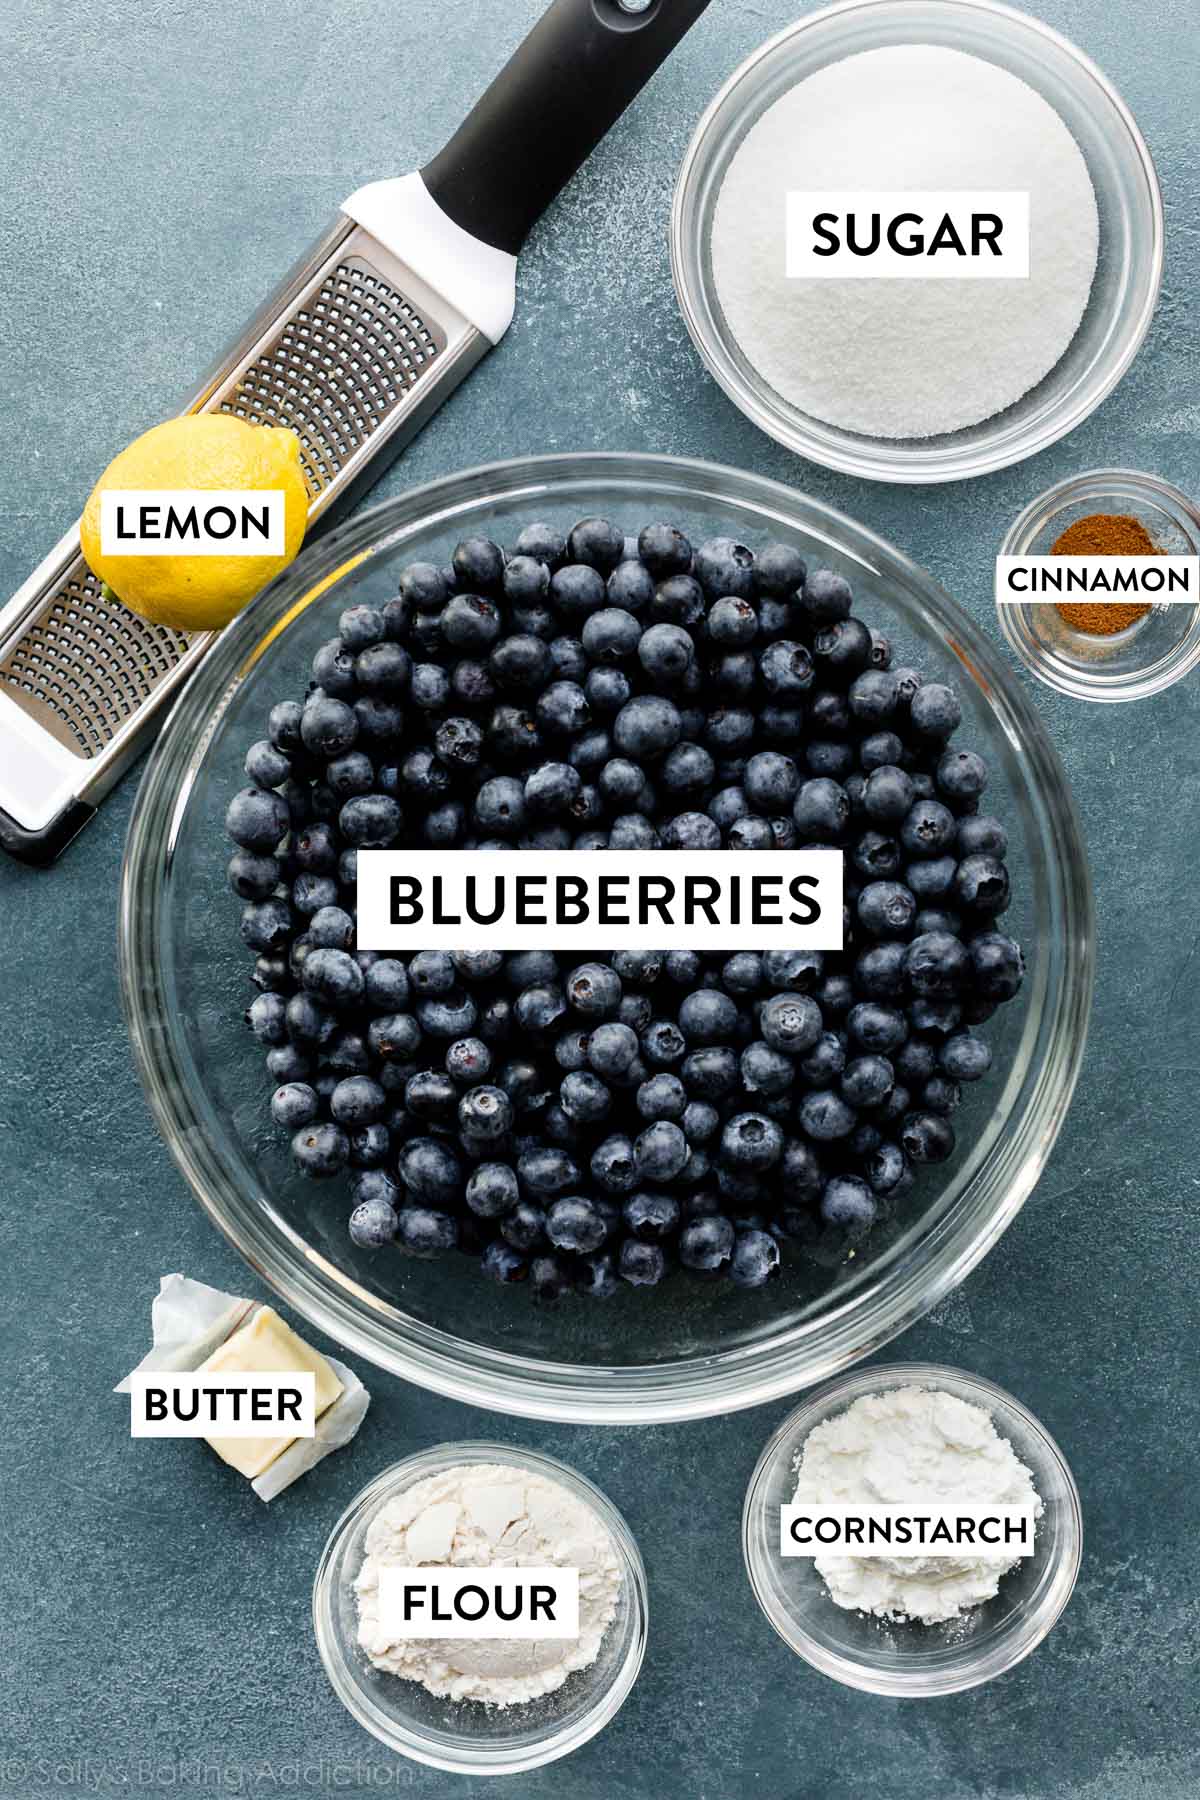
6 Ingredient Filling
After I’ve scared you off about the time it takes, let me mention that blueberry pie filling is actually one of the quickest fruit pie fillings to prepare! There’s no peeling, pitting, hulling, or chopping the fruit. Unlike triple berry pie, you do NOT need to pre-cook the filling either (a step we tested but found useless). Just rinse and pat the berries dry and then mix with sugar, flour, cornstarch, cinnamon, lemon juice, & lemon zest:
Pie Filling Success Tips:
- Use Flavorful Ingredients: You don’t need to add much to this pie filling to achieve amazing flavor. The berries are already pretty sweet on their own, so we only need to add ⅔ cup sugar. The zest and juice of a fresh lemon + a hint of cinnamon both add a subtle zing that really amplifies the natural flavor of the blueberries.
- Use 2 Thickening Ingredients: In the previous version of this recipe, I used ¼ cup of cornstarch to thicken the juicy filling, but we were still getting reader comments that their pies were turning out too runny. Taking note from my blueberry crumble pie, a reader favorite, I decided to use a mix of both cornstarch and flour. As long as you bake the pie long enough, the jammy filling sets up and thickens beautifully.
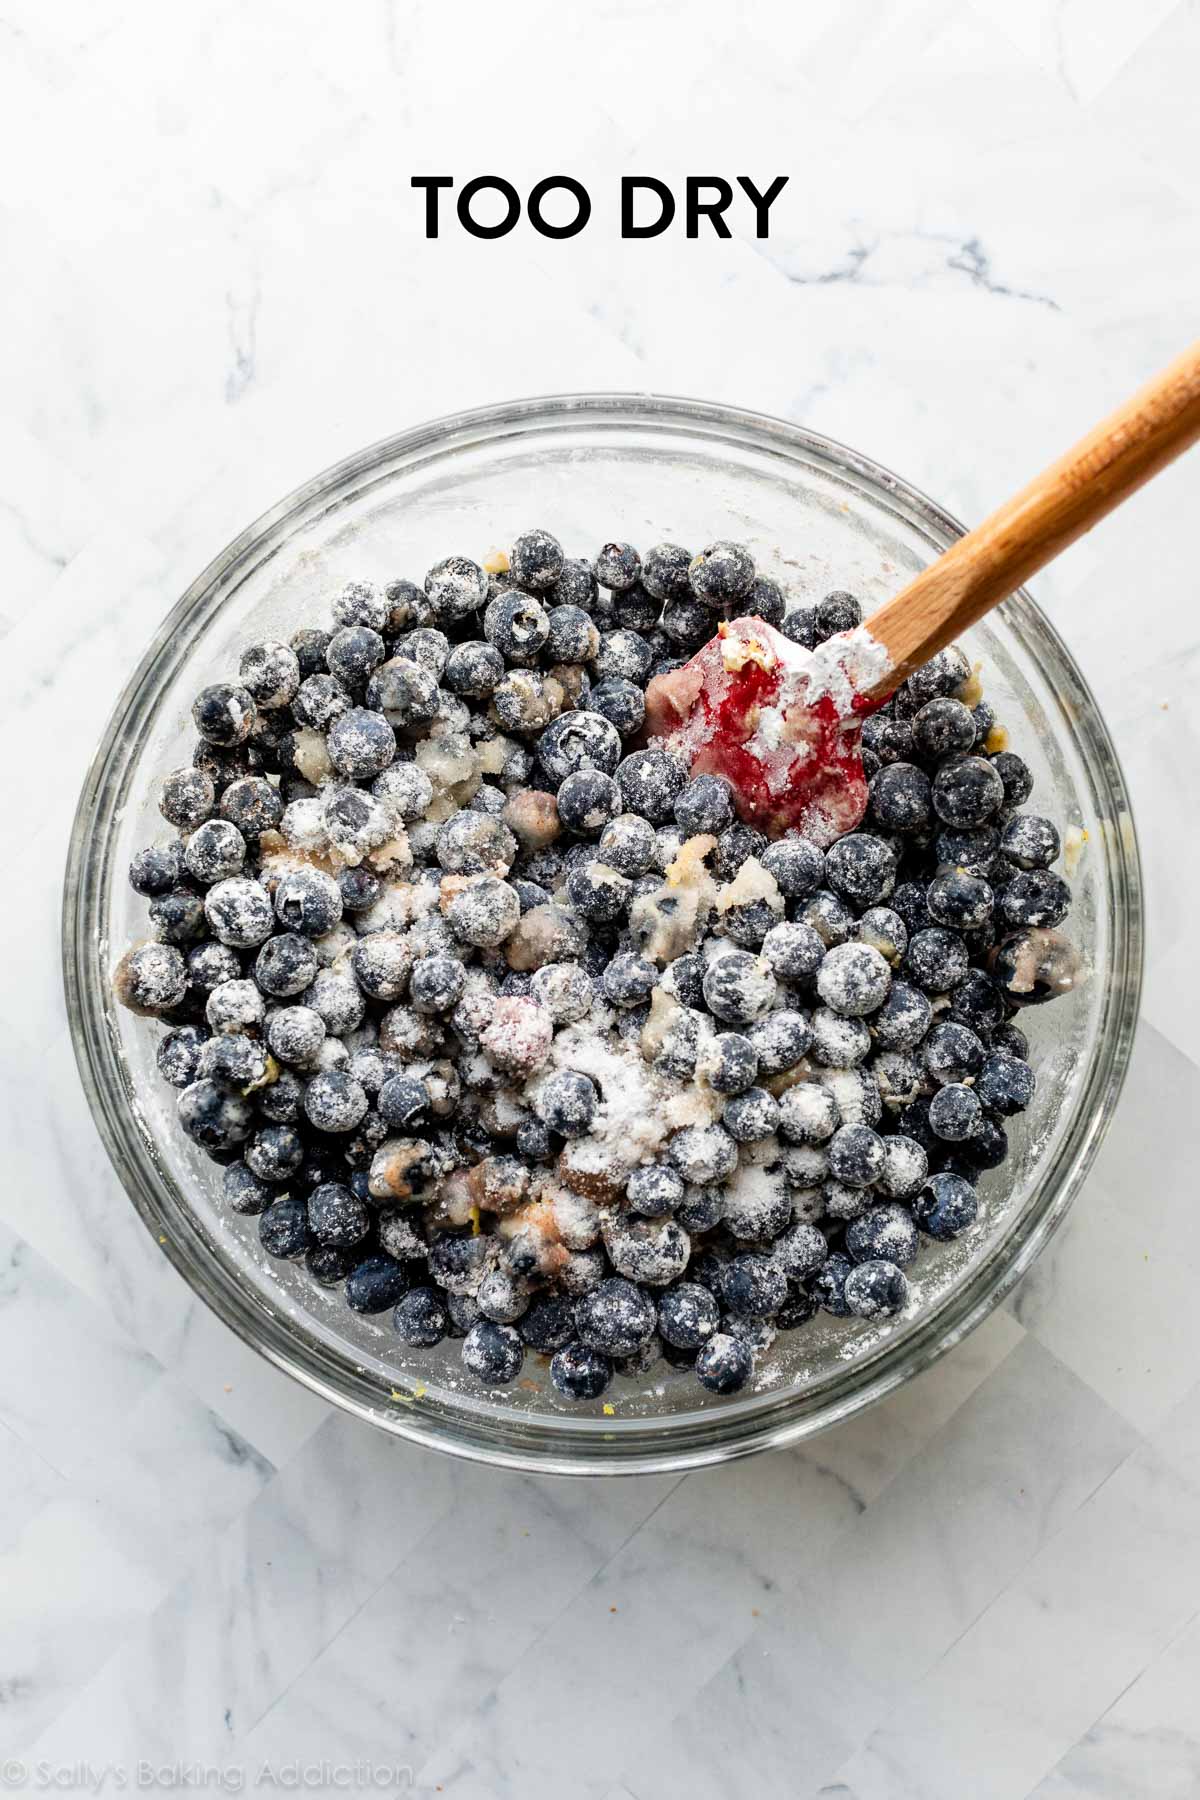
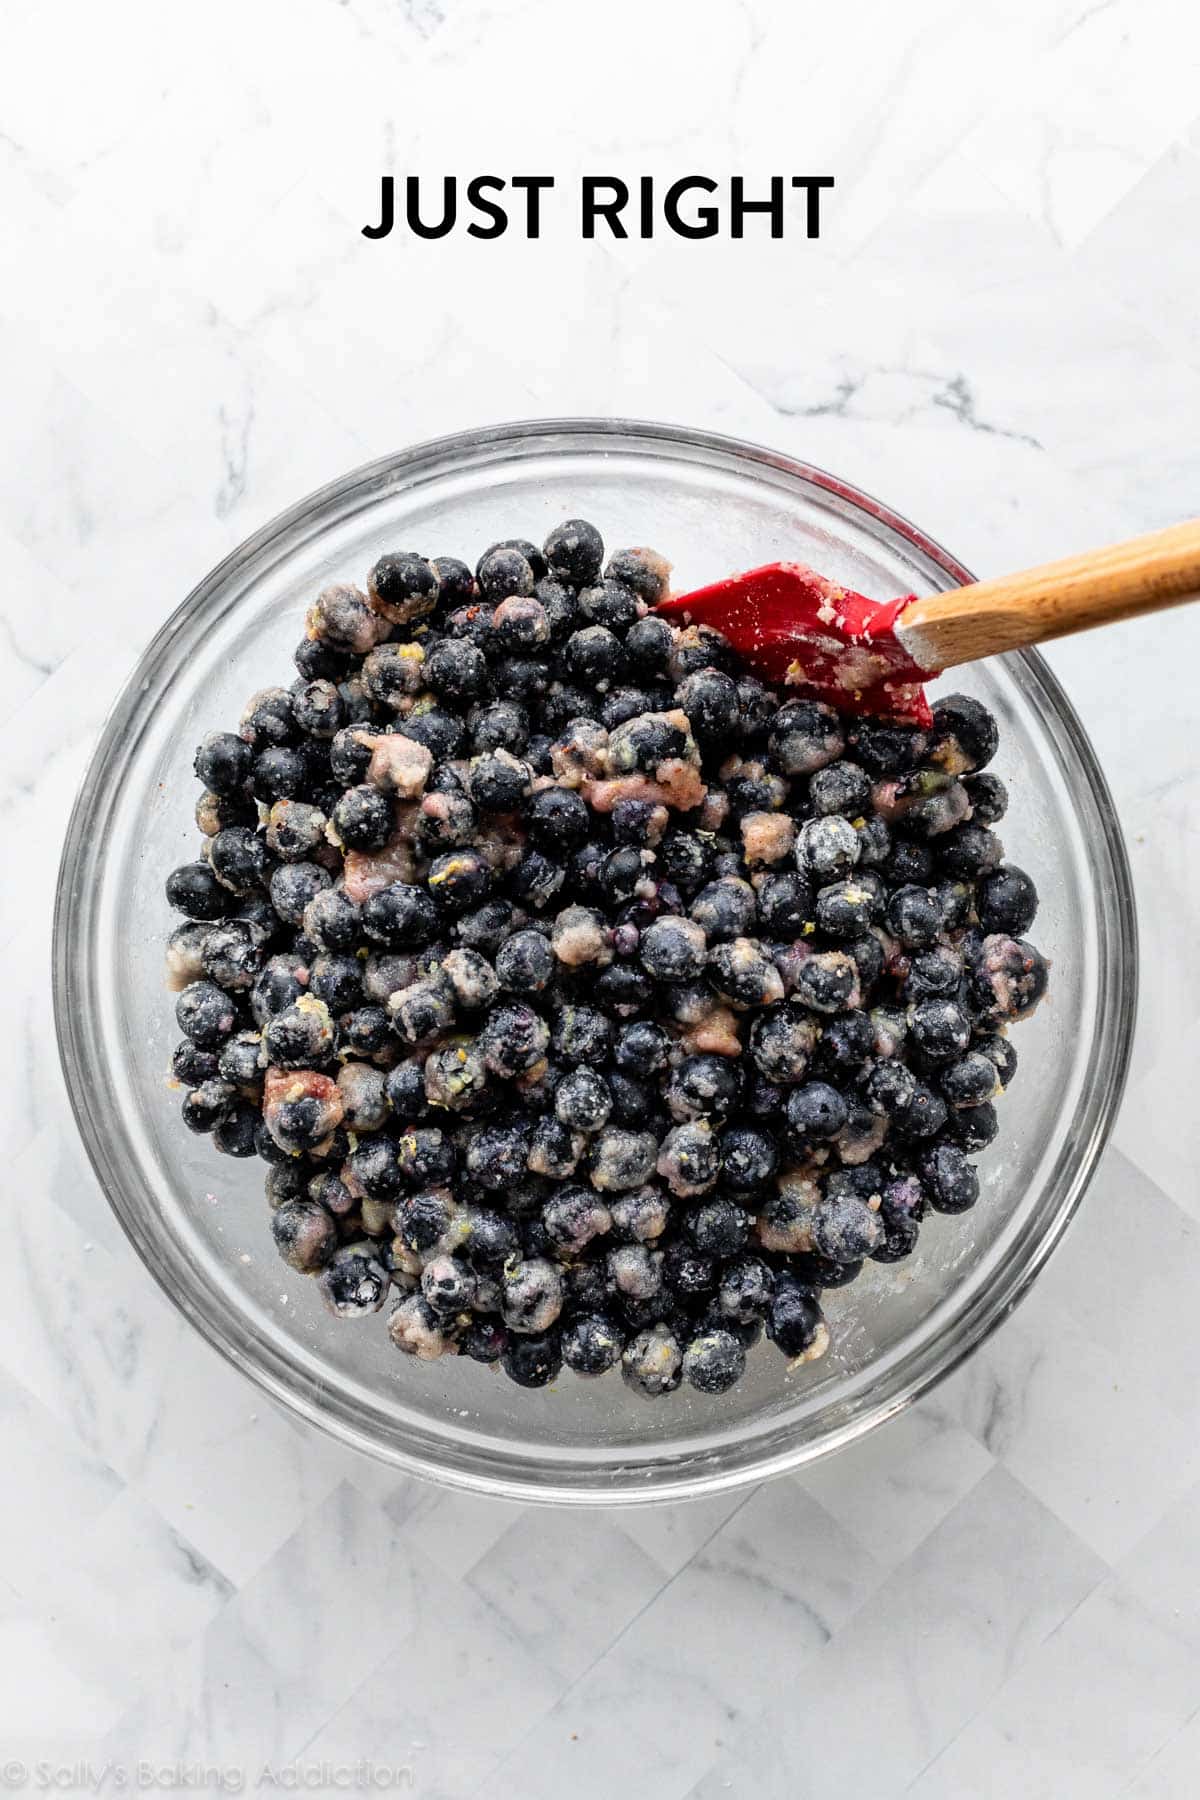
- Work the Ingredients Together: Between the flour, cornstarch, and sugar, there’s a lot of dry ingredients. To ensure there’s not too much dry powder, you may have to smash a few blueberries to help soak it all up.
Below Left: Your filling won’t bake properly if it’s this dry and powdery. Below Right: Work the ingredients together until the dry ingredients are moistened.
Assemble Your Pie
You can use your favorite pie dough recipe, but here’s why I encourage you to try mine. To make a perfect pie crust, I use a mix of shortening and butter because the two ingredients work together to make an unbeatable texture. Butter adds flavor and flakiness, while shortening’s high melting point keeps the crust tender and workable. The recipe yields 2 crusts—one for the bottom and one for the top—which is what you need for this pie. You don’t need to par-bake the crust because this pie bakes for so long.
A few topping notes:
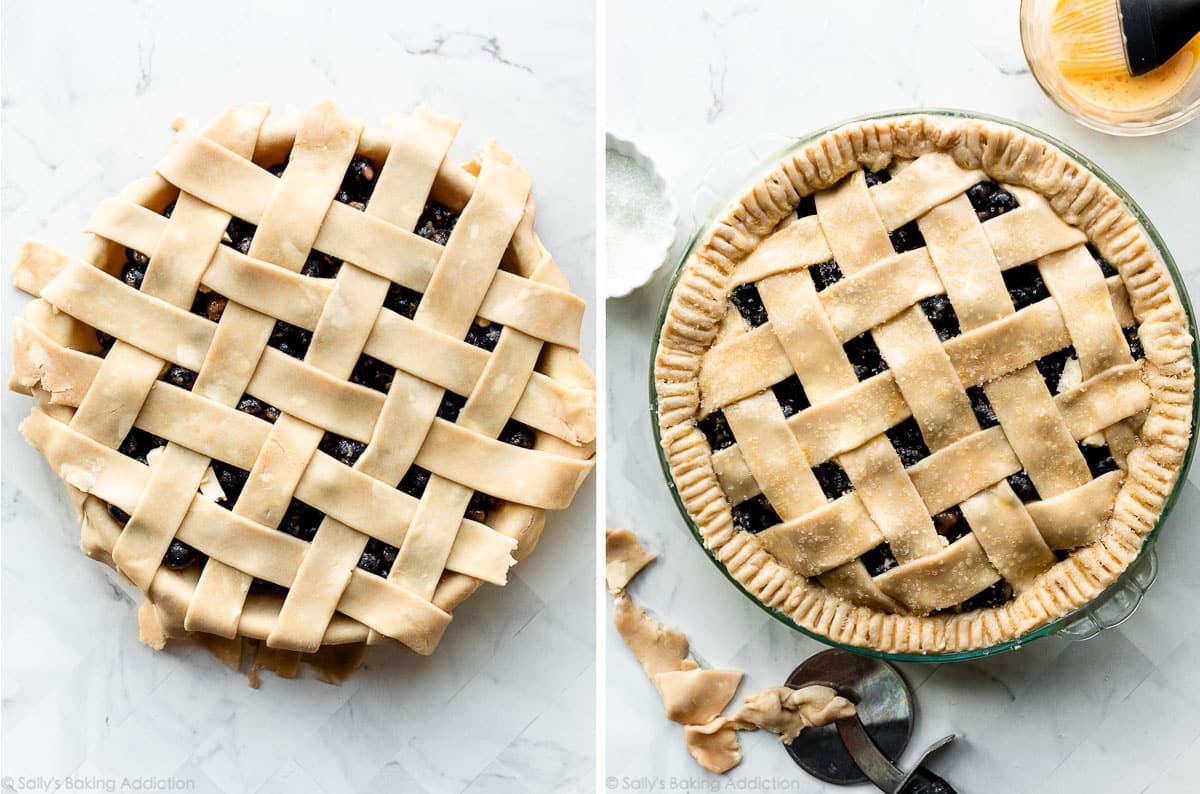
- Lattice: I like a signature lattice pie crust design for this blueberry pie (doesn’t it just scream “state fair blue ribbon winner“?!) but decorate the pie however you’d like. Here’s my detailed How to Lattice Pie Crust video & instructions.
- Other Designs: Feel free to check out other pie crust designs.
- Crumble: Or you could try this blueberry crumble pie. Note the slight variation in the filling to make up for a very buttery topping.
Regardless of the design, be sure to crimp or flute the pie crust, too. I simply crimped the edges with a fork in the photos here.
Don’t Forget…
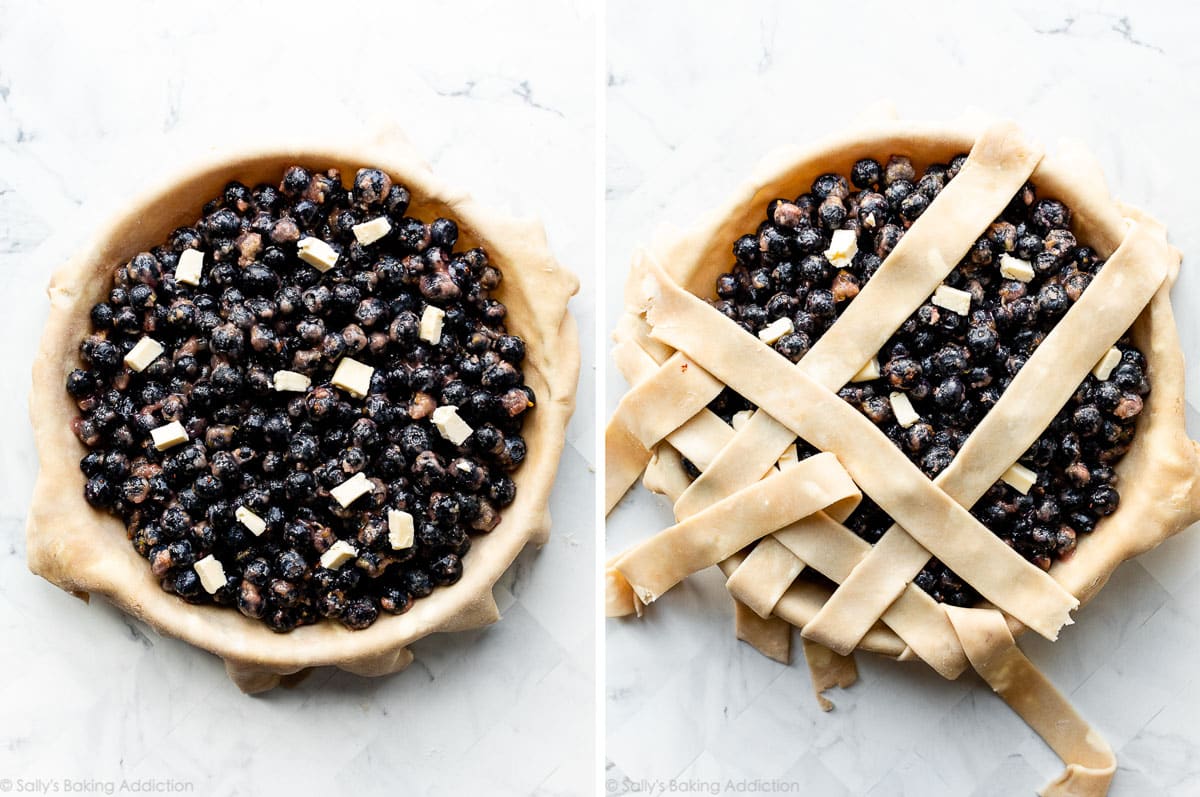
- To dot butter on top of the filling. Like in this cherry pie recipe, a touch of butter adds richness and helps the filling ingredients bind together.
- To brush the top dough with egg wash. Egg wash promises a crispier crust and helps develop that signature golden sheen. Without it, dough is dull and lackluster. You use egg wash on many other bakes, like apple pie, croissants, stromboli, breakfast pastries, and peach cobbler, to name a few.
Unlike the butter and egg wash, coarse sugar is an optional topping. I love adding it to sweet pies because it adds a little crunch and sparkle.
Many More Blueberry Pie Success Tips & Tricks
- Make the Pie Crust Ahead of Time. It has to chill for at least 2 hours, but it keeps well in the refrigerator for up to 5 days and the freezer for up to 3 months, so make it in advance and it will save you time on the day you actually make this pie.
- Baking Sheet on Rack Below the Pie: This pie gets pretty messy when it’s happily bubbling away for over an hour. Place a baking sheet on the bottom oven rack to catch the bubbled-over juices. If you really want to save yourself cleanup time, line it with foil first.
- Start at an Initial High Temperature: 425°F (218°C) for 25 minutes, then the remainder at 375°F (190°C). The reason for the initial hot oven burst is to set the crust and encourage the cornstarch to begin working quicker.
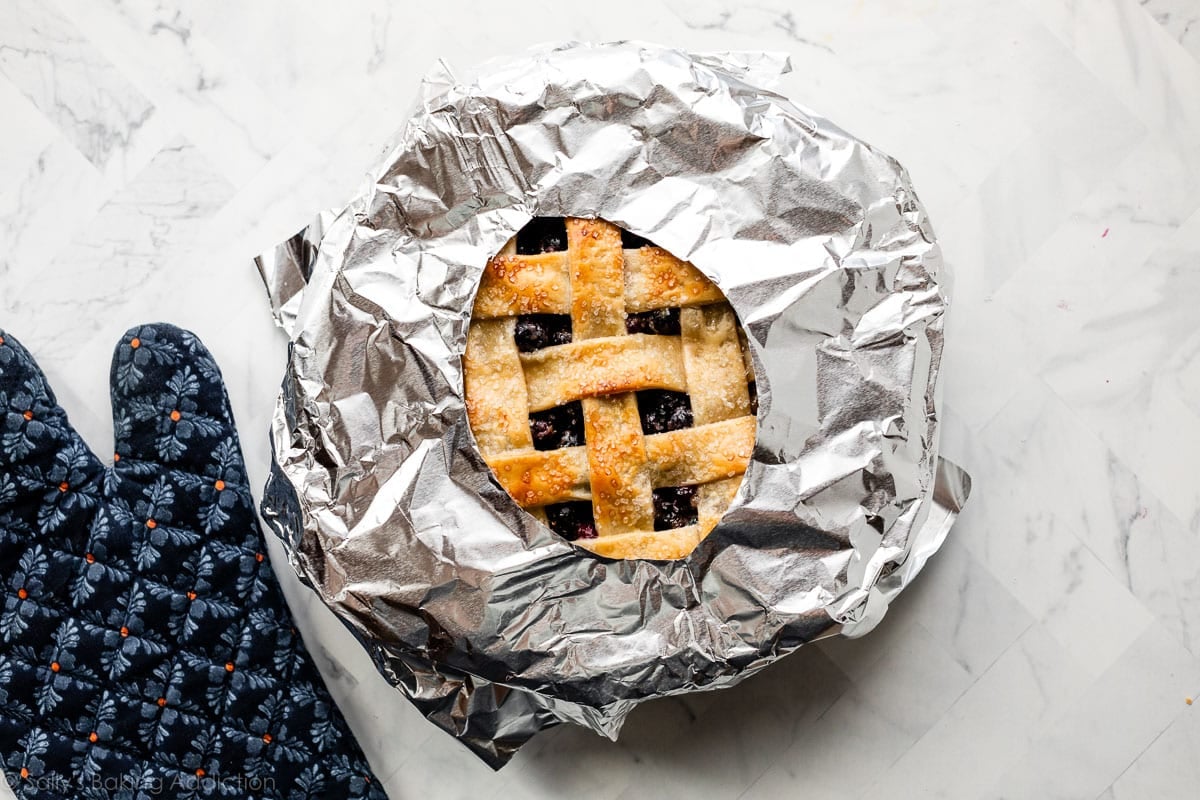
- Pie Crust Shield: After the first 25 minutes in the oven, when you lower the temperature, I recommend placing a pie crust shield (see Notes) on the crust’s edges to prevent it from over-browning too quickly. You can purchase a pie crust shield, but I often use aluminum foil. See the next photo.
- Bake for a Long Time: Blueberry pie takes a lot longer than some pies (like pumpkin pie and pecan pie). You want the filling to be bubbling at the surface nearly everywhere, and this takes close to 75–80 minutes total. The internal temperature in the test pies (easy to take with an instant read thermometer because of the lattice top) was around 200°F (93°C) when done. If you think about it, in order for gravies and other sauces to begin thickening, they must be boiling/simmering. Same with this blueberry pie filling.
- Cool Completely: Slicing warm will give you a soupy slice of pie. Cool for at least 4 hours at room temperature because the pie filling continues to set up as it cools.
Make a homemade pie crust shield out of a large square of aluminum foil by cutting a circle in the center of it:
There is something so soothing and satisfying about making pie from scratch and I hope you try this endlessly tested pie perfection soon. It’s perfect for summertime picnics, as part of your Father’s Day Recipes, or anytime you have fresh blueberries. Want to skip some pie drama? This blueberry cream pie, berry cobbler, blueberry galette, or these blueberry pie bars will satisfy your berry cravings and require half the work. 😉
Here is even more inspiration for blueberry dessert recipes. And if you can’t choose between this pie or peach pie, go for blueberry peach pie instead!
Recommended Tools
- Pastry blender for making pie dough.
- This is my favorite pie dish. I prefer baking pies in a glass pan so I can see the crust browning on the sides and bottom. Want to skip the pie dish? This easy berry galette is always a crowd-pleaser.
- This rolling pin has held up well over several years with constant use.
- Zester for lemon zest.
- Citrus juicer for lemon juice.
- Pastry brush for the egg wash.
Homemade Blueberry Pie
- Prep Time: 3 hours
- Cook Time: 70 minutes
- Total Time: 7 hours (includes cooling)
- Yield: 8-10 servings
- Category: Pie
- Method: Baking
- Cuisine: American
Description
After a few additional years of testing, this is now the best blueberry pie. As the pie bakes, expect a messy, bubbly, and juicy filling. As the pie cools, the filling sets into a jammy, yet sliceable consistency. For a truly out-of-this-world summer dessert experience, serve each flavorful slice with vanilla ice cream.
Ingredients
- Homemade Pie Crust or All Butter Pie Crust (both recipes make 2 crusts, 1 for bottom and 1 for top)
- 6 cups (3 pints; about 860g) fresh blueberries*
- 2/3 cup (135g) granulated sugar*
- 1/4 cup (31g) all-purpose flour
- 2 Tablespoons (14g) cornstarch
- 1/4 teaspoon ground cinnamon
- 2 Tablespoons (30ml) lemon juice
- 1 teaspoon lemon zest
- 1 Tablespoon (14g) cold unsalted butter, cut into small cubes
- egg wash: 1 large egg beaten with 1 Tablespoon (15ml) milk
- optional: coarse sugar for sprinkling on crust
Instructions
- The crust: Prepare either pie crust recipe through step 5.
- Make the filling: Stir the blueberries, sugar, flour, cornstarch, cinnamon, lemon juice, and lemon zest together in a large bowl. Mix together until it’s no longer dry and powdery; burst a few blueberries if necessary to moisten. Set filling aside as the oven preheats. Filling can be covered and refrigerated for up to 24 hours if needed.
- Adjust the oven rack to the lower third position and preheat to 425°F (218°C). Place baking sheet on the bottom oven rack to catch any blueberry juices.
- Roll out the chilled pie dough: On a floured work surface, roll out one of the discs of chilled dough (keep the other one in the refrigerator). Turn the dough about a quarter turn after every few rolls until you have a circle 12 inches in diameter. Carefully place the dough into a 9 x 1.5 or 2-inch round pie dish. Tuck it in with your fingers, making sure it is smooth. Pour and spread filling evenly into pie dish. Dot the pieces of butter on top of the filling. Set aside at room temperature or in the refrigerator as you assemble the top pie crust.
- Arrange the lattice: Remove the other disc of chilled pie dough from the refrigerator. Roll the dough into a circle that is 12 inches diameter. Using a pastry wheel, sharp knife, or pizza cutter, cut strips of dough; in the pictured pie, I cut 10 1-inch-wide strips. Carefully thread the strips over and under one another, pulling back strips as necessary to weave. (Here’s a lattice pie crust tutorial if you need visuals.) Press the edges of the strips into the bottom pie crust edges to seal. Use a small paring knife to trim off excess dough. Flute or crimp the pie crust edges with a fork.
- Lightly brush the top and edges of the pie crust with egg wash. Sprinkle the top with coarse sugar, if using.
- Bake the pie at 425°F for 25 minutes; then, keeping the pie in the oven, reduce the oven temperature down to 375°F (190°C). Place a pie crust shield (see Note for homemade shield) on the edges to prevent them from over-browning. Continue baking the pie until the filling’s juices are bubbling everywhere, including in the center, 40–50 more minutes. This sounds like a long time, but under-baking the pie means a soupy filling with paste-like flour and cornstarch chunks. If you want to be precise, the internal temperature of the filling taken with an instant read thermometer should be around 200°F (93°C) when done. Tip: If needed towards the end of bake time, remove the pie crust shield and tent an entire piece of foil on top of the pie if the top looks like it’s getting too brown.
- Remove pie from the oven, place on a cooling rack, and cool for at least 4 hours before slicing and serving. Filling will be too juicy if the pie is warm when you slice it.
- Cover leftovers tightly and store in the refrigerator for up to 5 days.
Notes
- Make Ahead & Freezing Instructions: This a great pie to make 1 day in advance, because the filling will have time to set overnight. The pie crust dough can also be prepared ahead of time and stored in the refrigerator for up to 5 days or in the freezer for up to 3 months. Feel free to prepare the filling 1 day in advance. See end of step 2. Baked pie freezes well for up to 3 months. Thaw overnight in the refrigerator and allow to come to room temperature before serving.
- Special Tools (affiliate links): Glass Mixing Bowl | Silicone Spatula or Wooden Spoon | 9-inch Pie Dish | Rolling Pin | Pastry Wheel or Pizza Cutter | Zester | Citrus Juicer | Pastry Brush | Sparkling Sugar | Pie Crust Shield | Instant Read Thermometer | Cooling Rack
- Blueberries: You need 6 cups (3 pints) of blueberries, which is about 2 lbs. (about 860g) total. I strongly suggest using fresh blueberries, not frozen. If you decide to use frozen, do not thaw first. The pie will take several more minutes in the oven if using frozen berries.
- Sugar: If your blueberries aren’t super sweet, such as in the wintertime, feel free to add another few Tablespoons of sugar. I find 2/3 cup (135g) is the perfect amount for sweet summer blueberries. You can increase to 3/4 cup (150g) if needed.
- Aluminum Foil Pie Crust Shield: You can purchase a pie crust shield or make one from aluminum foil. Cut a 14-inch square of aluminum foil. Fold in half. Cut out a 5-inch semi-circle on the folded edge. Unfold. Carefully fit the aluminum foil over the pie crust edges, securing down on the sides as best you can (careful, the pie is hot!), leaving the center of the pie exposed.
- Updated in 2022: The recipe you see above was very slightly updated in 2022 to produce a thicker, less soupy filling. The old recipe did not call for flour and instead used 1/4 cup (28g) of cornstarch. The old recipe also baked for less time (about 60 mins total), which is why the filling was often too runny. For a jammy, yet sliceable filling, bake the pie as instructed above in step 7.


The pie set up nicely but the filling was a little too sweet for my taste. I plan on reducing the sugar the next time I make it.
Gorgeous recipe! Turned out beautifully… and looked just like your picture! 🙂 Thank you!
I’m going to use this recipe for a pie county pie contest next month.
This took 2 hours for the center of the pie to reach 200 degrees and be bubbly all over. I put a shield over the edge after 25 minutes, then tented the entire pie after another 20 minutes. The crust still came out overdone.
According to contest rules, I need to use an aluminum pie tin. I used one from the grocery store which was 8 3/4″ wide in diameter at the top and not too deep. I used three pints of blueberries. By the time the center was 200 degrees the filling had risen up maybe 1/2″ or so. When it cooled, the center was somewhat depressed.
The pie cooled for 6 hours but the filling was even more set the next day. I think I’m going to make it the day before judging so it can really fully set.
I’m going to continue to test this recipe. Any ideas about the cooking time or depressed center?
Thanks, Sally, love your recipes. I’m also going to use your coconut cream pie recipe in the contest!
Hi Andy, since the pan you used was slightly smaller, I’m not surprised the pie took longer to bake. However, a 1/2 inch thick pie doesn’t seem right. The slices are around 1 inch thick when finally cooled. I wonder if your filling was too wet. Maybe you smashed a few too many blueberries and therefore it was too mushy/gooey/wet in the first place?
Hi Sally, could I make this pie in a muffin pan for individual servings?
Hi Cara! We haven’t tested mini pies so are unsure of the exact bake time. Pies will be done when the filling is bubbling and the crust is golden brown. Let us know how they go!
The pie was absolutely delicious day 1! Loved it!
I made this blueberry pie a few nights ago (so it cools/sets overnight to eat the next day) and it turned out perrrrrrrrfectly! I have previously made the original recipe and while delicious it was definitely a little soupy when cut. This time around with the new & improved recipe it set up like a dream. I made Sally’s amazing pie crust as well. Made for one DELICIOUS pie!!
This recipe is excellent!! My husband says this is the best pie I have ever made. (I have made lots of pies!) Your directions are so explicit that one only needs to READ and follow. The hardest part was convincing him to wait for the 4 hour cooling time!
This is completely worth the time to make it! I have never made a fruit pie that did not collapse when I cut it but this one is absolutely perfect! I followed the directions carefully and did not change anything. I made an all butter crust, which I have made before using Sally’s recipe. I have never had one of Sally’s recipes fail and this one certainly did not either! Thank you, Sally, for putting so much time into recipe development!
What size pie is it?
Hi Gigi! This recipe is written for a 9×2-inch round pie dish.
Good evening Sally. I was wanting to make this pie tomorrow but I’m very curious if I could use a uncooked store bought pie crust? Will this work?
Yes!
As I’ve said previously, this is the best blueberry pie recipe. Blueberries are in season now so I want to stock up. I don’t want to freeze the whole pie just the berries. I did some experimentation to see if these fresh berries would freeze ok (I’ve previously bought the grocery frozen blueberries and they were not satisfactory). I tried two ways (after mixing the berries with sugar and cornstarch and lemon juice): I froze one batch that i partially baked and froze the other as is. Then I baked both in the oven. The partially baked batch turned out too jammy but the other batch was very good (flavor and texture), although if I had some extra fresh berries handy I’d toss those in. So I’ve just frozen 7 cups of fresh berries tossed with the dry ingredients— a blueberry pie will be so welcome when winter comes 🙂
This is the best blueberry pie recipe I’ve ever made or eaten. I recommend using Sally’s homemade pie crust that uses crisco and butter. I’ve prided myself and have received many complements on my pie crust but this one from sally is the best—flavorful and tender and it doesn’t get soggy even with the juicy fruit filling.
Sally, one question. It’s blueberry season now so I’d like to stock up for future bb pies. If I bake a batch of blueberries according to your recipe, freeze them then thaw them to make a pie later—what do you think?
Nancy, I’m so glad to read how much you enjoy this pie! You can absolutely use your frozen berries in this pie. There’s no need to thaw them. See my recipe note.
Is there a way that I can slightly reheat this for serving, after letting the pie completely cool? Or will the filling become too runny?
Hi Christine, you could cover and pop it back in a cooler oven, let’s say 300°F (149°C) for 10-15 minutes.
Have you used tapioca as a thickener in pies, how does it compare to the flour cornstarch mixture?
Thank you
Hi Peggy! Tapioca powder can be a great thickener in pies, but we haven’t tested it in the place of the flour and cornstarch mixture in this pie. Let us know if you do!
Sets up beautifully and the lemon carries over great flavor in the finished pie!
Delicious! I didn’t realize how much I was underbaking blueberry pies until I saw how much your filling bubbles over. This was the best blueberry pie I’ve made in a long time. Thank you!
Wow! looks so awesome. I will try this recipe.
This recipe is a keeper! I made it last night so it could set up overnight. It was the perfect consistency! Best blueberry pie I have ever made! I did use frozen blueberries, but I partially thawed some to smash up to make it easier to get all the dry ingredients thoroughly mixed. I do not use the lemon juice or zest. And only about half the cinnamon. I will definitely make again. Using flour and cornstarch is definitely key! Thank you!
Hi! Could I make this pie recipe with a mango filling instead?
Hi Zoe, we haven’t tested a mango pie. It may take a bit of tinkering with the other filling ingredients to ensure the right texture, but let us know if you give anything a try!
Does the amount of blueberries change if I want to use the berries in your Strawberry and Peach galette dough? Thanks. I love your recipes.
Hi Kathleen! If you’re hoping to make a blueberry galette, you can use the galette crust and directions from the strawberry and peach recipe, but make the filling from this berry galette (just use blueberries).
This is a perfectly-timed recipe; as we are currently in Maine & had our first taste of a wonderful Blueberry Pie! Now if I make this, it can be a fond reminder. (definitely wish I could get my hands on the tiny Maine berries!)
Thanks for all your tips!
Hi Sally I’ve used your old recipe and it does work with a little change in it. I have fresh blueberries that I grow and what I do I squash the blueberries just a little bit and I know some of the juice comes out but it comes out perfect when I do that. Tried to add a little more cornstarch but it doesn’t taste the same it’s better when I squash the berries a little bit it still has a great taste so I’m happy how it comes out. I get 60 quarts of blueberries a year so I have plenty of berries to experiment with I will try your new recipe and see if it taste better
I agree, I do find smashing some of the berries helps bring the filling together. Let me know how you like this version!
Can this be made with Splenda or other sugar substitute for a diabetic?
Hi Troie! We’d love to help but we are not trained in baking with sugar substitutes. For best taste and texture (and so you don’t waste your time trying to adapt this recipe since it may not work properly), it may be more useful to find a recipe that is specifically formulated for sugar substitutes. Thank you!
Hi. Can you substitute arrowroot for cornstarch and flour?
Thanks
Hi Angelo, that’s actually something my team and I have not tested so I can’t be certain. I know you typically need more arrowroot than cornstarch and flour. Let me know if you try it.
Did you use a deep dish pie pan for this recipe? Thank you.
Hi Susan, the pie dish we used is about 1.75″ deep. We link to the exact one in the recipe notes — see “Special Tools.”
How well does the filling in the pie freeze after the pie has been cooked. When I make pie’s I try and cook several so that I can freeze some, but I find that the filling becomes watery and makes the crust soggy when thawed out. Thanks Sandy
Hi Sandy, the frozen and thawed baked pie isn’t nearly as tasty as when it’s baked fresh. It was good, for sure, but the crust definitely tasted a little wet.
Hi Sally I love your recipes and for a new challenge I wanted to try to make a napoleon! do you have nay recipes on this dessert?
Hi Hazel, we don’t at this time, but let us know if you find one you love!
Can assembled pie be made in advanced, refrigerated and baked the next day?
Hi Bernie, I don’t recommend it. I found this pie is best when baked right away or, at least, from room temperature. So if you try it, bring to room temperature (or close to) before baking.
Could you use this recipe with other Berries ( blackberries or raspberries)?
Hi Jo Ann, blackberries would be best. If they aren’t super sweet, I would use 3/4 cup (150g) sugar as mentioned in the notes. I don’t recommend raspberries unless you turn it into a mixed berry pie with blackberries and blueberries.
Can frozen blueberries be used in this recipe?
Hi Brenda, in a pinch, yes. I do recommend fresh for the best results, though. See recipe note.