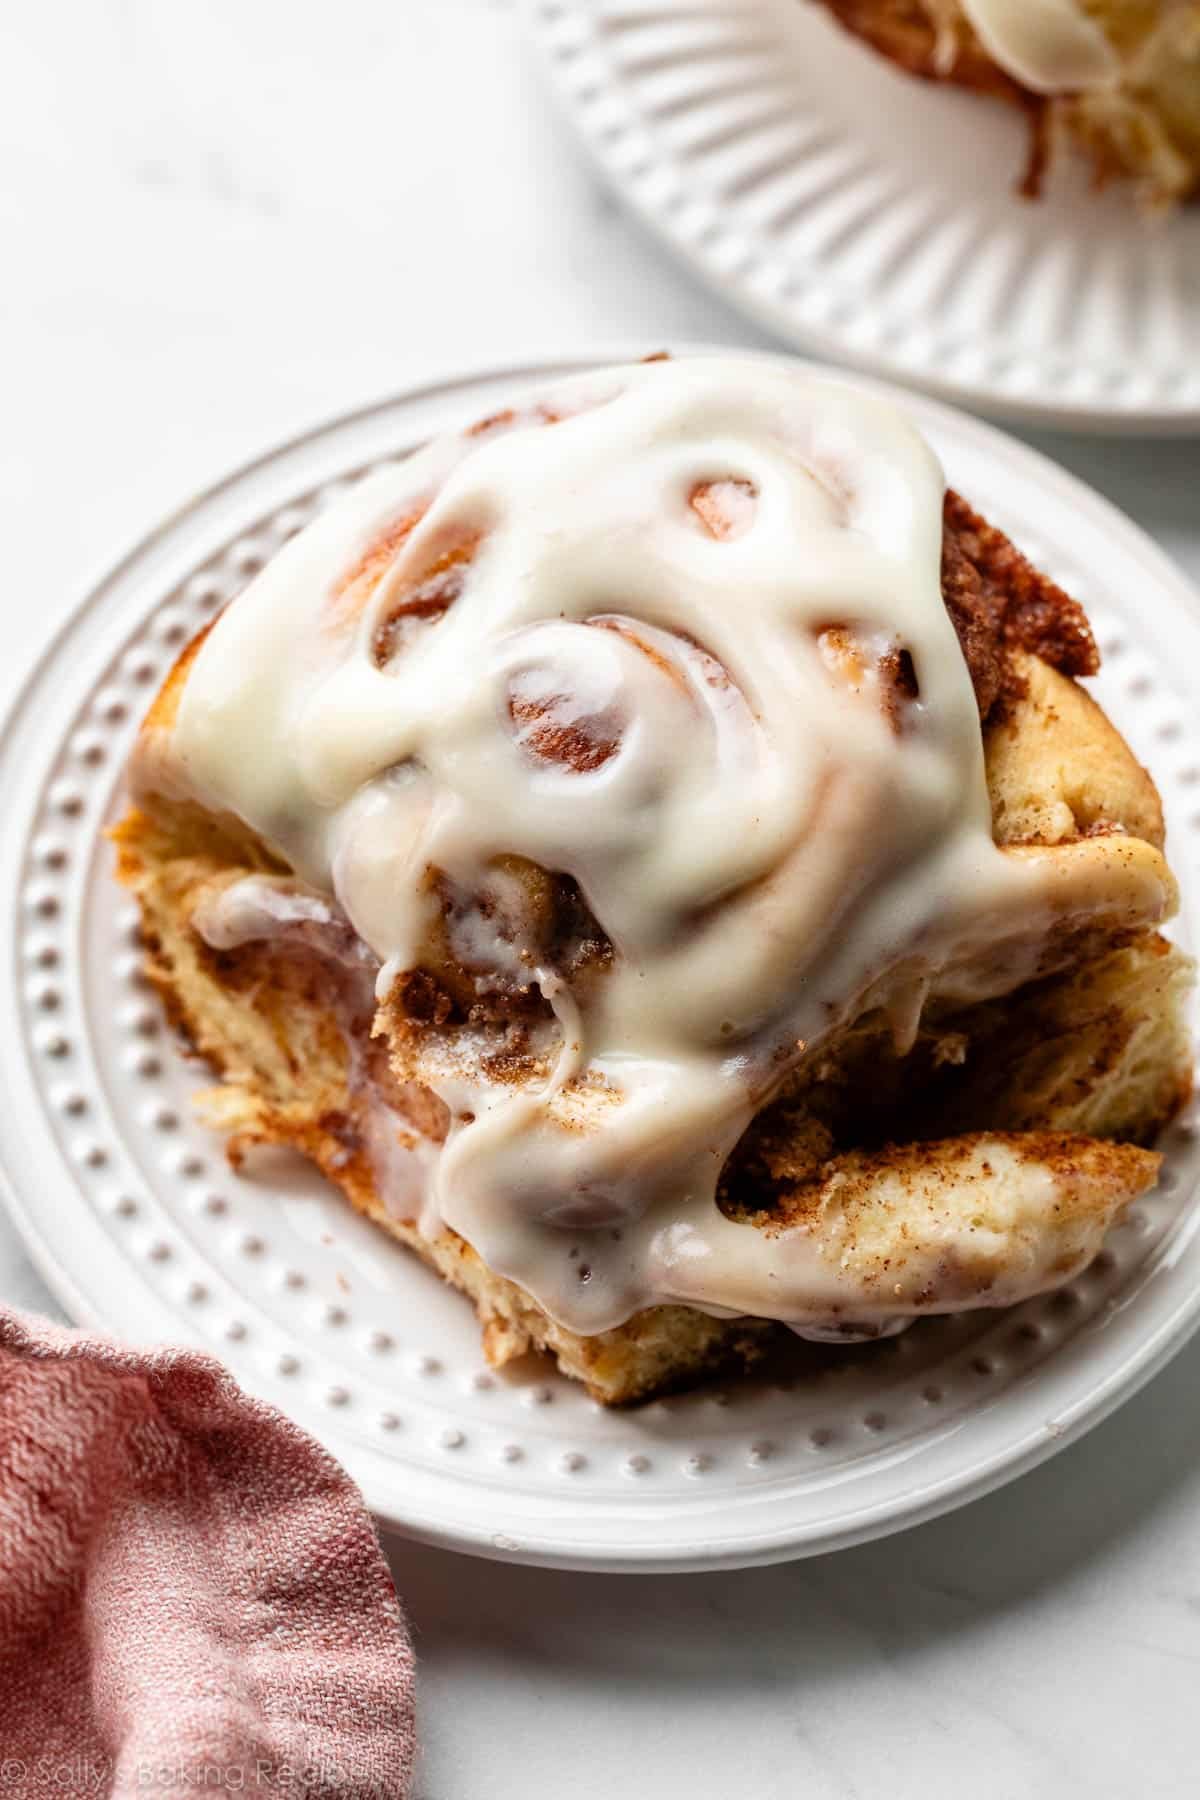
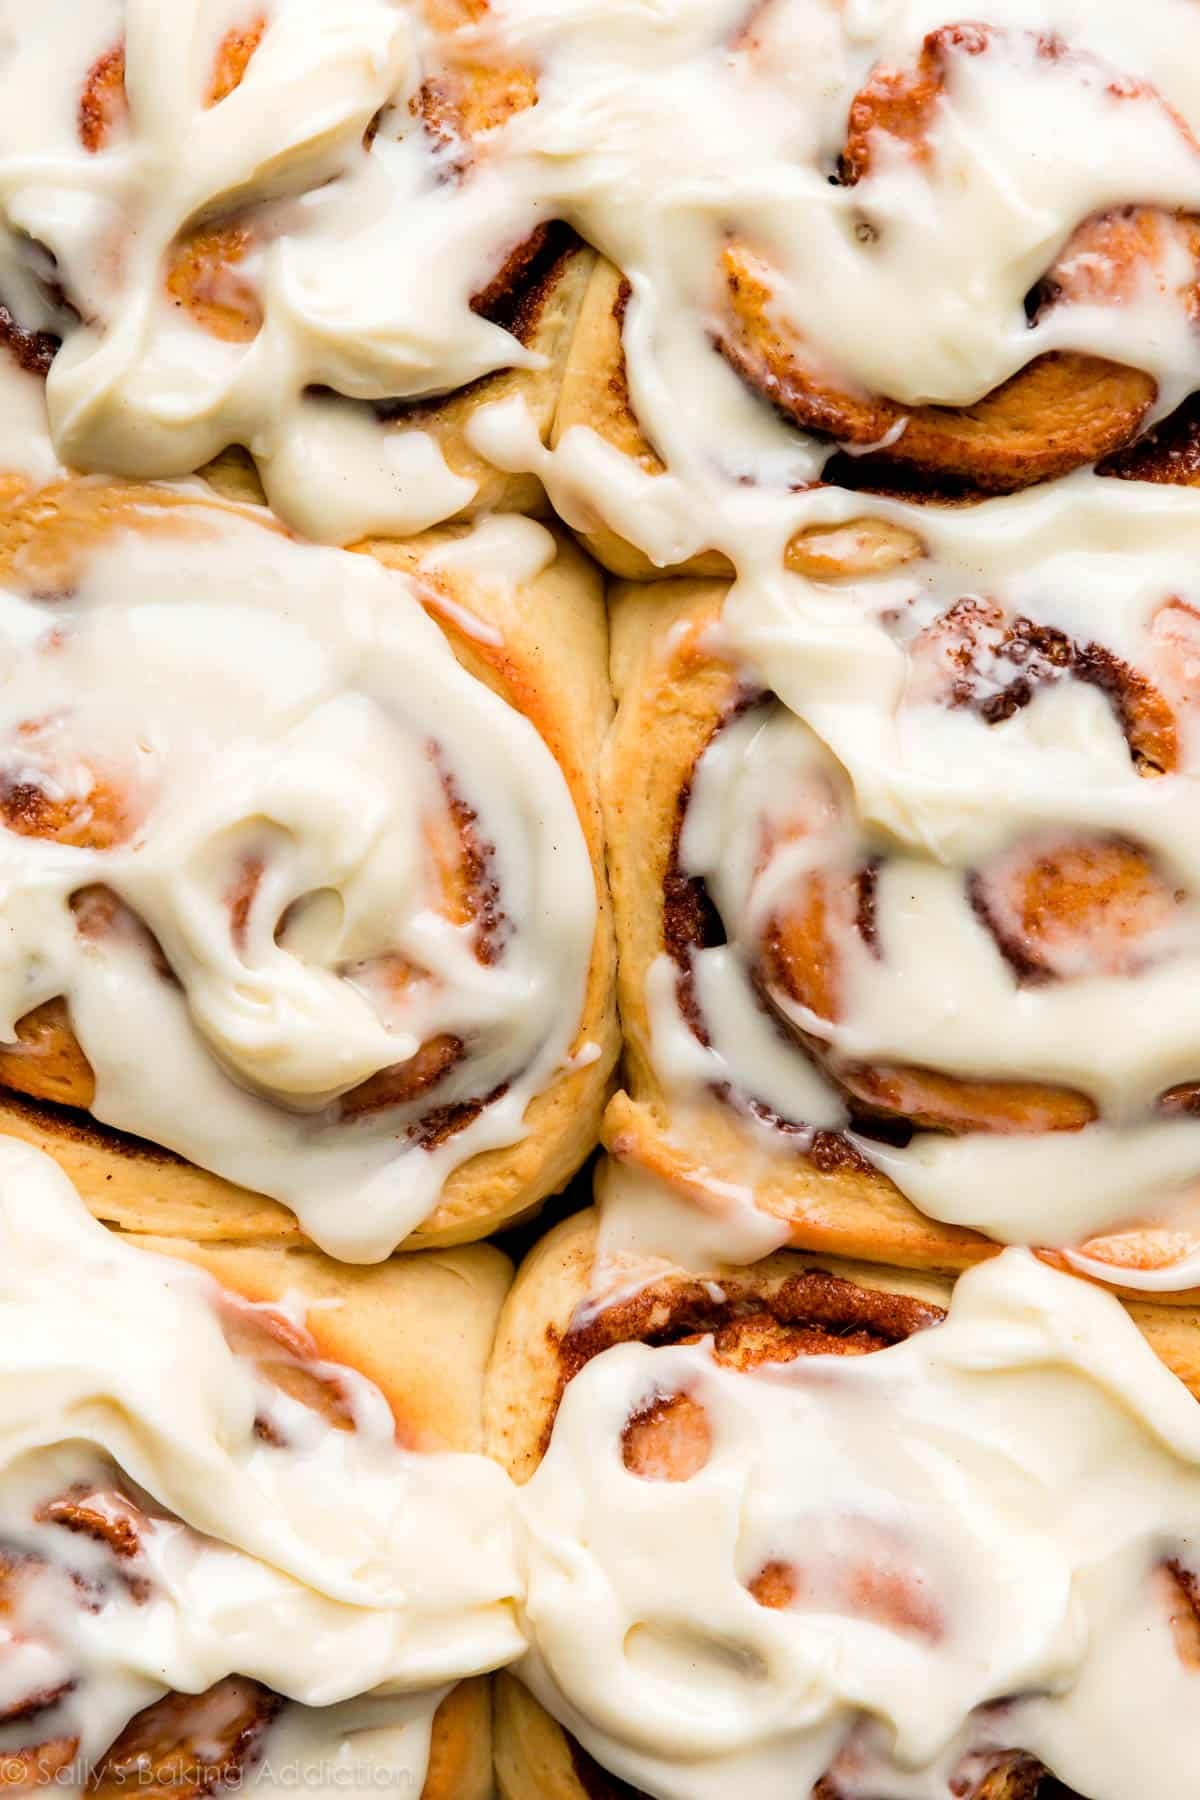
This recipe yields a pan of buttery soft, gooey cinnamon sweet, and extra fluffy homemade cinnamon rolls topped with tangy cream cheese icing. It’s been a reader favorite recipe for years and I love it so much that I turned this rich dough into apple cinnamon rolls, maple pecan sticky buns, maple cinnamon rolls, and even a cinnamon roll wreath. You can make the cinnamon rolls within a few hours or get started the night before using the overnight preparation option.
This recipe is brought to you in partnership with Red Star Yeast.
I originally published this recipe in 2014 and have since added new photos and a video tutorial, as well as more detailed instructions and success tips.
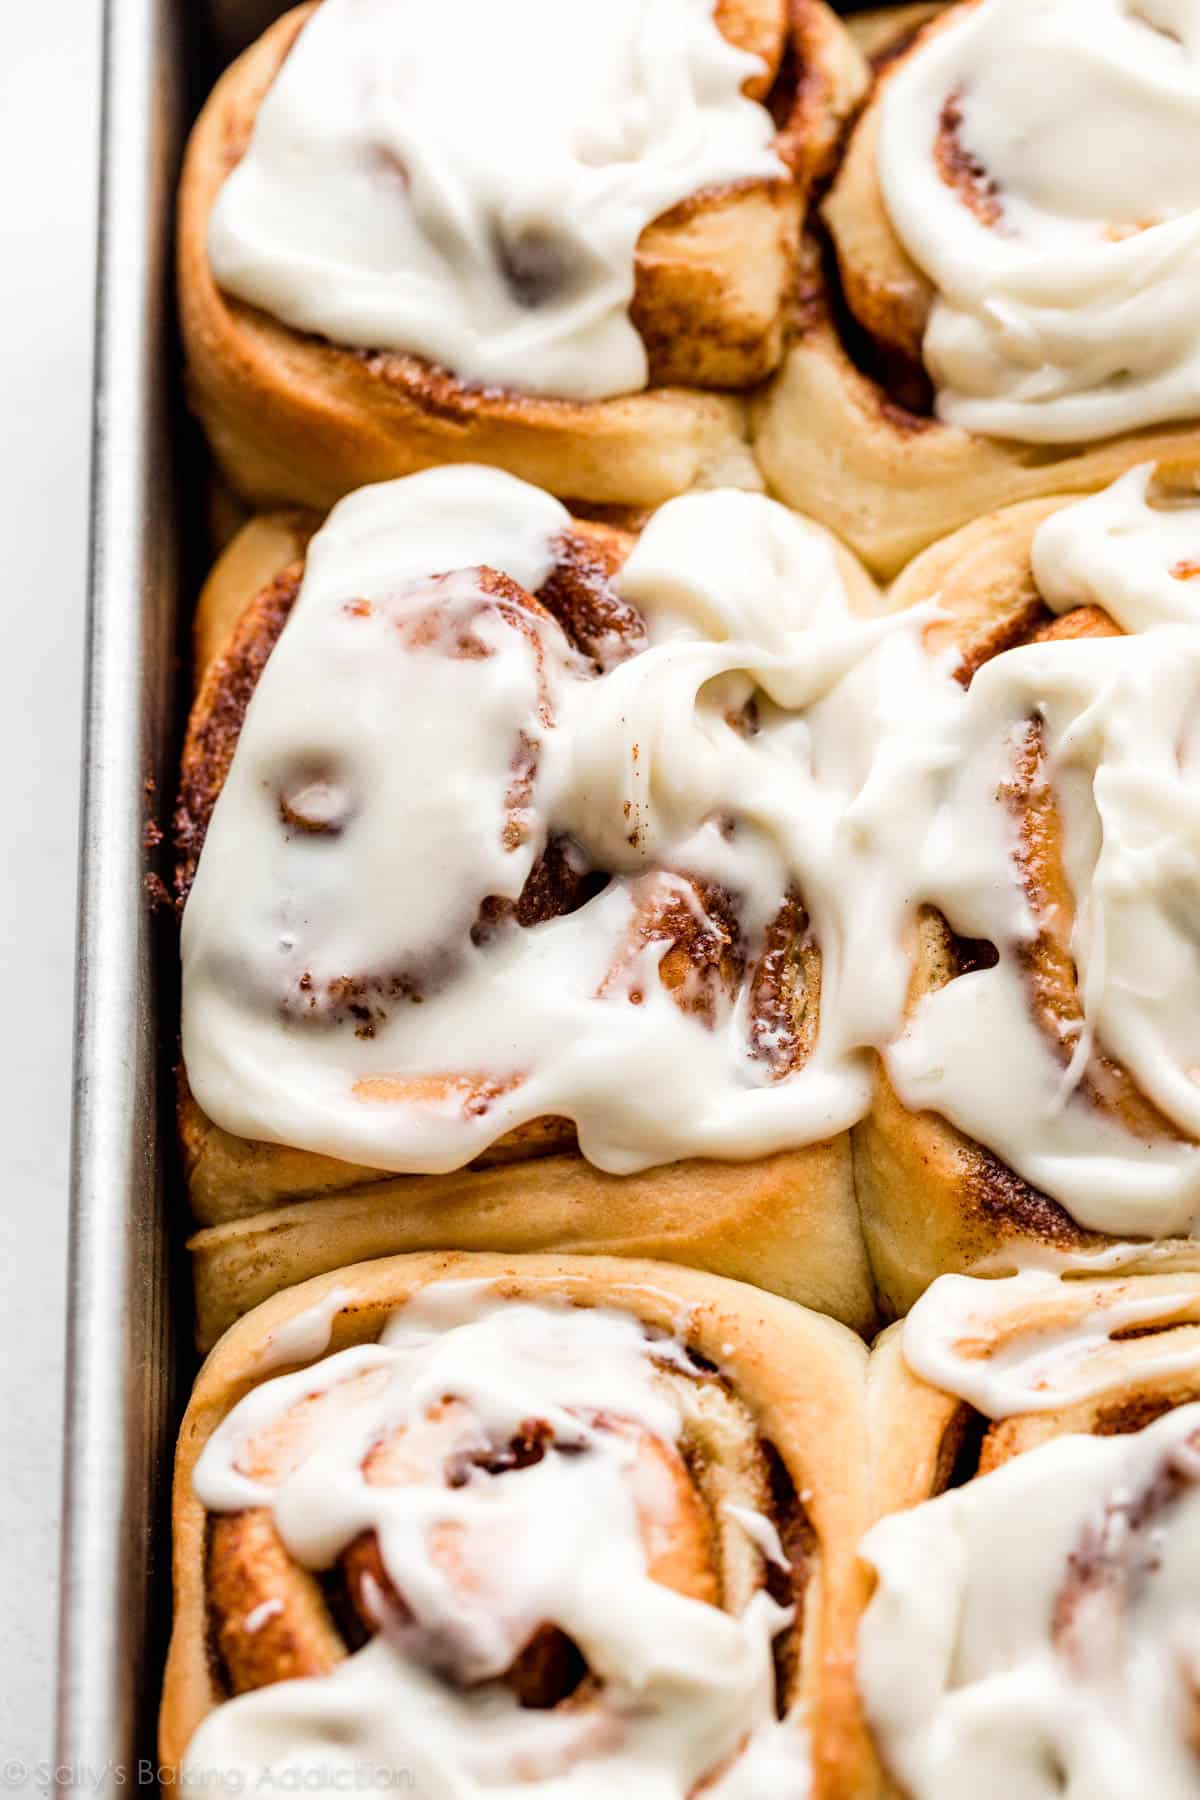
After making countless batches of these cinnamon rolls since I published the recipe many years ago, plus answering readers’ comments and questions, I thought it would be beneficial to update the post with more helpful information and success tips. Homemade cinnamon rolls are a popular breakfast choice, so I want to make sure you have all the resources you need for this classic recipe.
By the way, if you love this dough, be sure to try it as raspberry sweet rolls or strawberry sweet rolls with lemon glaze next. Or for a sprinkle loaded treat, my birthday cake cinnamon rolls use the same dough, too!
Tell Me About These Homemade Overnight Cinnamon Rolls
- Texture: This is one of my richest homemade doughs, so you’re already promised a soft, springy, and fluffy texture. I usually use all-purpose flour, but if you use the optional bread flour, your rolls will be a little chewier. I find that these homemade cinnamon rolls are even fluffier than my easy 1 rise cinnamon rolls (and that’s because there’s the additional rise here!).
- Flavor: The smell of warm cinnamon rolls is oh-so-irresistible and inviting. Once you take that first bite, you’ll enjoy a fresh homemade dough that’s swirled with endless pockets of (Cinnabon style!) sweet and gooey cinnamon.
- Ease: Homemade dough and shaped breads require more precision and effort than making say, a coffee cake. But the dough is pretty straightforward and simple to shape, as long as you have enough flour nearby for your hands, work surface, and rolling pin.
- Time: This dough requires 2 rises. Once you understand the assembly process, the prep moves pretty quickly. Set aside at least 4-5 hours from start to finish or divide between 2 days with the overnight option. Whichever method you choose, keep in mind most of that time is hands off as the dough rises.
If you are craving cinnamon rolls right now, and just can’t wait for dough to rise, try these no yeast cinnamon rolls!
What Readers are Saying:
“I HAD to come and leave this rave review. I just baked and iced these cinnamon rolls ay 9:05 am. It’s now 10:55 am in a household of only 3 people only two are left. This recipe is the best I’ve ever tried. ★★★★★” – Chelsea
“Delicious and easy to follow! This was my first time cooking with yeast and my first time making homemade cinnamon rolls and this was a great recipe to start with. Everyone at brunch was blown away. ★★★★★” – Hannah
“Delicious! I have tried many cinnamon roll recipes, and this is my new favorite. I prefer a roll that is large, more fluffy than dense/gooey, and buttery without being overly sweet. This fit the bill! ★★★★★” – Brice
Are You a Yeast Beginner?
This Baking with Yeast Guide is a wonderful starting point for beginners. I answer many common yeast FAQs in easy-to-understand explanations, so you can learn the basics before beginning.
7 Crucial Ingredients in These Homemade Cinnamon Rolls
Feel free to skip straight to the recipe. But if you’re new to making bread, the following explanations are points that I’ve learned over the years and will be massively helpful.
- Whole milk: Whole milk is ideal for the richest tasting cinnamon rolls. Buttermilk works just as well without any changes to the recipe. Many readers have successfully substituted nondairy milks. In a pinch, you can use 2% or 1% milk, but do not use nonfat milk.
- Sugar: You need 2/3 cup of white granulated sugar in the dough. Use 2 Tablespoons in step 1 below (the proofing step), then add the rest in step 2.
- Yeast: You can use active dry or instant yeast. Follow the directions exactly as written regardless of which you choose. You’ll still proof the yeast in warm milk with some sugar even if you use instant yeast. This step ensures that the yeast is active and not expired. Most yeast these days is already active, but it’s a quick 5-10 minute step that prevents you from wasting your time just in case the yeast has expired. If using active dry yeast, the rise times will be a little longer. For the past 10+ years, my go-to brand has been Red Star Yeast. I always recommend Platinum Yeast from Red Star.
- Butter: This is a rich dough, meaning it has fat to help guarantee softness. Use 1/2 cup of softened butter and to help it blend easier, cut it into 4 pieces before adding.
- Eggs: Like butter, eggs promise a softer, richer dough.
- Salt: Dough is bland without salt.
- Flour: Flour is the structure of the dough. You can use either all-purpose flour or bread flour. You’ll notice the rolls are a little chewier if you use bread flour. It’s not a huge difference, so don’t worry if you only have all-purpose flour. (That’s what I usually use!)
Note: You’ll notice that I use more yeast in this recipe compared to my easy cinnamon rolls. Why? These are much fluffier and larger—about twice the size.
Step-by-Step Photos
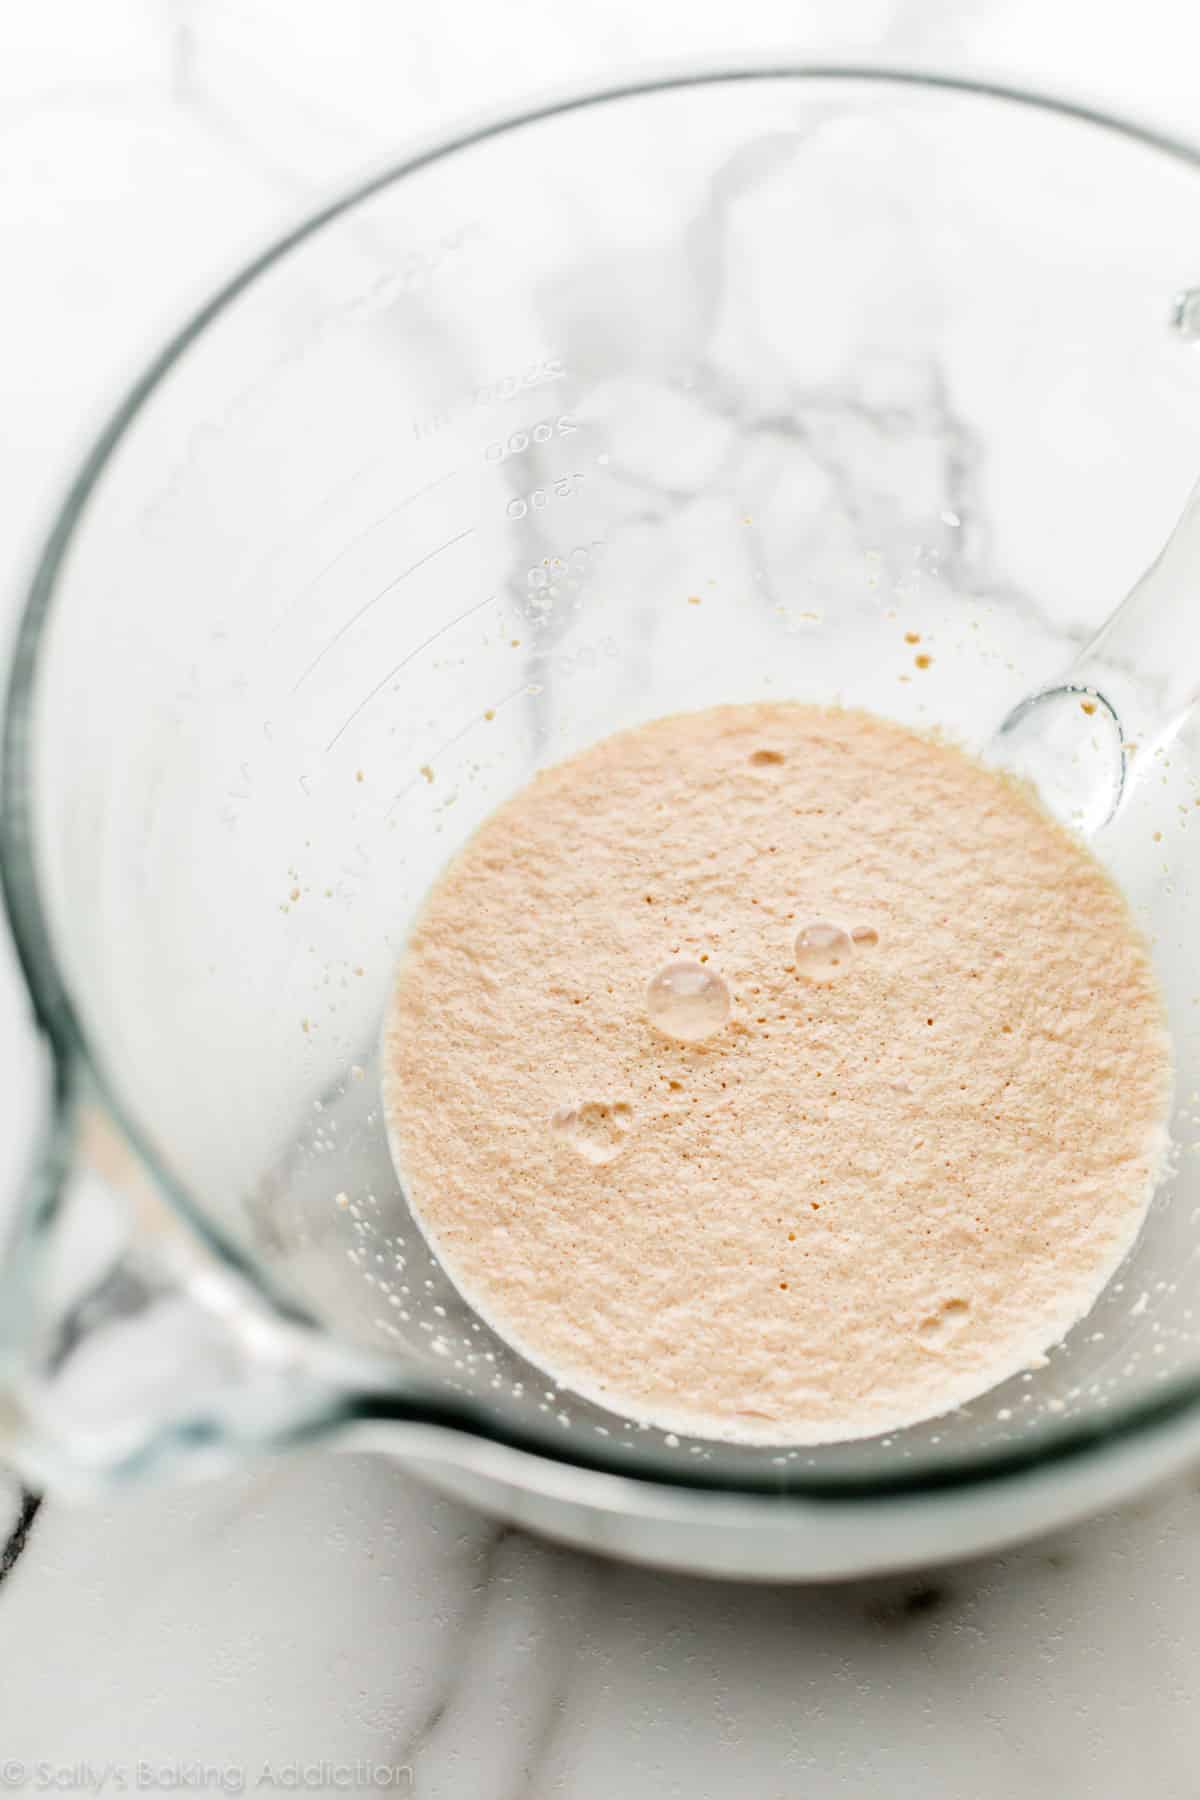
Here’s what you’re looking for after you let the warm milk, some of the sugar, and yeast sit for about 5-10 minutes. The top will be a little foamy:
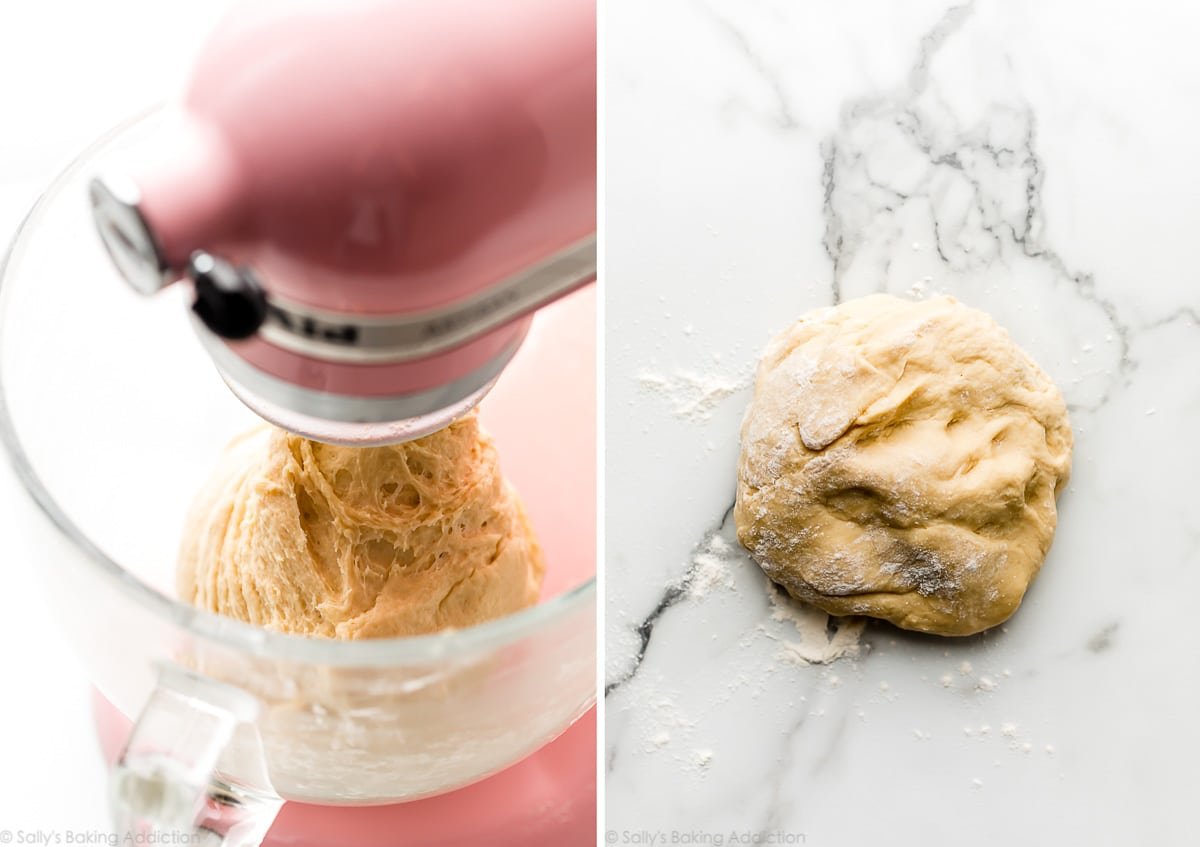
After the dough comes together, it will be a little soft and sticky—that’s normal. As explained in step 3 below, knead the dough on a floured counter or keep it in the mixer for kneading. If you’d like a visual of how to knead the dough by hand, you can watch the full video tutorial in my post on how to knead dough.
What If I Don’t Have a Stand Mixer? If you do not own a mixer, you can mix the dough together with a large wooden spoon/silicone spatula. It will take a bit of arm muscle. A hand mixer works, but the sticky dough repeatedly gets stuck in the beaters. Mixing by hand with a wooden spoon or silicone spatula is a better choice.
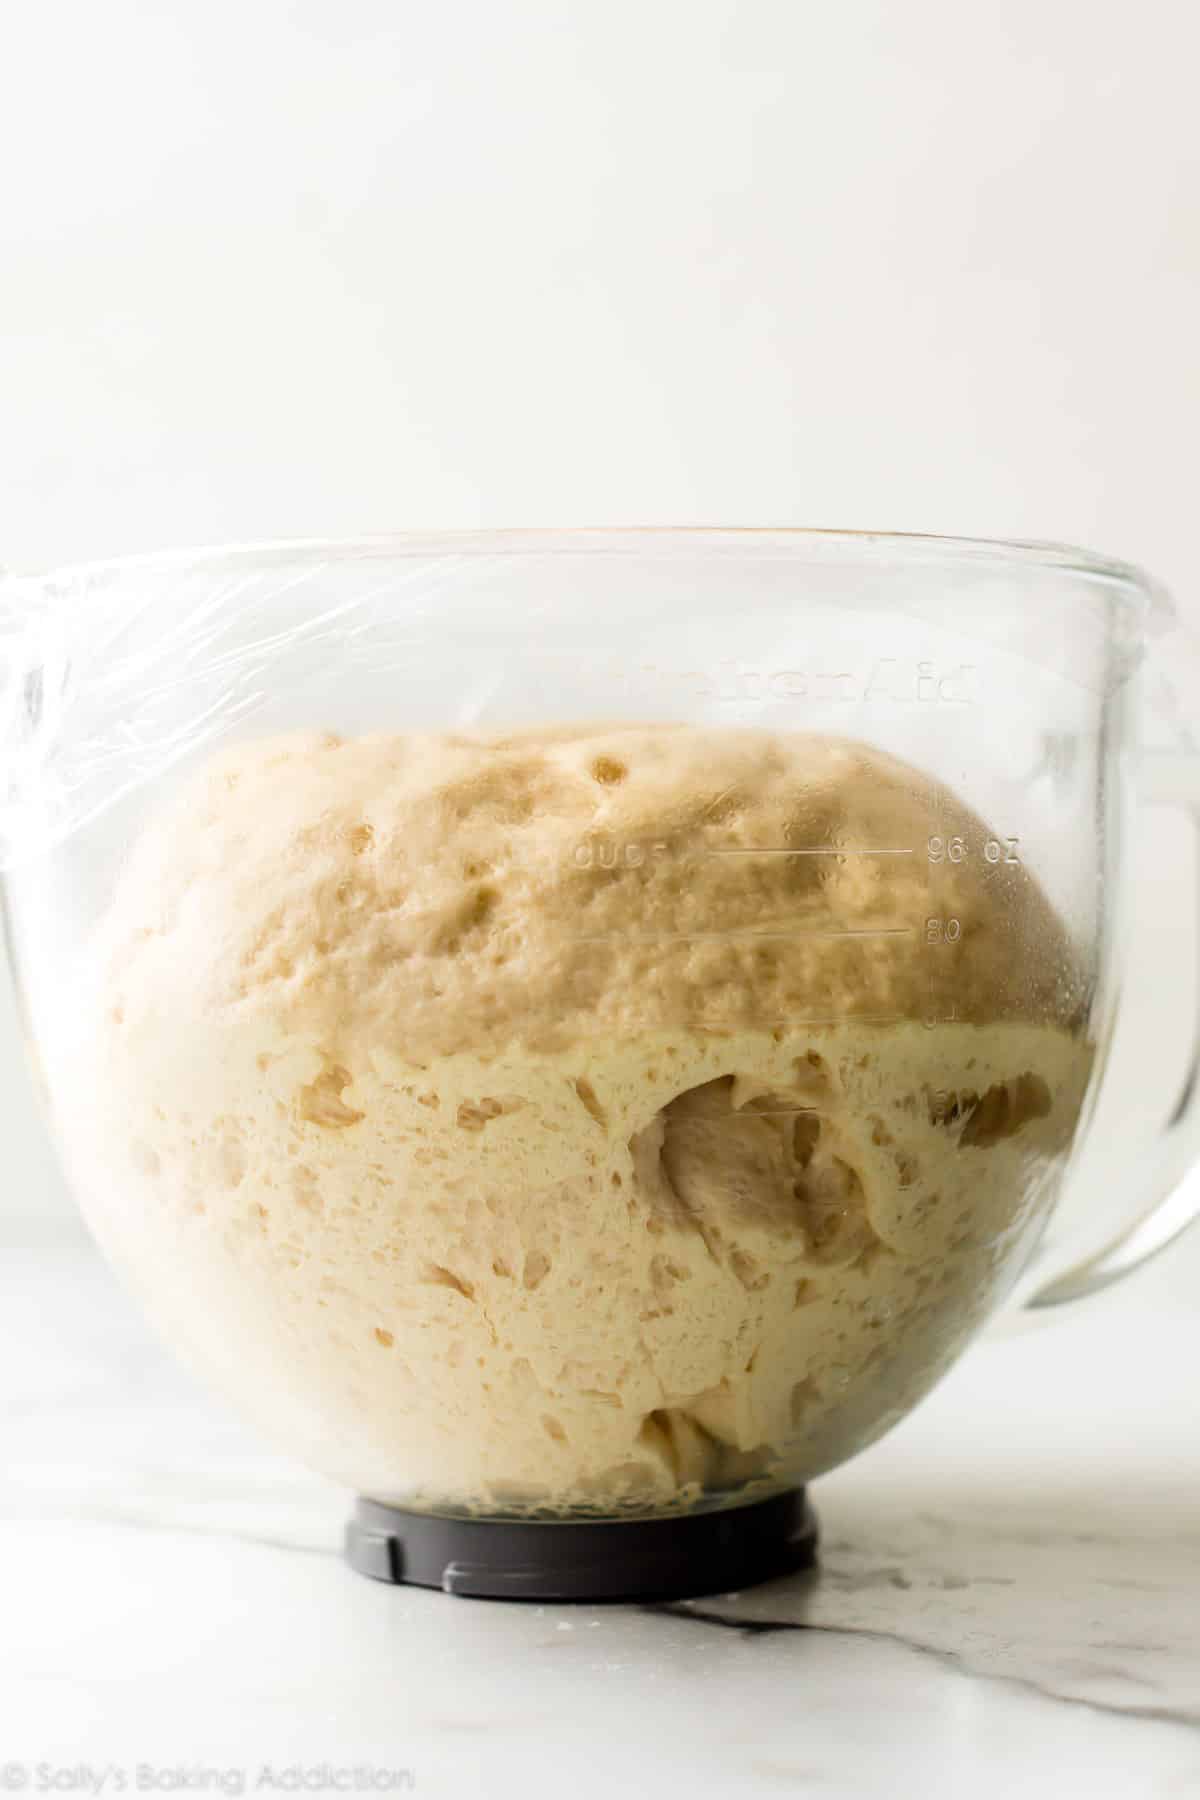
Let the dough rise until doubled in size:
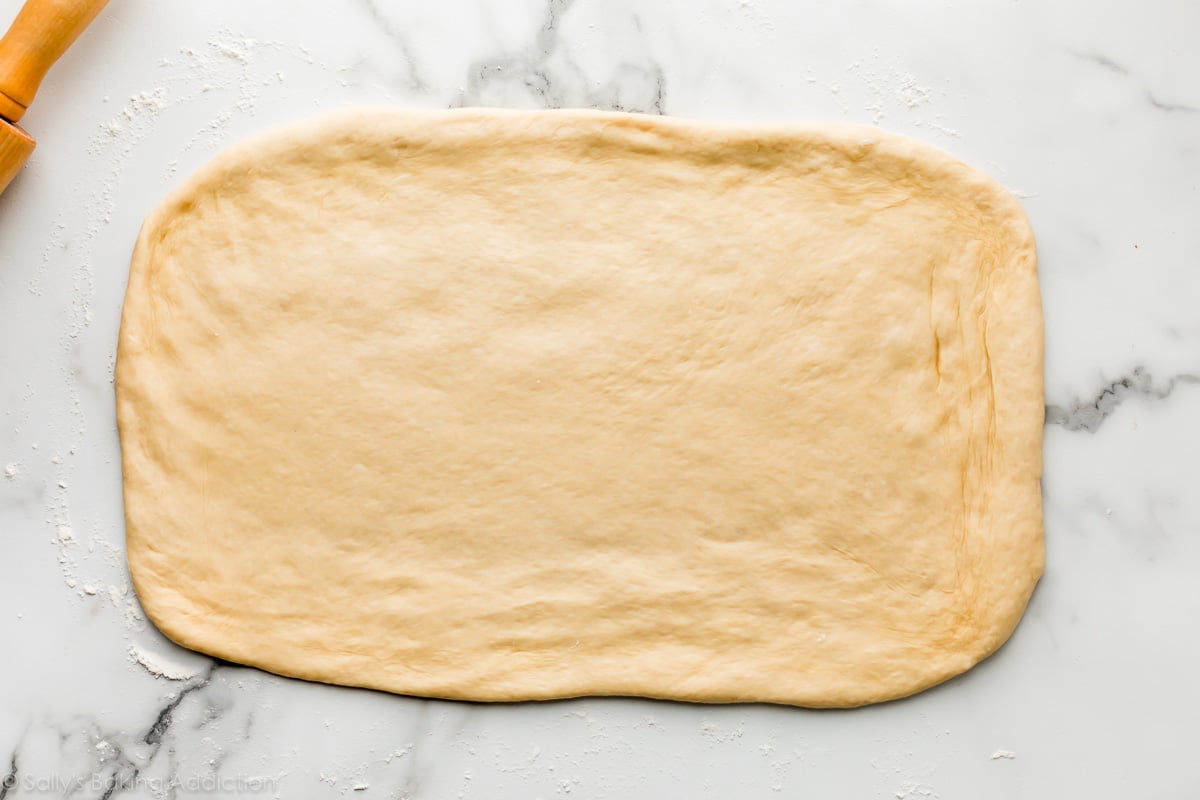
Punch the risen dough down and roll it out.
Baker’s Tip: If the dough keeps shrinking as you roll it out, stop what you’re doing, cover it lightly, and let it rest for 10 minutes to relax the gluten. When you return to the dough, it should stretch out much easier.
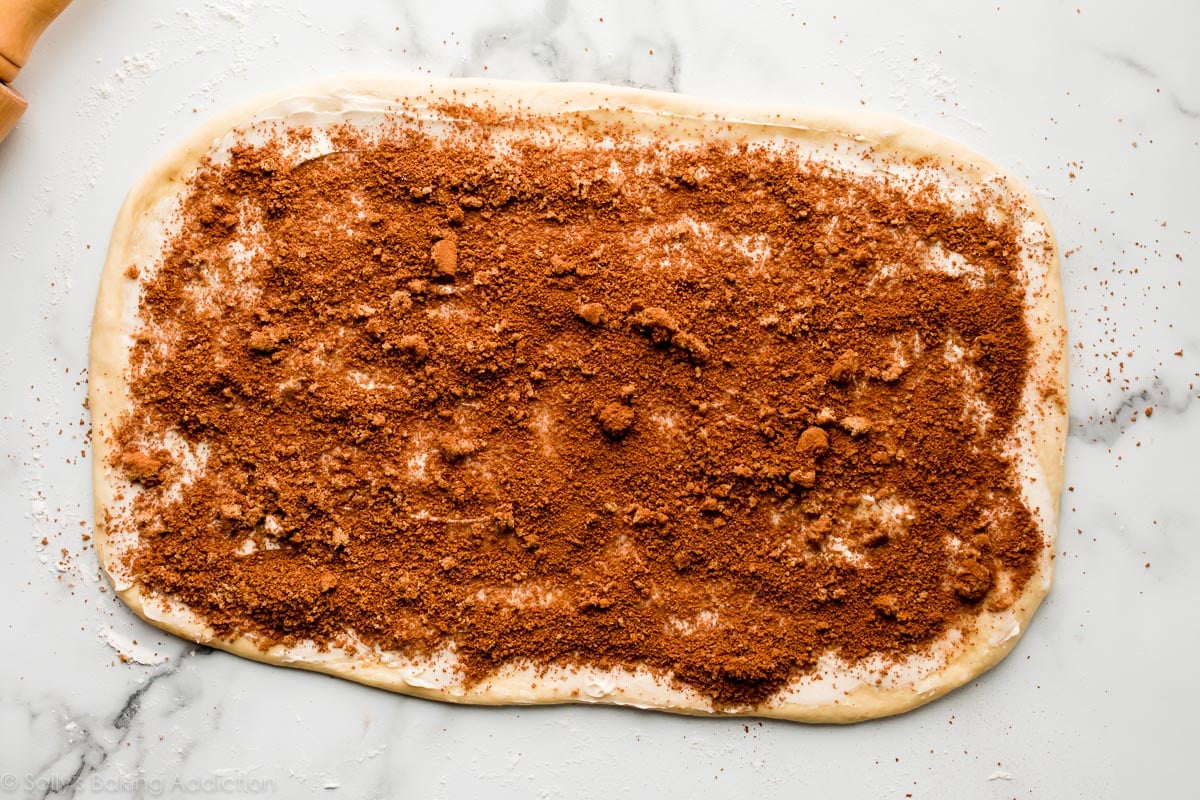
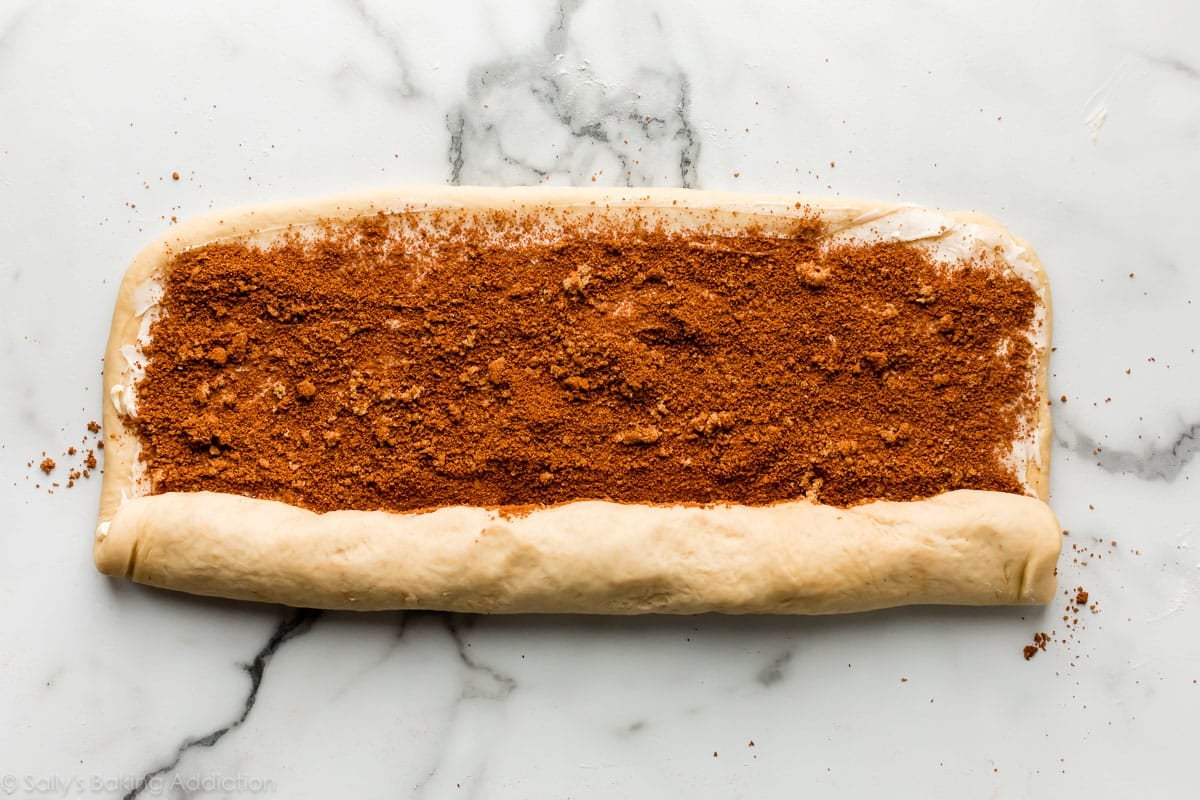
Spread softened butter on top, then sprinkle on a mixture of cinnamon and sugar (brown sugar or white granulated sugar).
Roll it up:
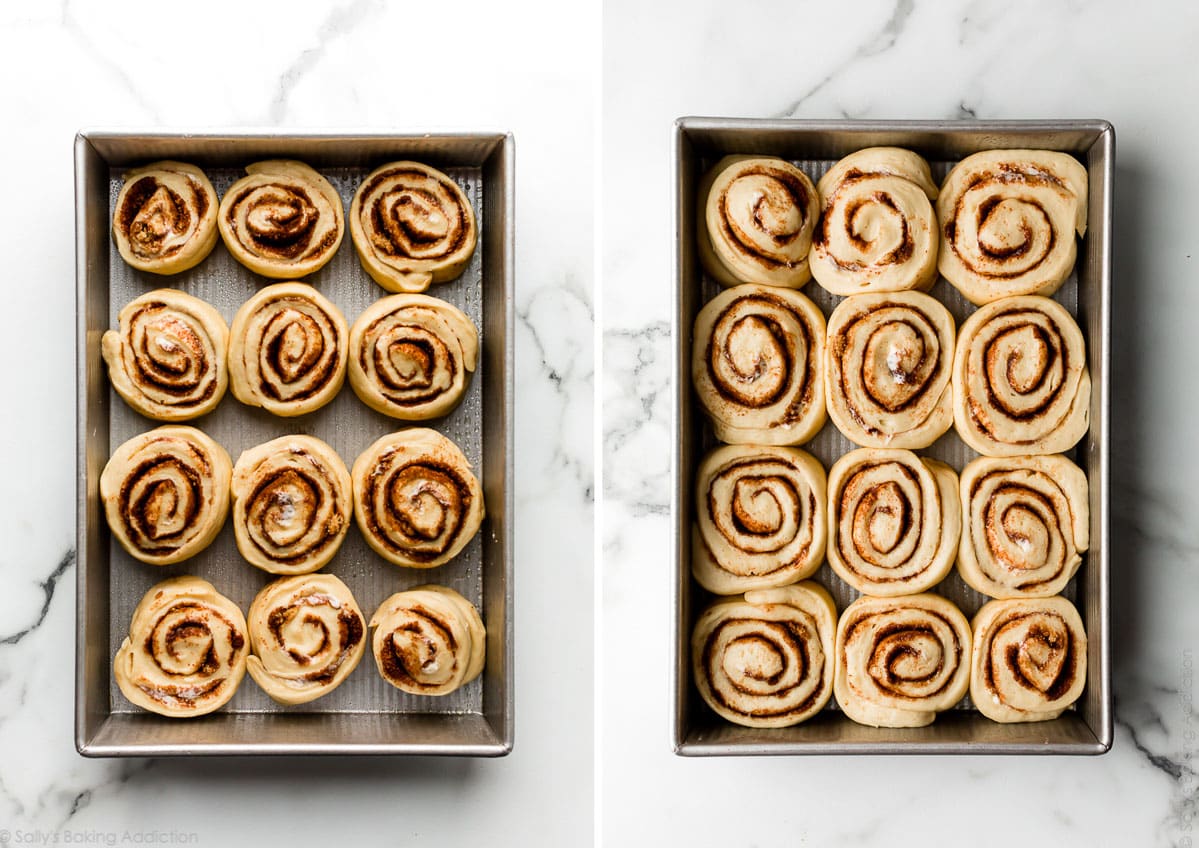
Use a very sharp knife to cut the roll into 12 rolls, each about 1.5 inches. Arrange in your greased baking pan, cover, then let the rolls rise until doubled in size and puffy, usually about 1 hour. The left photo is before rising and the right photo is after rising:
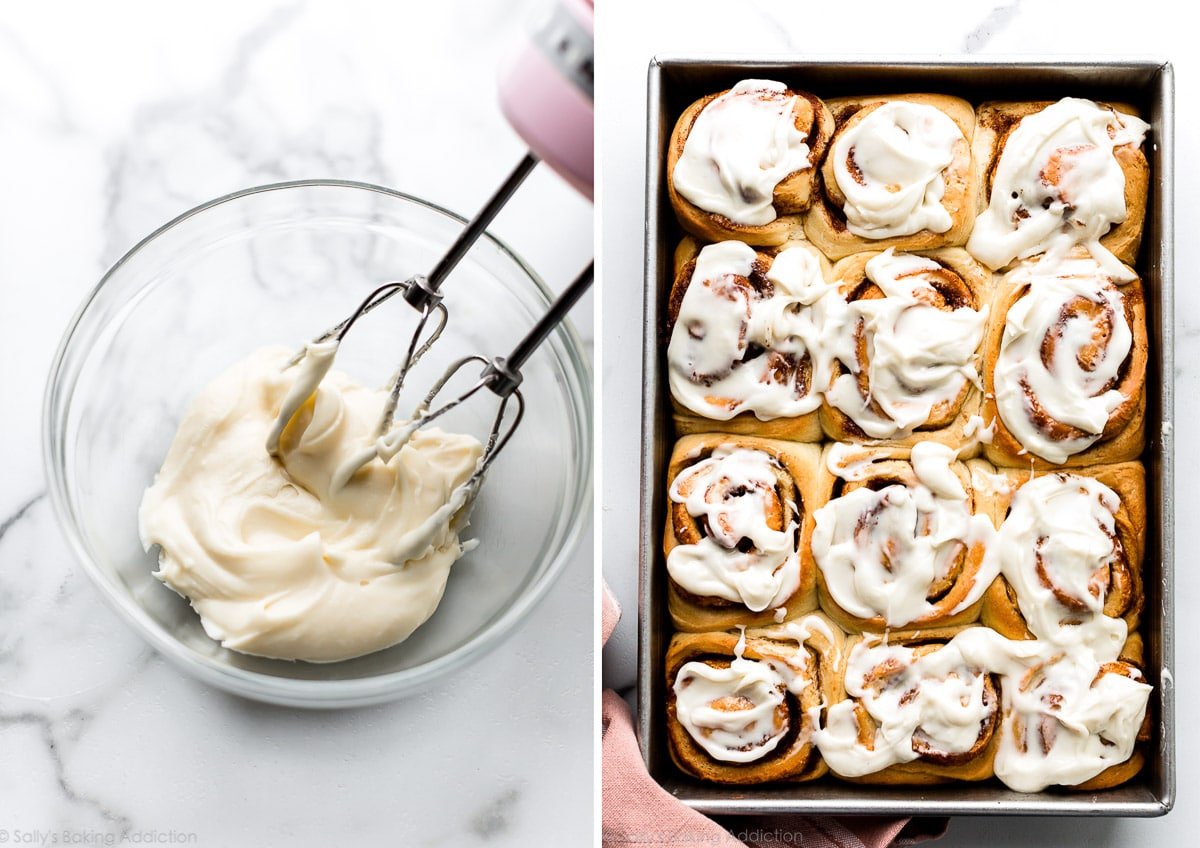
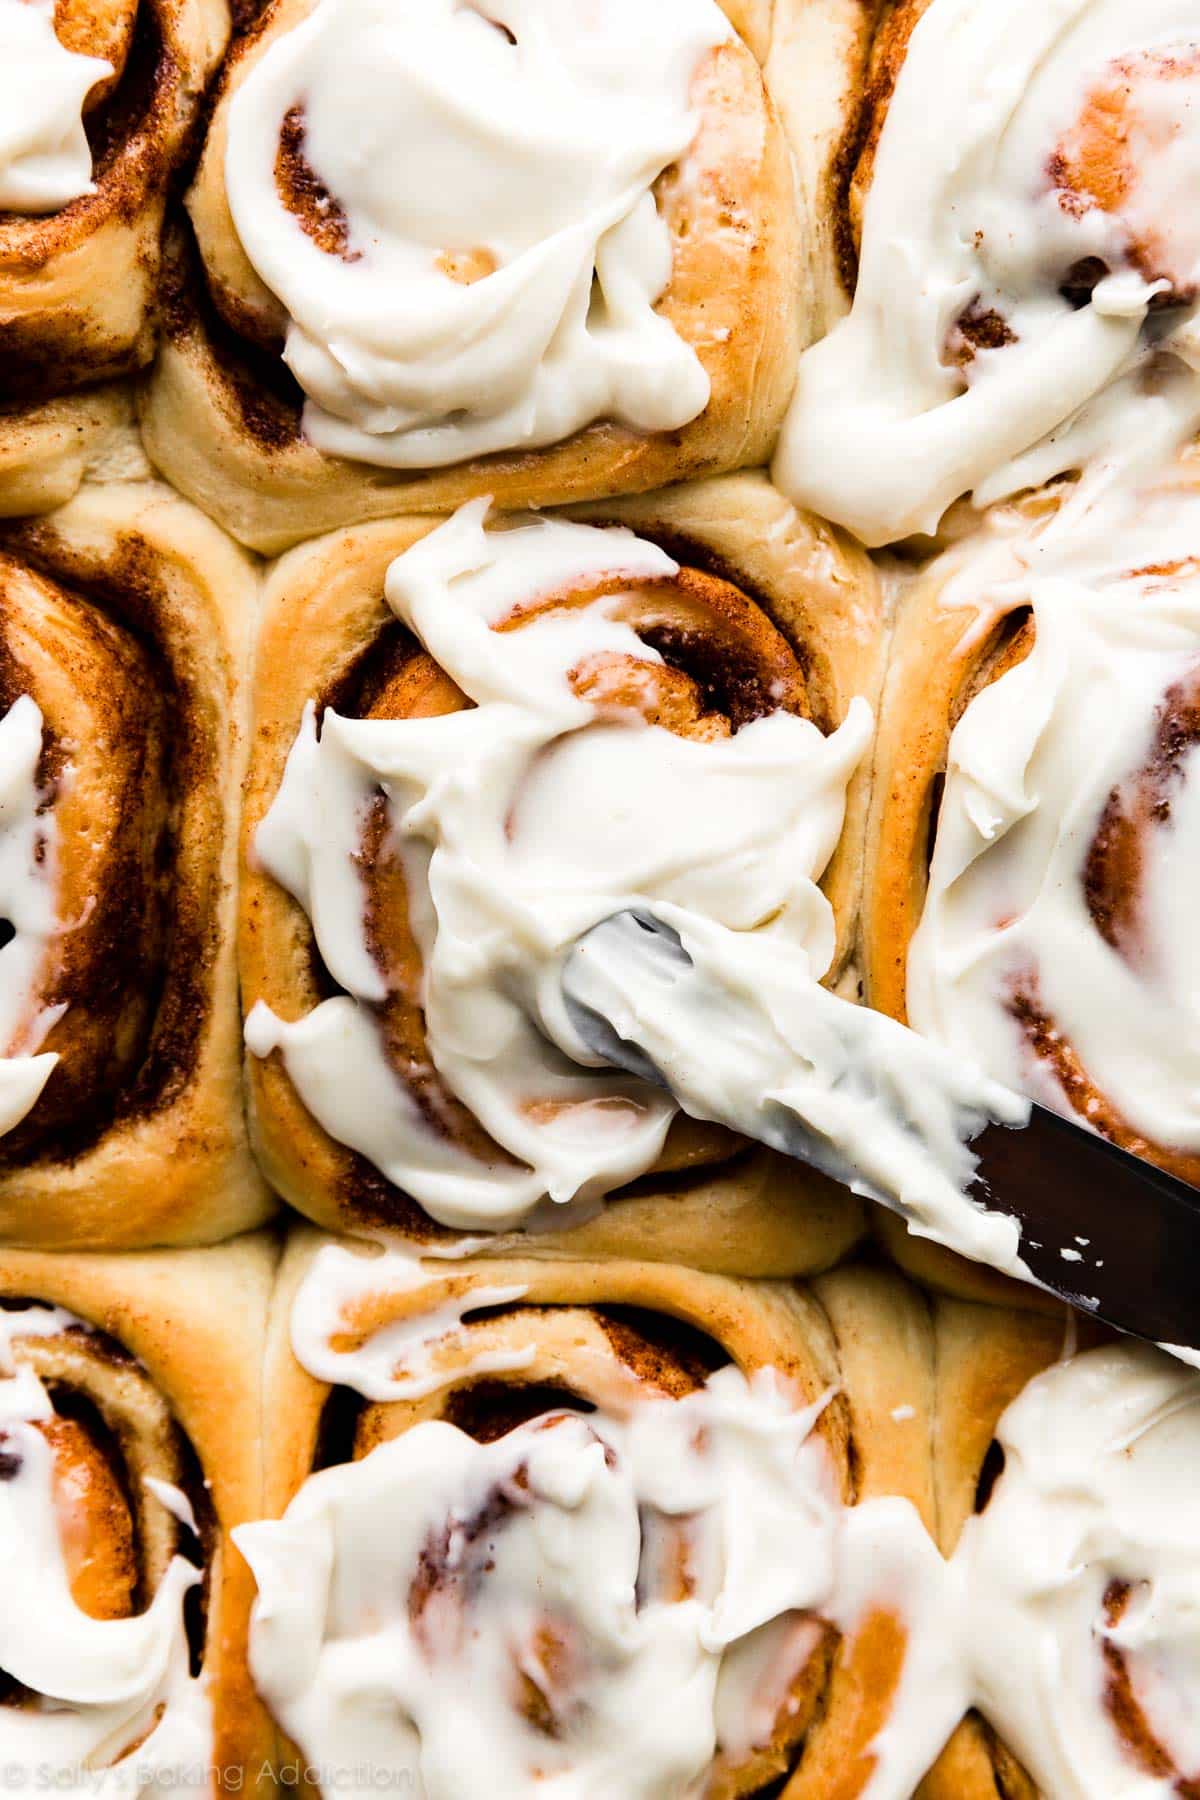
Bake the rolls and then make the tangy cream cheese icing to smother on top. If cream cheese isn’t your favorite, you could top the rolls with vanilla icing, the brown sugar icing from these pumpkin donuts, maple icing from maple cinnamon rolls, or even the caramel icing from apple cinnamon rolls. Lots of options!
5 Success Tips
- Use brown sugar or granulated sugar in the filling: I used to use granulated sugar in the cinnamon sugar filling, but recently switched to brown sugar for extra flavor. Brown sugar doesn’t necessarily make the filling more moist—there’s so much butter, so it’s moist and gooey either way. Use whichever sugar you prefer.
- Best pan to use: I recommend a 9×13-inch glass pan or metal pan. Avoid ceramic pans. If you must use ceramic, keep in mind that the rolls will likely take longer to bake through.
- Evenly baked cinnamon rolls: These are extra big and fluffy cinnamon rolls, so to help guarantee the centers AND tops cook evenly, tent a piece of aluminum foil over the rolls after about 15 minutes in the oven. This will protect the tops from browning too quickly before the centers can cook.
- Don’t have all morning to spend on this dough? Feel free to prep the dough the night before. This is a wonderful way to save time in the morning so you can wake up and eat sooner. See my make-ahead/overnight instructions in the written recipe below.
How to Freeze Homemade Cinnamon Rolls So They Still Taste Fresh
Let me share a tip I’ve learned after working with this dough for several years. You can prep the rolls and freeze them ahead of time so they still taste fresh.
- Here’s how: Bake the rolls in step 9 for only about 10 minutes. Cool completely, then cover and freeze. To serve, take the rolls out of the freezer and place in the refrigerator overnight to thaw. Once thawed, finish baking them for about 15-20 minutes.
I often use this method when I gift cinnamon rolls to others—just copy/paste or write these freezing instructions down. This method is also helpful if you have company over, want to cut down on time, or are entertaining. I like to make these cinnamon rolls ahead when I’m hosting holidays like Easter. See more Easter brunch recipes, like savory quiche and frittata, to complete your menu.
Print
Homemade Overnight Cinnamon Rolls
- Prep Time: 3 hours, 30 minutes (includes rises)
- Cook Time: 25 minutes
- Total Time: 4 hours (or overnight)
- Yield: 12 rolls
- Category: Breakfast
- Method: Baking
- Cuisine: American
Description
This recipe yields a pan of buttery soft, gooey cinnamon sweet, and extra fluffy homemade cinnamon rolls topped with tangy cream cheese icing. You can make the cinnamon rolls within a few hours or get started the night before using the overnight preparation option.
Ingredients
Dough
- 1 cup (240ml) whole milk, warmed to about 100°F (38°C)
- 2/3 cup (135g) granulated sugar, divided
- 1 and 1/2 Tablespoons (14g) active dry or instant yeast (2 standard size packets)*
- 1/2 cup (8 Tbsp; 113g) unsalted butter, softened to room temperature and cut into 4 pieces
- 2 large eggs, at room temperature
- 1/2 teaspoon salt
- 4 and 1/2 cups (563g) all-purpose flour or bread flour (spooned & leveled), plus more as needed
- 2 teaspoons canola, vegetable, or olive oil for bowl (or use nonstick spray)
Filling
- 1/2 cup (8 Tbsp; 113g) unsalted butter, softened to room temperature
- 2/3 cup (135g) packed light or dark brown sugar
- 1 and 1/2 Tablespoons ground cinnamon
Cream Cheese Icing
- 4 ounces (113g) full-fat brick cream cheese, softened to room temperature
- 1 cup (120g) confectioners’ sugar
- 1 Tablespoon (15ml) heavy cream or milk
- 1/2 teaspoon pure vanilla extract
Instructions
- Prepare the dough: Whisk the warm milk, 2 Tablespoons sugar, and the yeast together in the bowl of your stand mixer fitted with a dough hook or paddle attachment. Cover and allow mixture to sit for about 5 minutes or until foamy on top. *If you do not own a mixer, you can do this in a large mixing bowl and in the next step, mix the dough together with a large wooden spoon/silicone spatula. It will take a bit of arm muscle. A hand mixer works, but the sticky dough repeatedly gets stuck in the beaters. Mixing by hand with a wooden spoon or silicone spatula is a better choice.*
- On medium speed, beat in the remaining sugar (which should be 1/2 cup/100g) and the softened butter until it is slightly broken up. Add the eggs and salt and beat on medium speed until combined. The butter won’t really be mixing into the mixture, so don’t be alarmed if it stays in pieces. Switch the mixer down to low speed and with it running, add 1 cup of flour at a time, making sure it’s fully incorporated before adding the next. Stop the mixer and scrape down the sides of the bowl as needed. After 4 cups have been added, add the last 1/2 cup and beat until the dough comes together and pulls away from the sides of the bowl, about 3 minutes. Dough will be soft.
- Knead the dough: Keep the dough in the mixer (and switch to the dough hook if you used the paddle) and beat for an additional 5 full minutes, or knead by hand on a lightly floured surface for 5 full minutes. (If you’re new to bread-baking, my How to Knead Dough video tutorial can help here.) If the dough becomes too sticky during the kneading process, sprinkle 1 teaspoon of flour at a time on the dough or on the work surface/in the bowl to make a soft, slightly tacky dough. Do not add more flour than you need because you do not want a dry dough. After kneading, the dough should still feel a little soft. Poke it with your finger—if it slowly bounces back, your dough is ready to rise. You can also do a “windowpane test” to see if your dough has been kneaded long enough: tear off a small (roughly golfball-size) piece of dough and gently stretch it out until it’s thin enough for light to pass through it. Hold it up to a window or light. Does light pass through the stretched dough without the dough tearing first? If so, your dough has been kneaded long enough and is ready to rise. If not, keep kneading until it passes the windowpane test.
- 1st Rise: Lightly grease a large bowl with oil or use nonstick spray. Place the dough in the bowl, turning it to coat all sides in the oil. Cover the bowl with aluminum foil, plastic wrap, or a clean kitchen towel. Allow the dough to rise in a relatively warm environment for 2 hours or until double in size. (I always let it rise on the counter and it takes about 2 hours. For a tiny reduction in rise time, see my answer to Where Should Dough Rise? in my Baking with Yeast Guide.)
- Grease the bottom and sides of a metal or glass 9×13-inch baking dish (glass or metal) or line with parchment paper.
- Roll out the dough: Punch down the dough to release the air. Place dough on a lightly floured work surface and using a lightly floured rolling pin, roll dough into a 12×18-inch rectangle. Make sure the dough is smooth and evenly thick. If the dough keeps shrinking as you roll it out, stop what you’re doing, cover it lightly, and let it rest for 10 minutes to relax the gluten. When you return to the dough, it should stretch out much easier.
- For the filling: Spread the softened butter all over the dough. The softer the butter is, the easier it is to spread in this step. (Microwave it for a few seconds to soften if needed.) In a small bowl, mix the sugar and cinnamon together. Sprinkle evenly over the butter. Tightly roll up the dough to form an 18-inch-long log. If some filling spills out, sprinkle it on top of the roll. With an extra sharp knife, cut into 12 even rolls, about 1.5 inches each. Arrange in the prepared baking pan.
- 2nd Rise: Cover the rolls tightly and allow to rise until puffy, about 1 hour. (Or use the overnight option in the Notes below.)
- Preheat the oven to 350°F (177°C).
- Bake for about 25–28 minutes or until they are lightly browned on top. After about 15 minutes, tent a piece of aluminum foil over the top of the pan to prevent the tops from browning too quickly. Remove pan from the oven and place pan on a wire rack for about 10 minutes as you make the icing.
- Make the icing: In a medium bowl using a handheld or stand mixer fitted with a paddle or whisk attachment, beat the cream cheese on medium speed until smooth and creamy. Add the confectioners’ sugar, cream/milk, and vanilla. Beat on low speed for 30 seconds, then switch to high speed and beat for 1 minute. Spread the icing over the warm rolls and serve immediately.
- Cover leftover frosted or unfrosted rolls tightly and store at room temperature for up to 2 days or in the refrigerator for up to 5 days.
Notes
- Make Ahead Instructions – Overnight: To prepare the night before serving, prepare the rolls through step 7. Cover the rolls tightly and refrigerate for 8–12 hours. (16 hours max. 8–12 hours is best, but 16 hours is OK if absolutely needed. Do not exceed 16 hours.) The next morning, remove from the refrigerator and allow to rise on the counter for 1–2 hours before continuing with step 9.
- Make Ahead Instructions – Freezing: Baked rolls can be frozen for up to 3 months. Thaw overnight in the refrigerator and warm up before enjoying. You can also freeze the unbaked rolls and here’s how: bake the rolls in step 9 for only about 10 minutes. Cool completely, then cover tightly and freeze. To serve, take the rolls out of the freezer and place in the refrigerator overnight to thaw. Once thawed, finish baking them for about 15–20 minutes.
- Special Tools (affiliate links): Stand Mixer or Large Glass Mixing Bowl with Silicone Spatula or Wooden Spoon | Rolling Pin | 9×13-inch Glass Baking Pan or Metal Baking Pan | Cooling Rack
- Milk: I recommend using whole milk for the best, richest-tasting dough. You could also use buttermilk. Reduced-fat, low-fat, or nondairy milk works in a pinch. Do not use nonfat milk.
- Yeast: You can use active dry or instant yeast in this recipe. Follow all of the same instructions. If using active dry yeast, the rise times are usually slightly longer. Reference my Baking with Yeast Guide for answers to common yeast FAQs.
- Other Icing Options: Instead of cream cheese icing, you can top the warm rolls with vanilla icing, the brown sugar icing from these pumpkin donuts, maple icing from maple cinnamon rolls, or even the caramel icing from apple cinnamon rolls.
- Gluten Free: We have not tested this recipe with gluten-free flour, so we are unsure of the results.


You can use dental floss to cut the cinnamon rolls instead as a knife often flattens the roll a little. There is a YouTube video on this if you need a tutorial. It’s now my Go To.
I’ve tried making this recipe twice now and love the taste! However, when I roll the dough, I find it very soft and hard to cut neatly. This may be due to the high humidity where we live… any suggestions to how I can make the dough firmer in order to roll them better?
Hi Kimmy, adding a little extra flour will help. You don’t want to add too much to really change the end result’s texture, but just enough to help making cutting easier. I recommend another 1/4 cup, or about 31g). And don’t be afraid to generously flour your work surface when rolling out.
I have tried many cinnamon roll recipes over the years but this one was easy to follow, super fluffy moist cinnamon rolls. Everyone loved them! Thank you!
I have made more than a few recipes of Cinnamon Rolls. None have ever come out this well. Easy to follow and the final product is spot on delicious! Thank you again for providing these to us.
have you ever baked in an aluminum pan? thinking of an easier pan to use to freeze for later and the disposable aluminum would be more convenient but not sure if that messes up baking times.
Hi Becky, yes, you can absolutely make these in a disposable aluminum pan. We’d love to know how they turn out!
Hi Sally,
I am the mother of the groom, and have been asked by his bride to bake 4 dozen cinnamon buns which will be stacked as a wedding cake. I am baking your double rise buns. My question is this….I have to bake these 6 days prior to the wedding. To ensure the absolute freshest buns, can you please give me some tips on how to best freeze these so they are perfect!
Thank you!!
Hi Margaret, we’d recommend wrapping them tightly in a layer of Press N Seal and then a layer of aluminum foil. We’d also recommend waiting until they’re thawed to frost them. Hope this helps and that they’re a hit!
This is the only recipe that actually yielded 12 equal rolls!!! Loved it!!❤️❤️❤️
I’ve used this recipe countless times, it’s my go-to for chewy, delicious cinnamon rolls!
I was wondering if they could be baked in a muffin tin? I’d love to have a way to gift them individually.
Hi Kathryn, absolutely! We’re unsure of the exact bake time, but it should be pretty similar.
First times making homemade cinnamon rolls and I really enjoyed the recipe. I made the night before and I let the rolls sit at room temperature for two hours before putting them in the oven. I allowed to rest for ten minutes after bake time and the rolls were doughy. They did not get cooked all the way through. I used a glass pan like you recommended. Any other tips?
The flavor was amazing and of course my family ate the rolls around the edges thy were mostly cooked but I’d really like to nail it and enjoy all the rolls
Hi Kelsey, we’re glad your family enjoyed the rolls! If the tops/edges were done but underneath was a bit doughy, it may help to cover the pan with aluminum foil a bit earlier (after 10 minutes or so of baking), and lower the oven rack. Hope this solves the issue for next time!
Could I bake these in muffin tins for small servings
Hi Natalie, absolutely! We’re unsure of the exact bake time, but it should be about the same.
Hi –
For the fridge option, is it OK if it’s in the fridge less than 8 hours? As long as you let it rise outside of the fridge for one to two hours? Thanks!
Hi Alexa, yes, that will work just fine. Enjoy!
Almost all the filling ended up on the bottom. What did I do wrong?
Hi Renea, how strange! We haven’t experienced that before. Were your rolls rolled tightly? If they’re too loose, the filling could be melting down since it’s not being held together to the sides of the dough as much. Softened butter is needed for the filling, but make sure it’s not *too* soft to the point of being melty. Hope this helps for your next batch!
For dividing dough “logs” of this sort, I use a tip I picked up somewhere (I believe it was the GBBO). Instead of using a knife, take a length of dental floss (unflavored, preferably). Holding both ends, slide it under the “log” to where you want to make your cut, cross the ends and pull!
For your freezing instructions, are there two options? 1- you bake them for 10 minutes, let them cool and then freeze?
2- you go through step 8 and freeze them prior to any oven?
Hi Anthony, there are 2 freezing options: the first you listed, where you par-bake the rolls for 10 minutes and then freeze. Or, you can completely bake the rolls and freeze them for up to 3 months.
Hi! I haven’t made these yet but I really want to. Am i able to do two overnight rises? I want to make rhe dough way now but bake on Thursday. I just don’t want to over proof it. Thanks so much!
Hi Sabine, we don’t recommend additional rises, as it will cause the dough to overproof and collapse when bake. See recipe notes for our recommended make ahead options.
I recently tried making cinnamon rolls using this recipe. I followed the instructions carefully, but encountered some issues due to the warm environment where I live. This resulted in a strong yeasty flavor in the rolls.The recipe was straightforward, but the over-proofing led to a pronounced yeast taste. Additionally, I realized I had forgotten to add salt, which affected the overall flavor. Despite these challenges, the rolls were soft and had a good texture, but the yeasty flavor was quite overwhelming.For anyone trying this recipe, I recommend keeping an eye on the proofing time, especially in warm conditions, and don’t forget to add salt. I served the rolls with vanilla ice cream, which helped balance out the flavor somewhat.
The best cinnamon rolls I have ever made! As was promised, buttery, soft like pillows and not overly sweet. Easy to follow recipe, outstanding results from the first try. Thank you for sharing a wonderful recipe Sally, it’s definitely a keeper!
Hi! I’ve made this recipe twice now and I can’t seem to get the rolls to puff up during the 2nd rise. Any thoughts? (The kids still devour them even though they’re not really fluffy.).
Hi Stephanie, are you using the overnight method where they sit in the refrigerator? If so, try letting them sit out at room temperature for longer to give them more time to puff up.