Using my perfected master scone recipe, build your own scones with a variety of add-ins like chocolate chips, berries, or cheese and herbs. These better-than-the-bakery treats are flaky, flavorful, and moist with crisp crumbly edges. There’s a lot of helpful information and step-by-step photos, but feel free to jump right to the recipe!

Scones are sweet or savory, perfect with coffee and tea, welcome at baby showers, bridal showers, brunch, snack time, bake sales, Mother’s Day, and wherever muffins or coffee are appropriate. (All the time!)
But depending on the recipe and technique, scones can be dry and sandpaper-y with flavor comparable to cardboard. They can also over-spread. My basic scone recipe promises uniquely crisp and buttery scones with crumbly corners and a soft, flaky interior.
I have several scone recipes that begin with the same basic formula. Let’s review the fundamentals so you can learn how to make the best scones. Sit back because there’s a lot to cover in this post!

What are Scones?
Depending where you live, the term “scone” differs. English scones are more similar to American biscuits and they’re often topped with butter, jam, or clotted cream. American scones are different, but different isn’t necessarily a bad thing! Today’s scones are sweeter, heavier, and aren’t usually topped with butter because there’s so much butter IN them. Sweetness aside, there’s still room for vanilla icing or a dusting of confectioners’ sugar on top. By the way, here’s my favorite recipe for traditional scones.
Scones are leavened with baking powder, so making them is generally quick. Blueberry scones are my favorite variety, but that quickly switches to pumpkin scones in the fall months! (Here are all my scone recipes.)
No matter which flavor you choose, these scones are:
- Moist & soft inside
- Crumbly on the edges
- Buttery & flaky
- Not sandpapery 🙂
Video Tutorial: Scones
Let’s start with a video tutorial.

Only 7 Ingredients in this Basic Scone Recipe
You only need 7-9 ingredients for my master scone recipe.
- Flour: 2 cups of all-purpose flour is my standard amount, but set extra aside for the work surface and your hands.
- Sugar: I stick with around 1/2 cup of sugar for this scone dough. Feel free to slightly decrease, but keep in mind that the scone flavor and texture will slightly change. Reduce to about 2 Tablespoons for savory flavors. Brown sugar works too. However, if using brown sugar, whisk it into the wet ingredients to get out all the lumps. For example, see my caramel apple scones.
- Baking Powder: Adds lift.
- Salt: Adds flavor.
- Butter: Besides flour, butter is the main ingredient in scones. It’s responsible for flakiness, flavor, crisp edges, and rise.
- Heavy Cream or Buttermilk: For the best tasting pastries, stick with a thick liquid such as heavy cream or buttermilk. I usually use heavy cream, but if you want a slightly tangy flavor, use buttermilk. Thinner liquids change the flavor and appearance. You’ll be headed down a one way street to dry, bland, and flat scones.
- Egg: Adds flavor, lift, and structure.
- Optional: Vanilla extract adds necessary flavor to sweet scones, but skip it if you’re making savory scones. Depending on the flavor, cinnamon is another go-to ingredient.
And don’t forget about the add-ins! Scroll down to see all my favorite scone flavors.

How to Make Scones from Scratch
So now that you understand which ingredients are best, let’s MAKE SCONES!
- Mix the dry ingredients together. Use a big mixing bowl because you want lots of room for the mixing process.
- Cut in the grated frozen butter. You can use a pastry cutter or 2 forks, like we do with pie crust, or your hands. A food processor works too, but it often overworks the scone dough. To avoid overly dense scones, work the dough as little as possible. Messy and crumbly is a good thing!
- Whisk the wet ingredients together.
- Mix wet ingredients and dry ingredients. Mix together, then pour out onto the counter.
- Form into a disc and cut into wedges. Wedges are easiest, but you can make 10-12 drop scones like I do with my banana scones.
- Brush with heavy cream or buttermilk. For a golden brown, extra crisp and crumbly exterior, brush with liquid before baking. And for extra crunch, a sprinkle of coarse sugar is always ideal!
- Refrigerate for at least 15 minutes. Keep scone dough as cold as possible. To avoid over-spreading, I recommend chilling the shaped scones for at least 15 minutes in the refrigerator before baking. In fact, you can even refrigerate overnight for a quick breakfast in the morning!
- Bake until golden brown. Scones bake in a relatively hot oven for only 20-25 minutes.
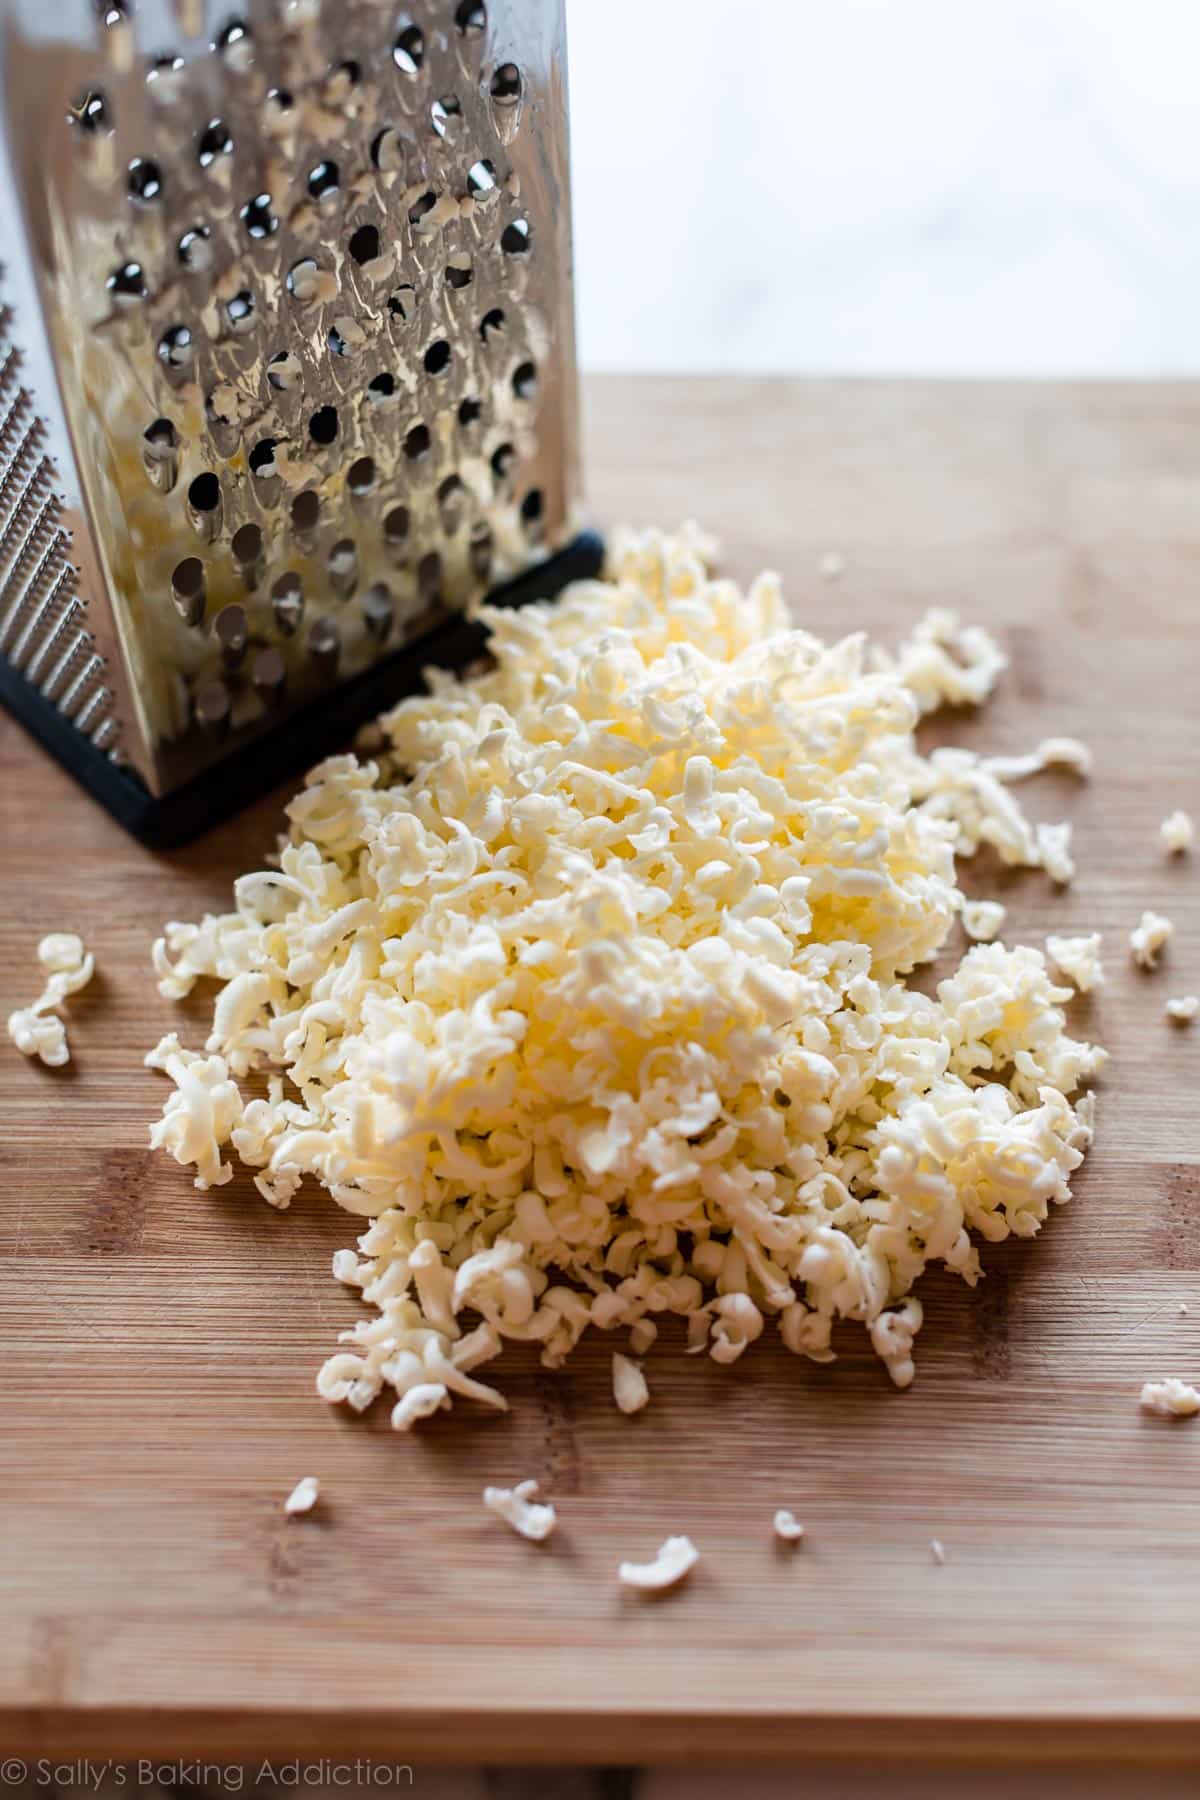
Cold Ingredients & Frozen Grated Butter
Keeping scone dough as cold as possible prevents over-spreading. When scones over-spread in the oven, they lose the flaky, moist, and deliciously crumbly texture. In other words, they’re ruined. But the easiest way to avoid disaster is to use cold ingredients like cold heavy cream, egg, and butter.
But frozen grated butter is the real key to success.
Like with pie crust, work the cold butter into the dry ingredients to create crumbs. The butter/flour crumbs melt as the scones bake, releasing steam and creating air pockets. These pockets create a flaky center while keeping the edges crumbly and crisp. Refrigerated butter might melt in the dough as you work with it, but frozen butter will hold out until the oven. And the finer the pieces of cold butter, the less the scones spread and the quicker the butter mixes into the dry ingredients. Remember, you don’t want to over-work scone dough.
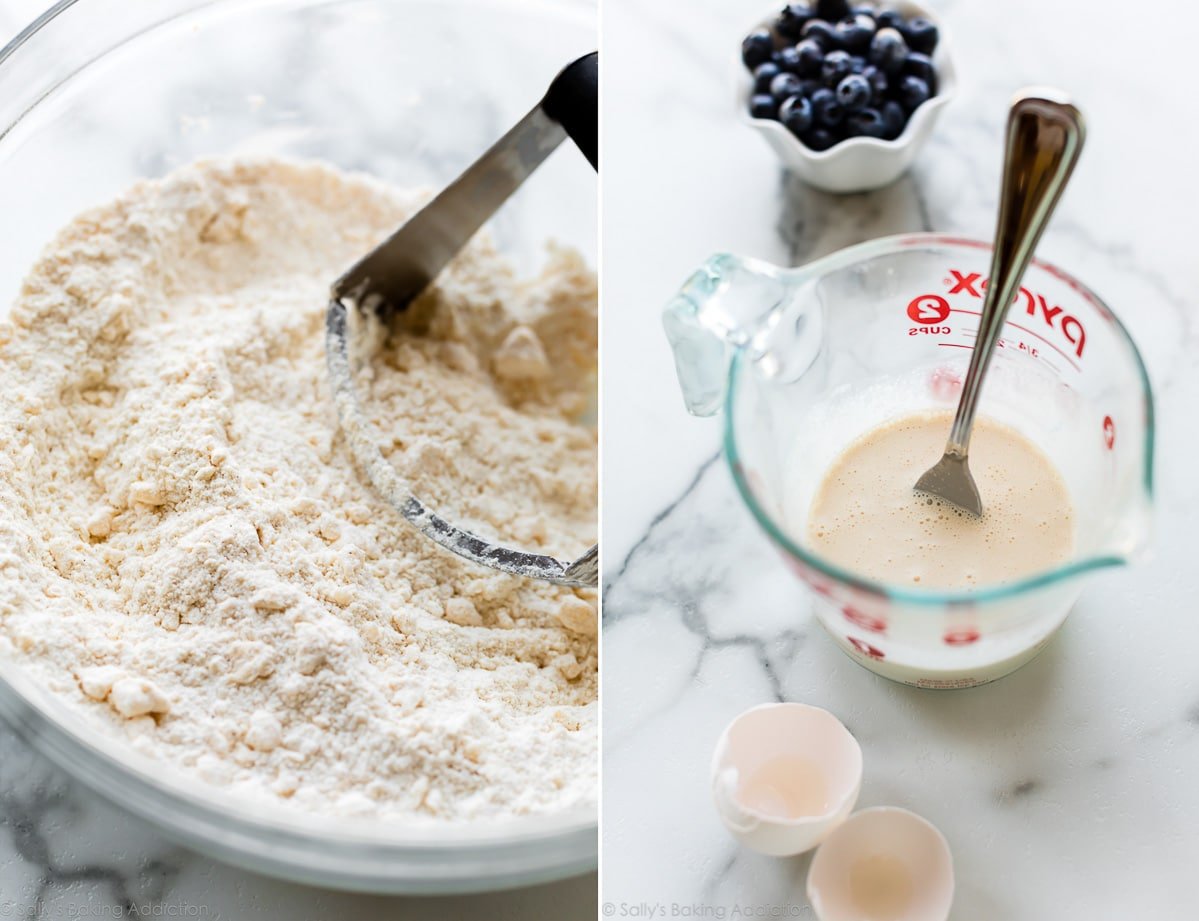
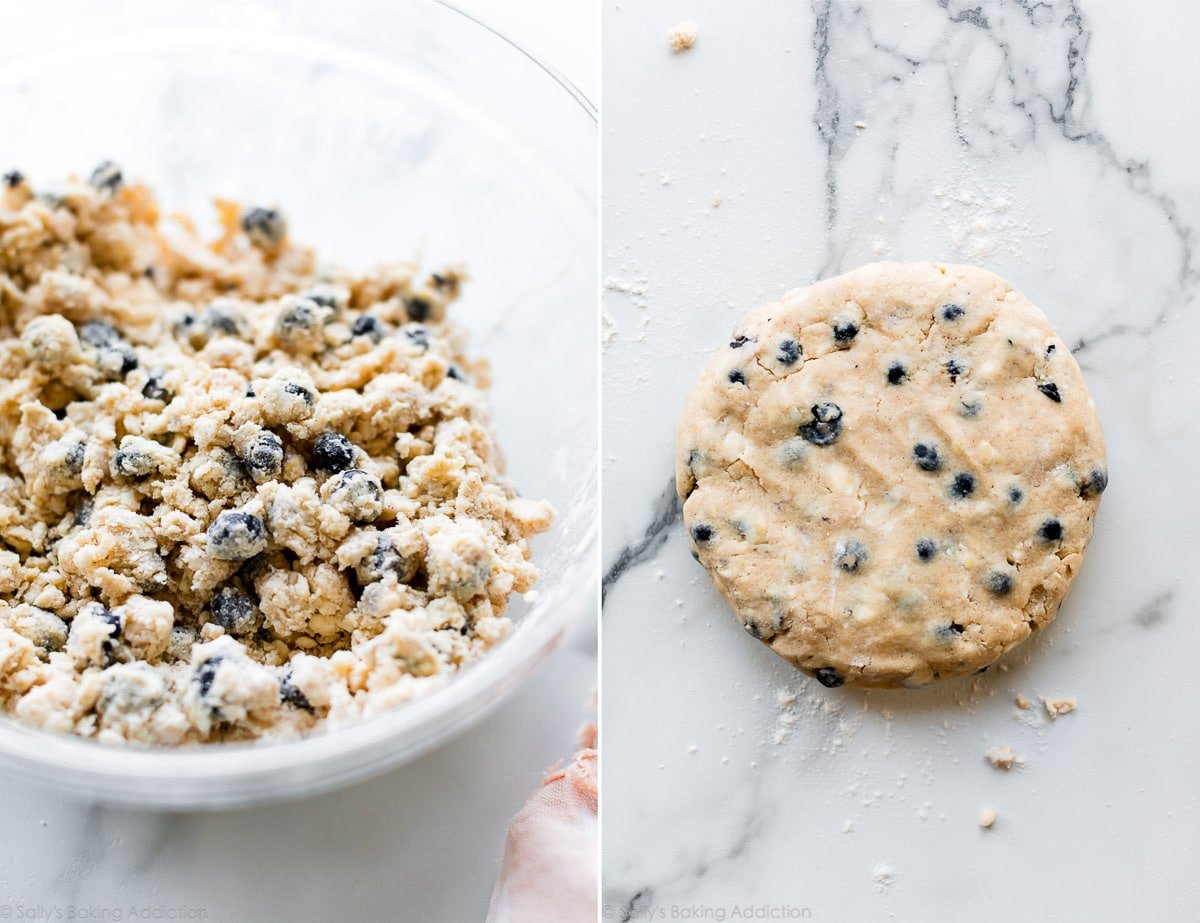
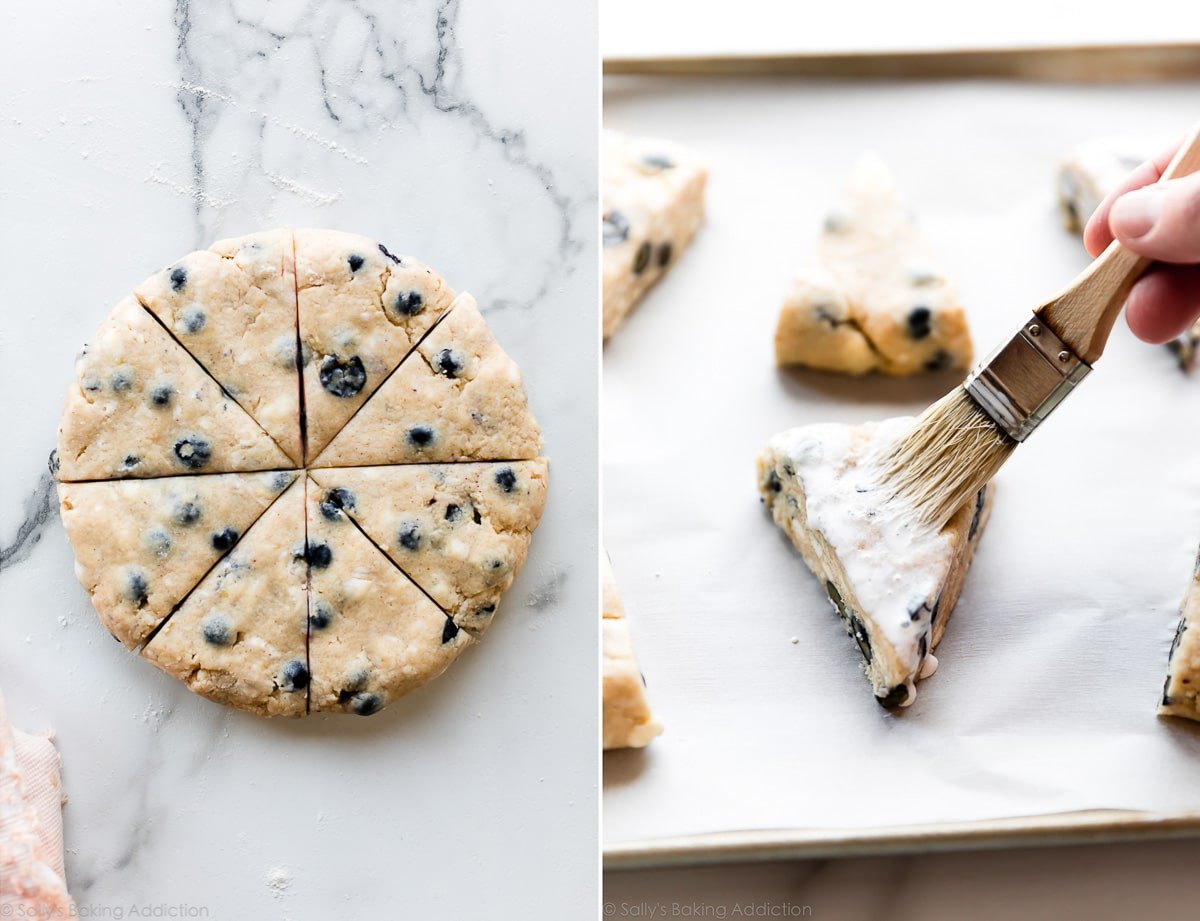
3 Tricks for Perfect Scones
If you take away anything from this post, let these be it!
- Heavy Cream or Buttermilk: Avoid thinner milks which yield a flatter, less flavorful scone. Canned coconut milk makes a wonderful nondairy option!
- Frozen Grated Butter: See above!
- Refrigerate Before Baking: Remember, cold dough is a successful dough. To avoid over-spreading, I recommend chilling the shaped scones for at least 15 minutes in the refrigerator before baking.
How to prevent flat scones: See #2 and #3. 🙂

How to Freeze Scones
I used to be totally against freezing scone dough. You see, the baking powder is initially activated once wet and if you hold off on baking, the scones won’t rise as much in the oven. However, the decrease in rise is so slight that it doesn’t make a noticeable difference. In fact, you can even shape this scone dough into wedges and refrigerate overnight before baking.
- Freeze Before Baking: Freeze scone dough wedges on a plate or baking sheet for 1 hour. Once relatively frozen, you can layer them in a freezer-friendly bag or container. Bake from frozen, adding a few minutes to the bake time in the recipe below. Or thaw overnight, then bake as directed.
- Freeze After Baking: Freeze the baked and cooled scones before topping with icing or confectioners’ sugar. I usually freeze in a freezer-friendly bag or container. To thaw, leave out on the counter for a few hours or overnight in the refrigerator. Warm in the microwave for 30 seconds or on a baking sheet in a 300°F (149°C) oven for 10 minutes.

15+ Scone Flavors
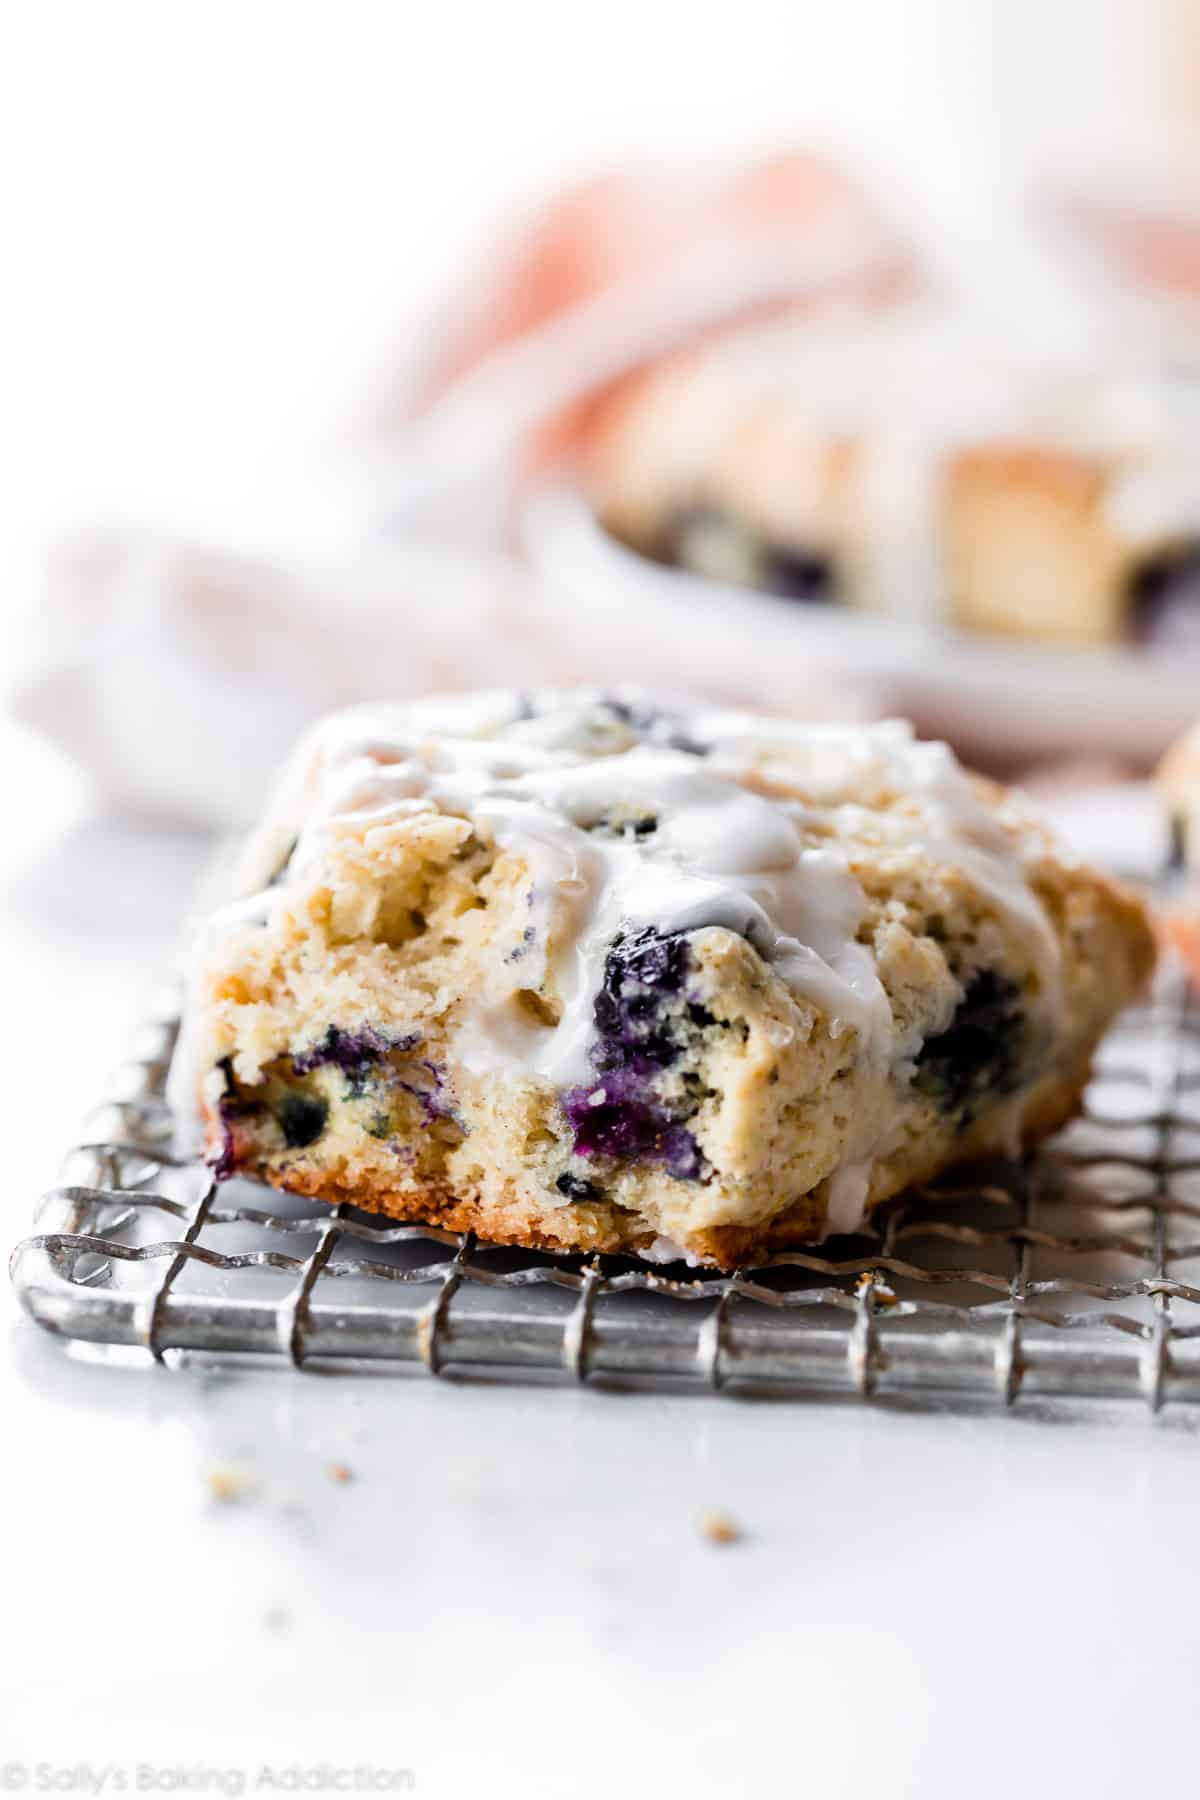
- Blueberry Scones and Chocolate Chip Scones (both pictured)
- Cranberry Orange and Pumpkin Scones
- Banana Scones and Lavender Scones
- Lemon Blueberry Scones and Sprinkle Scones
- Caramel Apple and Cinnamon Chip Scones
- Triple Chocolate Scones – they taste like brownies!
- Strawberry Lemon Poppy Seed Scones
- Ham & Cheese Scones
- Mixed Berry (pictured): Follow recipe below and add fresh or frozen mixed berries. Raspberries and blackberries burst easily, so don’t go overboard on those.
- Cherry Chocolate Chip: Follow recipe below and add 3/4 cup semi-sweet chocolate chips and 3/4 cup chopped fresh or frozen cherries.
- Raspberry Almond: Follow the recipe below and add 1/2 teaspoon of almond extract with the vanilla. After shaping the scones, gently press frozen raspberries into each, using about 1 cup total. (Avoid mixing them into the dough, as they can bleed.) Top the shaped scones with sliced almonds before baking (1/3 cup / 37g total almonds). After baking, drizzle with the raspberry icing from these mini vanilla pound cakes.
- Fresh Herb: Reduce sugar to 2 Tablespoons, leave out vanilla extract, and add 2 minced garlic cloves, 1/2 teaspoon ground black pepper, 1/2 cup chopped herbs such as rosemary, parsley, and basil. Additionally, feel free to add 1 cup shredded cheese to the dough and top with sea salt before or after baking!
Using the master recipe below as a starting point, toss in your favorite add-ins like white chocolate chips, toasted pecans, sweetened or unsweetened coconut, dried cranberries, peanut butter chips, etc. If it’s a particularly wet add-in like chopped peaches, blot them with a paper towel before adding to the dough. Top with lemon curd, raspberry sauce, or any of the suggested toppings below. Above all, have fun finding your favorite flavor!
Look At All Of Your Scones!
Feel free to email or share your recipe photos with us on social media. 🙂
Print
How to Make Perfect Scones
- Prep Time: 30 minutes
- Cook Time: 25 minutes
- Total Time: 1 hour
- Yield: 8 large or 16 small scones
- Category: Breakfast
- Method: Baking
- Cuisine: American
Description
Use this basic scone dough for any sweet scone variety. See blog post for a couple savory scone options. Feel free to increase the vanilla extract and/or add other flavor extracts such as lemon extract or coconut extract. Read through the recipe before beginning. You can skip the chilling for 15 minutes prior to baking, but I highly recommend it to prevent the scones from over-spreading.
Ingredients
- 2 cups (250g) all-purpose flour (spooned & leveled), plus more for hands and work surface
- 1/2 cup (100g) granulated sugar
- 1/2 teaspoon salt
- 2 and 1/2 teaspoons baking powder
- 1/2 cup (8 Tbsp; 113g) unsalted butter, frozen
- 1/2 cup (120ml) heavy cream or buttermilk (plus 2 Tbsp for brushing)
- 1 large egg
- 1 and 1/2 teaspoons pure vanilla extract
- 1–1.5 cups add-ins such as chocolate chips, berries, nuts, fruit, etc
- optional: coarse sugar for topping
Instructions
- Whisk flour, sugar, salt, and baking powder together in a large bowl. Grate the frozen butter using a box grater. Add it to the flour mixture and combine with a pastry cutter, two forks, or your fingers until the mixture comes together in pea-sized crumbs. See video above for a closer look at the texture. Place in the refrigerator or freezer as you mix the wet ingredients together.
- Whisk 1/2 cup heavy cream, the egg, and vanilla extract together in a small bowl. Drizzle over the flour mixture, add the add-ins, then mix together until everything appears moistened.
- To make triangle scones: Pour onto the counter and, with floured hands, work dough into a ball as best you can. Dough will be sticky. If it’s too sticky, add a little more flour. If it seems too dry, add 1-2 more Tablespoons heavy cream. Press into an 8-inch disc and, with a sharp knife or bench scraper, cut into 8 wedges. For smaller scones, press dough into two 5-inch discs and cut each into 8 wedges. To make 10-12 drop scones: Keep mixing dough in the bowl until it comes together. Drop scones, about 1/4 cup of dough each, 3 inches apart on a lined baking sheet. To make mini (petite) scones, see recipe note.
- Brush scones with remaining heavy cream and for extra crunch, sprinkle with coarse sugar. (You can do this before or after refrigerating in the next step.)
- Place scones on a plate or lined baking sheet (if your fridge has space!) and refrigerate for at least 15 minutes.
- Meanwhile, preheat oven to 400°F (204°C).
- Line a large baking sheet with parchment paper or silicone baking mat(s). If making mini or drop scones, use 2 baking sheets. After refrigerating, arrange scones 2-3 inches apart on the prepared baking sheet(s).
- Bake for 18-26 minutes or until golden brown around the edges and lightly browned on top. Larger scones take closer to 25 minutes. Remove from the oven and cool for a few minutes. Feel free to top with any of the toppings listed in the recipe Note below.
- Leftover scones keep well at room temperature for 2 days or in the refrigerator for 5 days.
Notes
- Freeze Before Baking: Freeze scone dough wedges on a plate or baking sheet for 1 hour. Once relatively frozen, you can layer them in a freezer-friendly bag or container. Bake from frozen, adding a few minutes to the bake time in the recipe below. Or thaw overnight, then bake as directed.
- Freeze After Baking: Freeze the baked and cooled scones before topping with icing or confectioners’ sugar. I usually freeze in a freezer-friendly bag or container. To thaw, leave out on the counter for a few hours or overnight in the refrigerator. Warm in the microwave for 30 seconds or on a baking sheet in a 300°F (149°C) oven for 10 minutes.
- Overnight Instructions: Prepare scones through step 4. Cover and refrigerate overnight. Continue with the recipe the following day.
- Special Tools (affiliate links): Glass Mixing Bowls | Box Grater | Pastry Cutter | Whisk | Silicone Spatula | Bench Scraper | Baking Sheet | Silicone Baking Mat or Parchment Paper | Pastry Brush
- Scone Flavors: See blog post above. If adding fruit, use fresh or frozen. If frozen, do not thaw. Peel fruits such as apples, peaches, or pears before chopping. If desired, add 1 teaspoon of cinnamon with the flour. I usually add cinnamon when making chocolate chip scones.
- Over-spreading: Start with very cold scone dough. Expect some spread, but if the scones are over-spreading as they bake, remove from the oven and press back into its triangle shape (or whatever shape) using a rubber spatula.
- Mini/Petite Scones: To make smaller scones, press dough into two 5-inch discs and cut each into 8 equal wedges. Bake for 18-20 minutes or until lightly browned.
- Optional Toppings: Vanilla icing, salted caramel, lemon icing from this iced lemon pound cake, maple icing from these banana scones, brown butter icing from these pistachio cookies, lemon curd, orange icing from these hot cross buns, raspberry icing from these mini pound cakes, dusting of confectioners’ sugar.



This recipe turned out just the way we like them, crispy on the outside and a soft chew on the inside. The only thing I did was add 1/2 teaspoon of cinnamon to the dry mixture and brushed them with sugared buttermilk. I didn’t have any fancy sugar. My add ins were 1/2 cups dried cranberries and 1/2 cup of walnuts
chopped a bit. I refrigerated them for a couple of hours. They did spread out but were scrumptious. I will certainly make them again as we like to split one with our
afternoon coffee. Our golden was eying them but wasn’t sure if dogs can tolerate cranberries. She settled for a piece of chicken. Next time I’ll make currant scones. Saving a lot of money because our local bakery charges $3 a scone. Many thanks for all your recipes as I love to bake and my husband is very appreciative,
Just made these and they are amazing. Best recipe I’ve tried yet. Picked fresh blueberries this morning and used those in the recipe. Delicious!
Came out more like cake. I will stick to my own recipe next time. Very disappointed.
I’ve made this twice, exactly as written, and they turned out great and gave me a way to use all the huckleberries I picked in Oregon.
Totally failed for me. I followed this recipe to a tee – chilled the flour, grated the frozen butter, put it back in the freezer while I made the rest, did not overwork, and let the finished dough sit in the fridge overnight. They completely spread almost immediately and basically turned into huge misshapen soft sugar cookies. Was planning to take them to a weekend in Vermont with friends, and am very disappointed to have nothing to bring. I did not mix in any chunky add-ons – just did lemon zest and fresh rosemary – so maybe that was part of the issue as it wasn’t dense enough? But I don’t know why they even smelled like sugar cookies. Sadly,very disappointed!
sally’s recipes are the best! i made chai scones using this recipe. 🙂 i added a homemade chai spice + opened chai tea bag for appearance to the dry ingredients, and made a homemade eggnog glaze to spread on top. they are DIVINE!!
Good afternoon, Sally. I was wondering if you could please, please, help me. I am almost desperate. My dear beloved Mama passed away 15 years ago. Sadly and much to my regret I did make sure to get her recipe and methodology for her egg noodles. I have been thinking about them a long time now. I am nostalgic for them and find myself craving them. I just remember flour, a little bit of salt and some eggs in the flour crater. I also remember she always knew when the humid Oregon coast humidity was not too much and not too little. Can you help me with this? Thank you. BTW, I like your blog. I look forward to your emails too. Thank you, Sally.
Hi Mama Laura, thank you so much for your sweet note! We really wish we could help, but we have never tried making our own egg noodles before. You might wish to search for a few recipes online (ones with lots of positive reader reviews!) and see what kinds of methods and ingredients they use. We hope you find one you love that reminds you of your mother’s recipe!
Great recipe! Used fresh peaches from my tree and some frozen blackberries from the bush. Used buttermilk. Turned out great. I think I would have just baked it another minute or two as they were more soft than I thought. Had to take some to neighbor’s so I wouldn’t stuff them all in my face! Thanks for the recipe!
I’m wondering why reviews are closed for certain recipes? Keeping the Comments/Ratings open helps us fully understand challenges about recipes and whether to make that recipe or choose another. I tried the CHOCOLATE CHIP SCONE recipe recently due to the very high rating, but the comments are closed on the page (why?). I followed the recipe exactly, but either the temp of the oven or the bake time of 22 min cannot be correct. My scones almost burned and they were incredibly dry and not tasty at all. Many recipes here are good, but gotta wonder about some very highly rated ones that have closed comments.
Hi KB, I see the comments are presenting as open on that page. I wonder if it was a strange glitch over the weekend? I keep the comments open on my blog posts as feedback and reviews are crucial to the success of my recipes. Sorry about the confusion. Thank you for the feedback on the chocolate chip scones. Did you by chance alter the recipe or change an ingredient? The bake time is correct.
Hi, thanks for all the information and tips. The recipe looks so good and easy to follow. I just have a question about the heavy cream/buttermilk. Can they be substituted by Greek yogurt?
Hi JL, For best results we recommend using either heavy cream or buttermilk. You could substitute some of the heavy cream/buttermilk for Greek yogurt or sour cream, but we don’t recommend substituting out ALL the liquid. Some Greek yogurt/sour cream + regular milk would be OK, too. We haven’t tested exact measurements, though. If you try it, let us know how it goes!
My favorite scone recipe was the raspberry almond scone recipe but it’s gone! Can’t find it anywhere on the website ♀️ Can it be reposted?
Hi Ashley, we recently removed that older recipe from the website, but if you send us an email at sally@sallysbakingaddiction.com, we’d be happy to share a copy with you. Thanks!
Best scones ever! I made them several times already. My only problem is that they don’t look like as nice. Blueberries are breaking when I shape the dough into a disk and when I cut them. I used frozen ones. Any tips how to prevent it from falling?
Hi Dagi, some breakage can be normal when folding in the blueberries. Just be sure to use an extra gentle hand. You may find fresh blueberries easier to incorporate, since they won’t bleed as much. As for the spread, be sure that your dough is extra cold when going into the oven. If you still find they are spreading too much, you can take them out of the oven and gently reshape them with a silicone spatula, then return to the oven to finish baking. So glad these are a favorite for you!
Hi, can you please help me with a wet dough like when I use fresh berries in my scones? What’s your secret? Thanks so much!
Hi Celia, fresh berries can be a bit tricky to work into the dough, since they can easily pop and release their liquids into the dough. But it can certainly be done! Feel free to add some additional flour, 1 Tablespoon at a time, so that the dough comes to a workable consistency. Keep in mind that the dough should still be slightly sticky, even when adding additional flour. You could certainly try reducing the buttermilk a bit, but start very small so that you don’t dry out the dough. Flouring your hands and work surface will be helpful for working with the sticky dough. Hope this helps!
I just found your YouTube channel, it’s great! Thank you 🙂
This was my first time making scones. I tried another recipe that didn’t work then I tried yours. The only change I had to make was lower my temp to 350 and bake for 16 minutes and they came out amazing. I am not sure what altitude you’re at but I am at sea level and it worked perfect.
So glad you enjoyed them, Lisa!
I am not a baker but I love scones, specially YOUR scones! But, I have a problem you may be able to help me solve. My scones are kind of flat when I take out of the oven. Could it be that I live in south Florida? Any tips? Thank you so much for sharing your delicious recipes.
Hi Luis, Very cold dough is important, so extending the chill time should help. If the scones are over-spreading as they bake, remove from the oven and press back into its triangle shape (or whatever shape) using a rubber spatula. You could also try adding a few additional Tablespoons of flour if you live in a particularly humid climate. Hope this helps for the next batch!
Thank you so much for your tips Lexi. I’ll surely try them!
Wow! I added half a cup of flour and VOILA! These are the best scones ever! I make small round scones and have one with a cup of coffee… to die for!!! Thank you so much for helping me out.
I’ve been making a lot of your scone recipes and they’re great. Was thinking of new flavors and wondered if coconut lime might be good. If so, how would I change the master recipe to do it? Thanks!
Hi CL, We haven’t tested a coconut lime version of these scones, but they sound delicious! You can try adding 1 cup shredded coconut to the dough (though it may take some testing because shredded coconut can be a drying ingredient), and even use canned coconut milk instead of heavy cream for extra coconut flavor. Lime zest is the best way to add lime flavor (try about 2 tsp- 1 Tbs). Let us know what you try! You may love these coconut lime cookies as well.
I only have sweetened coconut in my pantry. Is that ok and if so should I decrease the sugar? Also, would a little lime juice (1 tsp?) add too much lime to overpower the coconut or just stick with the zest? Thanks. Love everything I’ve ever made from your site!
Hi CL, you can use the sweetened coconut without any changes to the sugar. You could certainly add in a teaspoon of lime juice as well. Enjoy!
I tried two different batches and the ones with coconut milk instead of cream were better. You were right, they were less moist than usual. Any way to offset that? I also used vanilla icing substituting lime juice for vanilla. But had to use more lime juice than usual. That put a nice little lime punch on the project. Thanks Sally! You’re the best!
Best instructional recipe , I used this recipe twice now and each time the scones came out perfectly better than store bought scones , I received so many compliments from friends and it made our tea time a great success. The only change I did was cutting my butter instead of grating the butter as I made a mess with grating the butter thank you for all the little suggestion. I made plain, blueberry and pumpkin scones all were perfect
This is my family’s favorite scone recipe! The crust is perfectly crunchy with just enough sweetness, while the inside is warm and soft. Depending on the season, I use fresh fruit. I make a double batch and freeze the extras.
This definitely my “go-to” scone recipe! I’ve made them many, many times. Everyone raves about them. Fall, is fast approaching and I would love to adapt the recipe for pumpkin scones and would appreciate any suggestions.
Hi Pam, Here’s our pumpkin scones recipe!
Made these today, they are delicious. My question is, how can I keep the frozen butter falling directly into the flour instead of sticking all over the inside of my box grater?
Hi Kathy, a little sticking is normal (especially if your butter is starting to get soft). You can try holding the box grater on an angle to help it fall more. So glad you enjoyed the scones!
I LOVE your scone recipe! It is perfect and I have never felt the need to change a single thing. One question I have though, is if you have ever tried to par-bake your scones, freeze them, and then pop them frozen into a toaster oven to finish baking so they can be warm & ready to eat on short notice? Just curious what bake times & temps would work best for something like that.
Hi Jill, we haven’t par-baked them, but you can bake them through and then freeze the scones (works wonderfully!). Then reheating them in the toaster will definitely work. So glad this is a favorite for you!