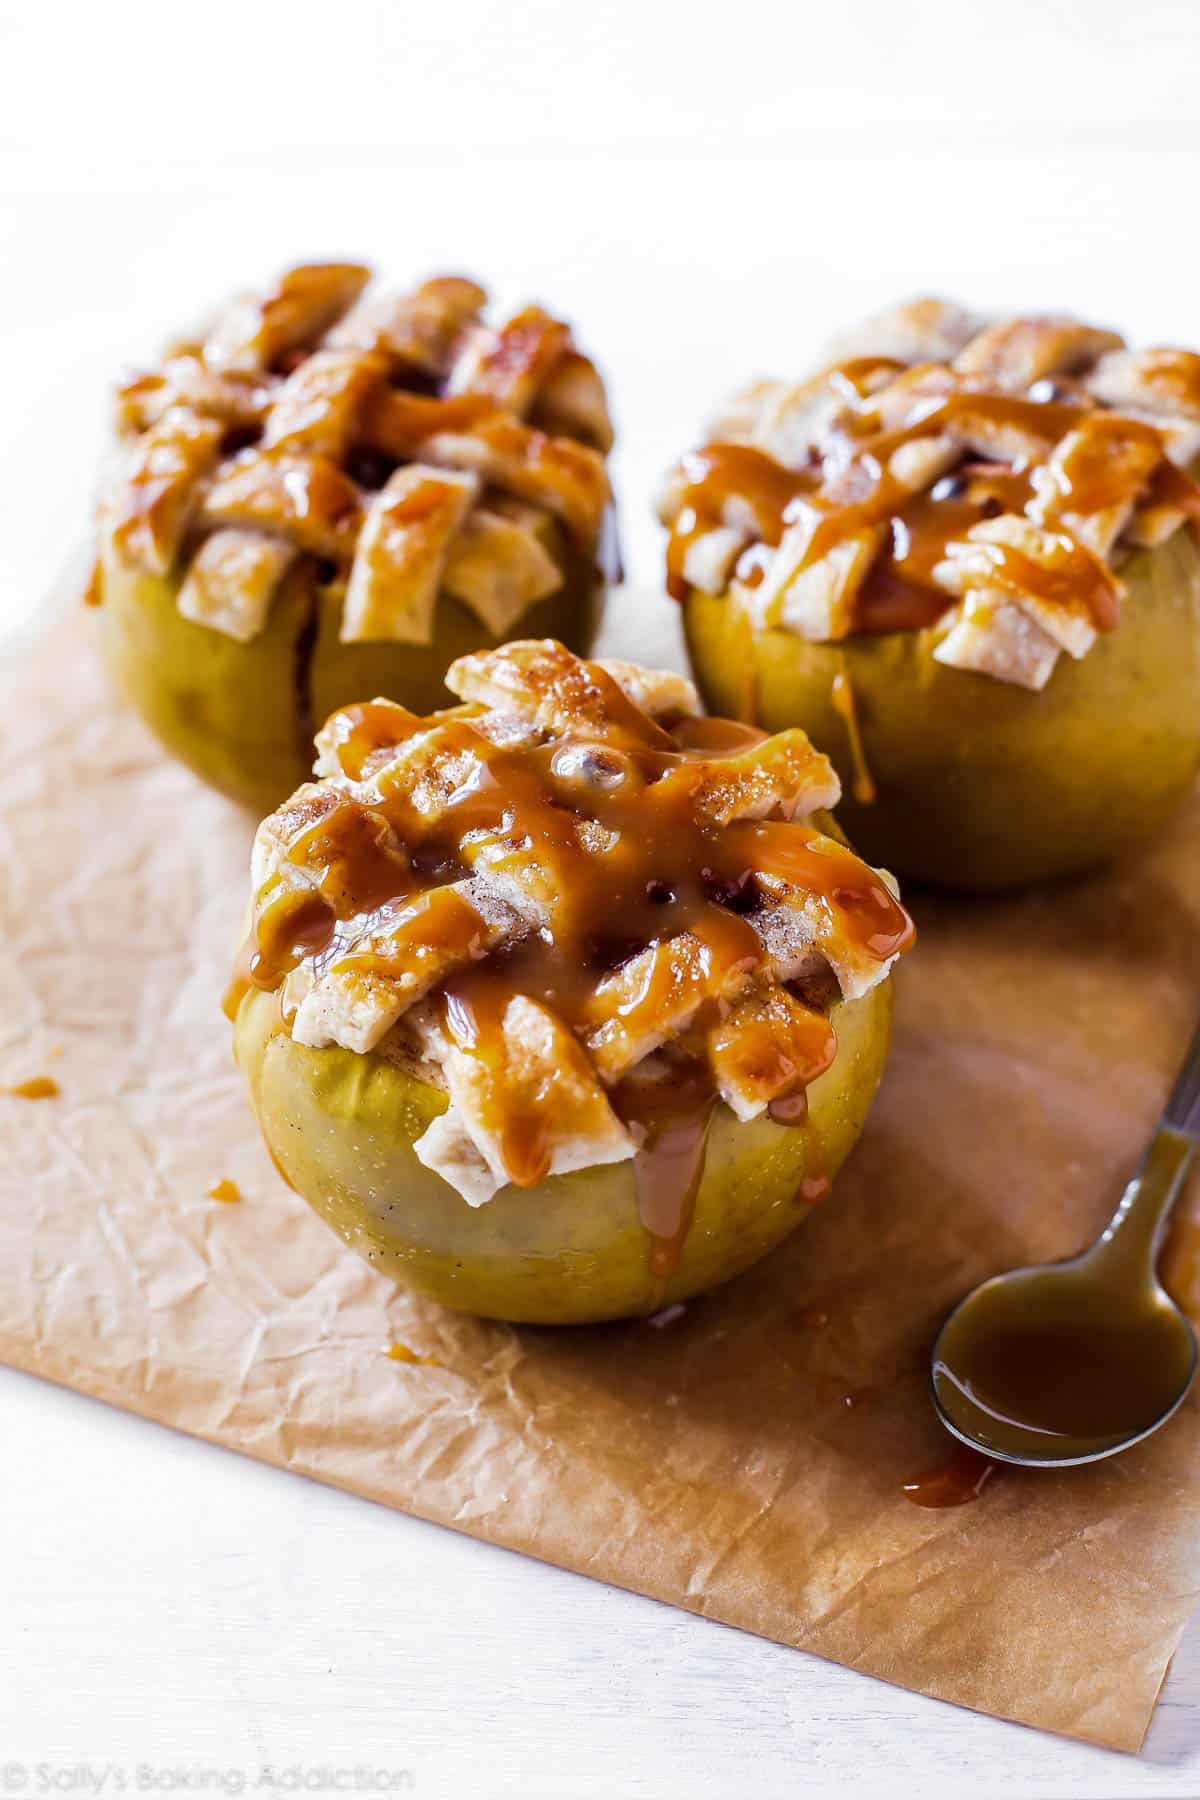
Everything you love about apple pie—the gooey cinnamon filling, the warm apples, the buttery homemade pie crust—all baked inside an apple. These apple pie baked apples are a fun and festive dessert that everyone will love.

My favorite dessert has always been and will always be good ‘ole apple pie. I prefer my homemade apple pie served warm with a dollop of whipped cream and a scoop of vanilla ice cream on the side. There is absolutely no dessert I would choose over that masterpiece. Except for, maybe, today’s adorable apple pie treats.

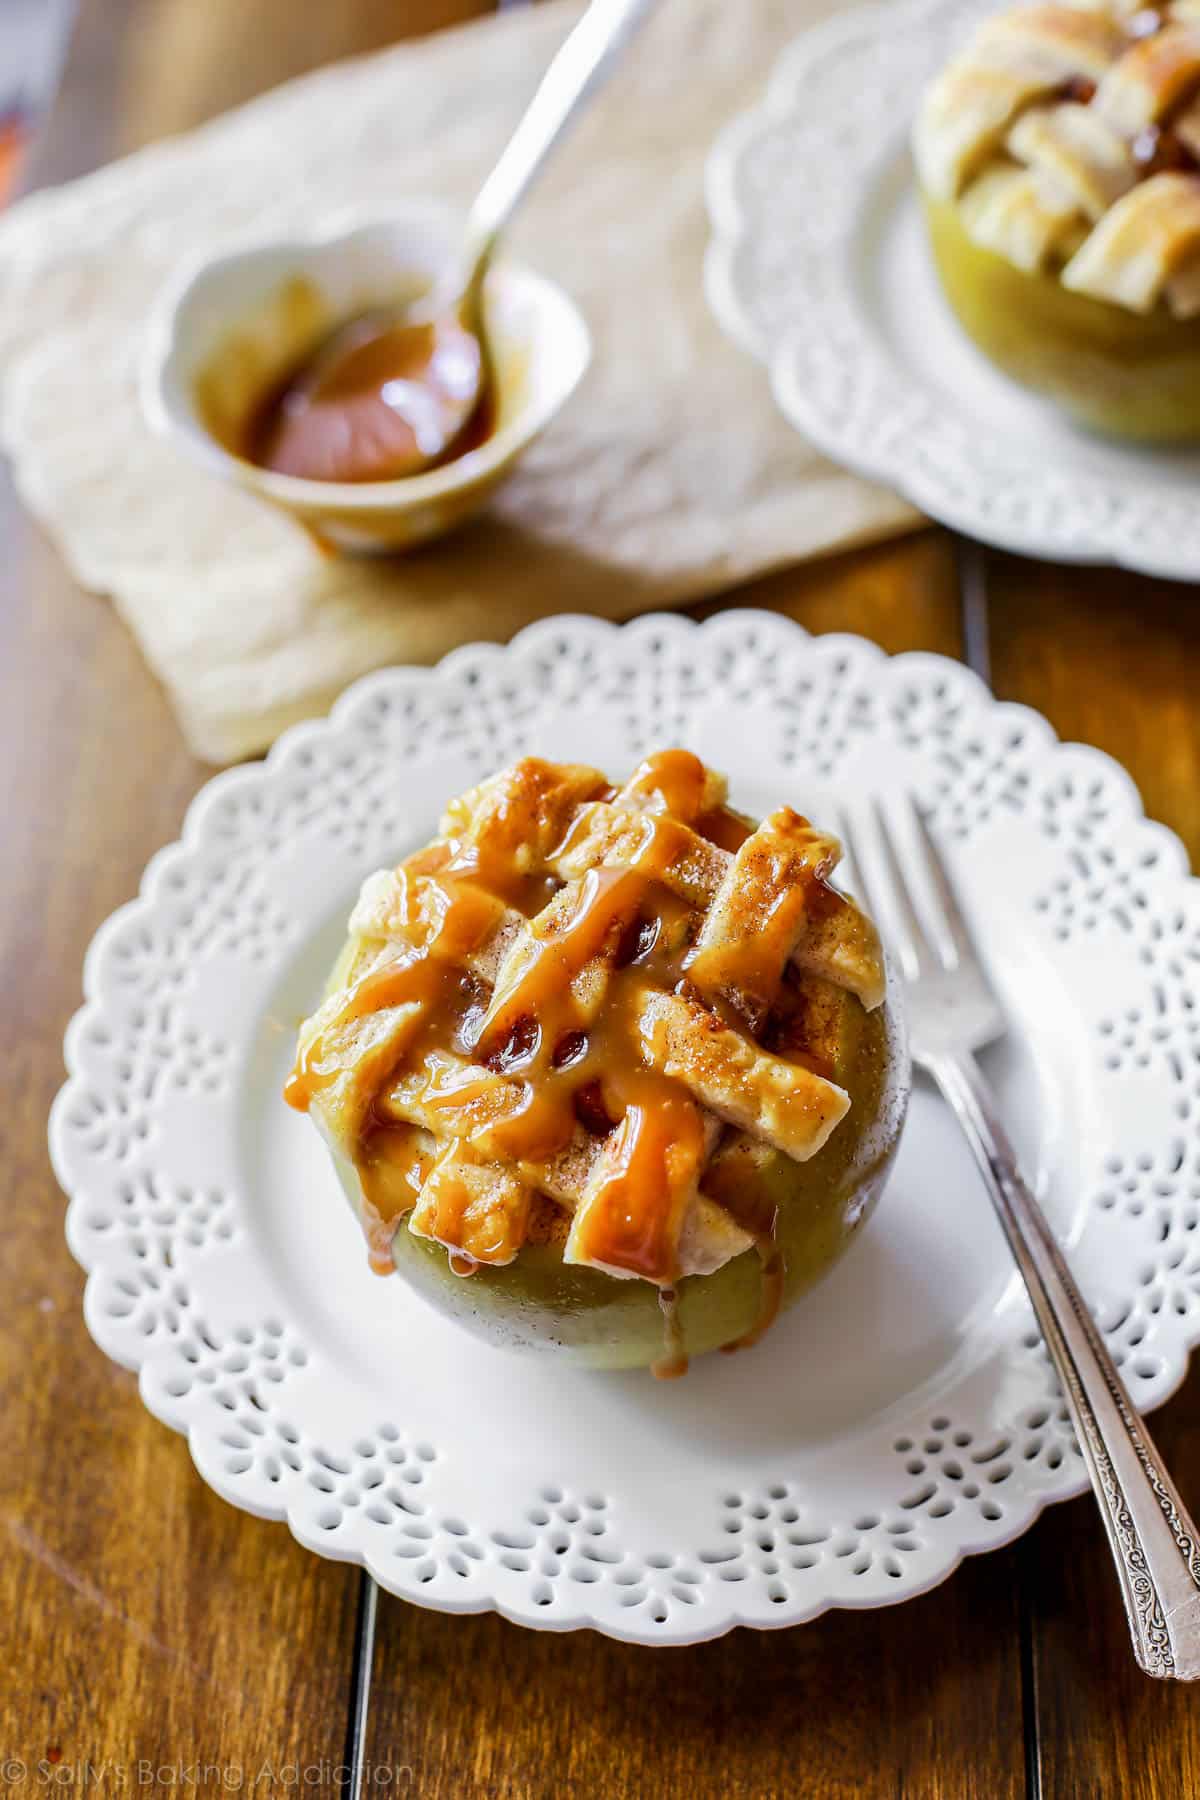
This is a twist on traditional apple pie. It’s a fun way to make, serve, and eat America’s iconic dessert. You’re looking at gooey cinnamon apple pie filling baked inside a cored-out apple and covered with a buttery lattice pie crust. And, of course, salted caramel on top. If you prefer an oat streusel topping, you’ll love my baked apples instead.
Everything is made from scratch. Pure homemade apple pie goodness.
I have lots of step-by-step photos so you can easily make theses at home.
The first thing to do is to make homemade pie crust. You need 1 pie crust. My recipe makes 2 pie crusts, so you can freeze the other half now for pumpkin pie on Thanksgiving (or one of my other Thanksgiving pies!). Or you can make 8 of these adorable apple pie baked apples. Four were plenty for us.
You *could* use pre-made crust, but nothing compares to the taste and texture of homemade. If you’ve never attempted my homemade crust before, now is the time. The world of pie crust possibilities is endless. Homemade brown sugar cinnamon pop tarts, anyone?
My homemade pie crust is simple. I use both shortening and butter to obtain optimum flakiness and tenderness. These fats must be COLD. You also need very cold ice water. Why the emphasis on temperature here? Keeping your pie dough as cold as possible prevents the fat from melting inside. If the butter melts before baking, you lose the flakiness of the crust. When the lumps of fat melt in the oven as the crust bakes, the steam helps to separate the crust into multiple flaky layers. Warm fats and water will lend a hard, crumbly crust instead of the nice flaky crust we all love.
As the pie dough chills, I make the homemade apple filling—pictured above. This stuff is incredible. It’s similar to what I use in my caramel apple turnovers. It’s thick, gooey, cinnamon-spiced, and everything nice. If you have leftovers, spoon it over ice cream. 🙂

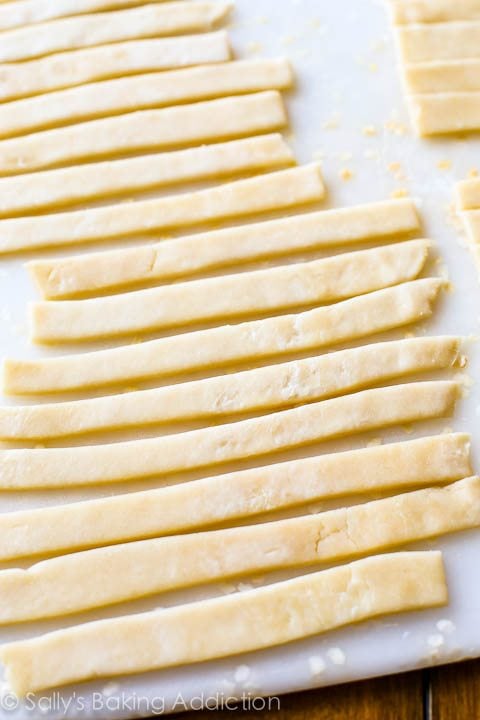
Back to the crust. Once the pie dough has chilled as instructed in the recipe, cut it into 4 quarters, then each of these pieces into 1/4 inch strips. Use a pizza cutter for ease; it’s the easiest tool to use in this process. Chill your strips in the refrigerator as you core the apples. Remember, the dough must always be cold.
The apples. I use granny smith for not only their flavor, but because they are fat and round. The perfect “cups” for our mini apple pies. I have a feeling large honeycrisp apples would be just as fantastic. Use any apple varieties you enjoy, keeping in mind that perfectly round apples are the best choice.
Coring out apples. This is a little trickier than it looks, but doable. I use a very sharp paring knife and a spoon. If you have a melon-baller, use that. Slice off the tops, then dig out the core. It doesn’t have to look perfect. Spoon the filling into the cored-out apples.
Time for our lattice pie crust. Lay 3 or 4 pie dough strips on top of the apple. Take another strip and, going perpendicular, weave the strip over and under the bottom strips. Repeat with 2-3 more strips to finish the lattice style. No crimping or fluting needed here—just trim any excess pie crust with a sharp knife or kitchen shears.
Don’t forget the egg wash. The egg wash gives your crust that beautiful golden, glossy sheen.
The apple pie baked apples take about 25-30 minutes in the oven. You want the filling to be bubbly and the crust to be cooked through and lightly browned. During this time, your home will smell like a crisp autumn day. Not really—it will just smell like apple pie. Glorious, glorious sweet apple pie.
If you live in this house, salted caramel on top is a necessity. Only 4 ingredients and 8 minutes on the stove. Make a few batches over the holidays to give in cute little jars. Trust me, anyone receiving this homemade salted caramel sauce will be on cloud 9. And it’s truly the perfect finishing touch on these little pies!
Oh, and the best part of all? Edible serving dishes. (!!!)
Grab a fork and knife and let’s DIG IN. Enjoy, apple pie lovers.
Print
Apple Pie Baked Apples
- Prep Time: 45 minutes
- Cook Time: 25 minutes
- Total Time: 2 hours
- Yield: 4 apples
- Category: Pie
- Method: Baking
- Cuisine: American
Description
Ingredients
- 1/2 recipe homemade pie crust*
- 1 teaspoon cornstarch
- 1 Tablespoon (15ml) warm water
- 5 large, perfectly round and firm apples (I prefer Granny Smith or Honeycrisp)
- 1 teaspoon ground cinnamon
- 1/2 cup (100g) granulated sugar
- 1 teaspoon pure vanilla extract
- 1 large egg
- 1 teaspoon milk
- optional: homemade salted caramel sauce, for drizzling
Instructions
- Prepare the pie crust, including allowing it to chill for at least 2 hours. I usually prepare it the night before and leave it in the refrigerator until the next day when it’s time to begin the apples. The colder the pie crust, the better.
- Make the apple filling: In a very small bowl, mix the cornstarch and warm water together until smooth, creamy, and the cornstarch has dissolved. Set aside. Peel and dice 1 apple. In a medium saucepan over medium heat, cook the apple pieces, cornstarch/water mixture, cinnamon, and sugar. Stir constantly for 5 minutes. Switch to low heat and allow to simmer for 5 minutes. Remove from heat, stir in the vanilla, and allow to cool off for 20 minutes.
- Assemble: On a floured work surface, roll out the pie dough. Turn the dough about a quarter turn after every few rolls until you have a circle 10-11 inches in diameter. Cut into fourths, as if you were cutting a pizza. (Pizza cutter works best here!) Then, cut each quarter into 1/4-inch wide strips. I like to chill the strips as I cut out the apples. I suggest putting them on a large cutting board and placing in the fridge. Remember, you always want your pie dough to be COLD.
- Preheat oven to 375°F (191°C).
- Slice off the tops of the 4 remaining apples. Using a spoon (or melon baller), dig out the core. It doesn’t have to look perfect. Spoon the prepared apple filling into the cored-out apples. You may have some filling leftover—it’s great warmed up over vanilla ice cream. Lay 3-4 strips of the pie dough on top of the apple. Then, working with one new strip at a time, alternate weaving it over and under the dough strips already in place. Repeat until the top of the apple has been covered in this lattice style crust. Using a sharp paring knife, trim excess pie crust around the edges. Repeat with remaining apples and pie dough strips.
- Place apples into an 8-inch square baking pan, 9-inch square baking pan or 9-inch pie dish—really any size baking pan works. In a small dish, whisk the egg and milk together. Lightly brush the tops with egg wash. I sprinkled a little bit of cinnamon on top of the egg wash before going into the oven—this is optional. Bake for 25-30 minutes or until the crust is browned and the filling is bubbly.
- If desired, drizzle each with salted caramel. We ate ours with a knife and fork and vanilla ice cream on the side. These apples are best enjoyed immediately. Store any leftovers in the refrigerator for up to 2 days.
Notes
- Special Tools (affiliate links): Glass Mixing Bowls | Saucepan | Rolling Pin | Pizza Cutter | 8-inch Square Baking Pan, 9-inch Square Baking Pan or 9-inch Pie Dish | Whisk | Pastry Brush
- Pie Crust: You need 1 (one) pie crust per four apples. This homemade pie crust recipe makes 2 crusts. I suggest making it all and freezing the other dough (for up to 3 months) to make your favorite pie at a later time.
- Inspired by my intense love for apple pie and adapted from food.com.


A very fun individual dessert! We usually make them with Granny Smith.
I want to make 8, do I need to double the recipe?
Yes, this recipe yields 4 apples, so feel free to double it.
My toddler is allergic to eggs what can I use instead?
You can skip the egg wash on top of the crust, or simply brush it with milk instead.
Hi Sally,
Omg! These baked apples look amazing Question, I’m short on time would store bought pie crust work for the topping? Or any other recommendations? Thank you so much for sharing all your wonderful recipes
Hi Jackie, You can use store bought dough in a pinch! I usually make extra when I’m making dough to keep in the freezer for pie emergencies 🙂
Thank you for getting back to me Sally I went and bought everything to make homemade pie crust. I couldn’t do your recipe the justice it deserves with fake crust Looking forward to making this amazing dessert.
I’d like to make these for a potluck next Friday. How many days in advance can I make the dough and keep it in the fridge? Thanks! LOVE your blog <3
Just sit them in a muffin tin or a cupcake carrier – too cute to not use the apples!!
Hey Sally, I really love this idea! I was trying it out for myself but was wondering, do your apple skins come out wrinkled? I only had gala apples at the time and they shriveled up. 🙁
Slightly– but not really. Usually I see baked apples’ skins begin to shrivel around 40+ minutes in the oven. Maybe try some firmer apple varieties? I love Granny Smith.
Hi, Sally! I’m new to your blog but I’m excited to try out your recipes. I was hoping you could advise me: I’m thinking of making these this Christmas for dessert but I want them to be fresh and warm. Could I prepare them in the morning and leave them in the fridge until after dinner to bake them off? Thanks!
Hi Michelle! Yep, you can prep/assemble these in the morning, refrigerate, and then bake right before serving.
Hi Sally,
How about assembling and refrigeration overnight? Do you think that will work? I don’t know if the raw apple will brown?
Maybe rub some lemon juice on them to help prevent browning.
I made these but used left over cranberries from thanksgiving as the filling and didn’t trim the crust so tightly. Also, custard as a side dish per my husbands desires to always have custard with his apple pie.
Hi there, so I’m trying to make these delicious apples for a party tomorrow night and due to time I will have, I have tried to pre make all the steps so I can put them together quickly. My only hiccup has been the filling, I thought I followed the recipe exact but it’s not thickening up at all… any hints for me so i can still use this recipe? Thanks in advanced!
Is your cornstarch up to date? You may try adding a little more cornstarch/water mixture.