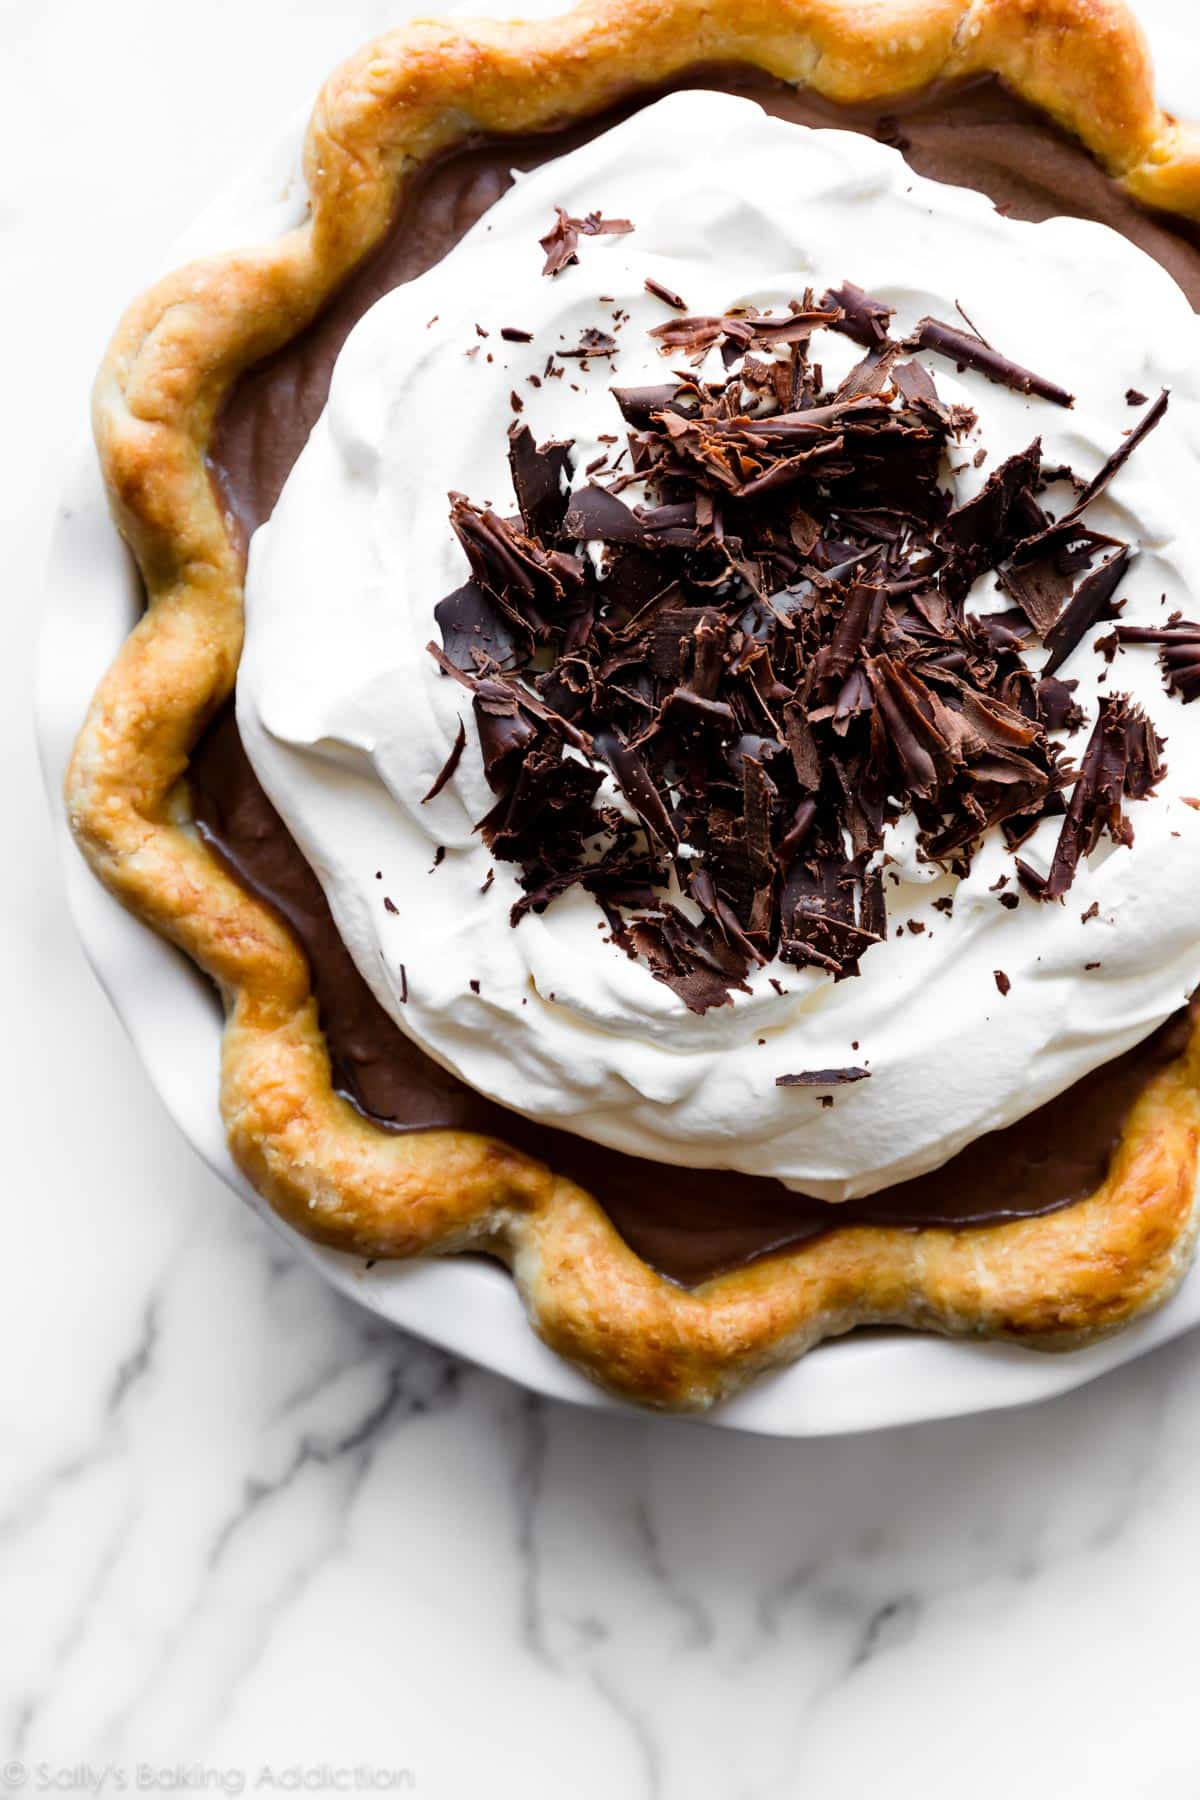
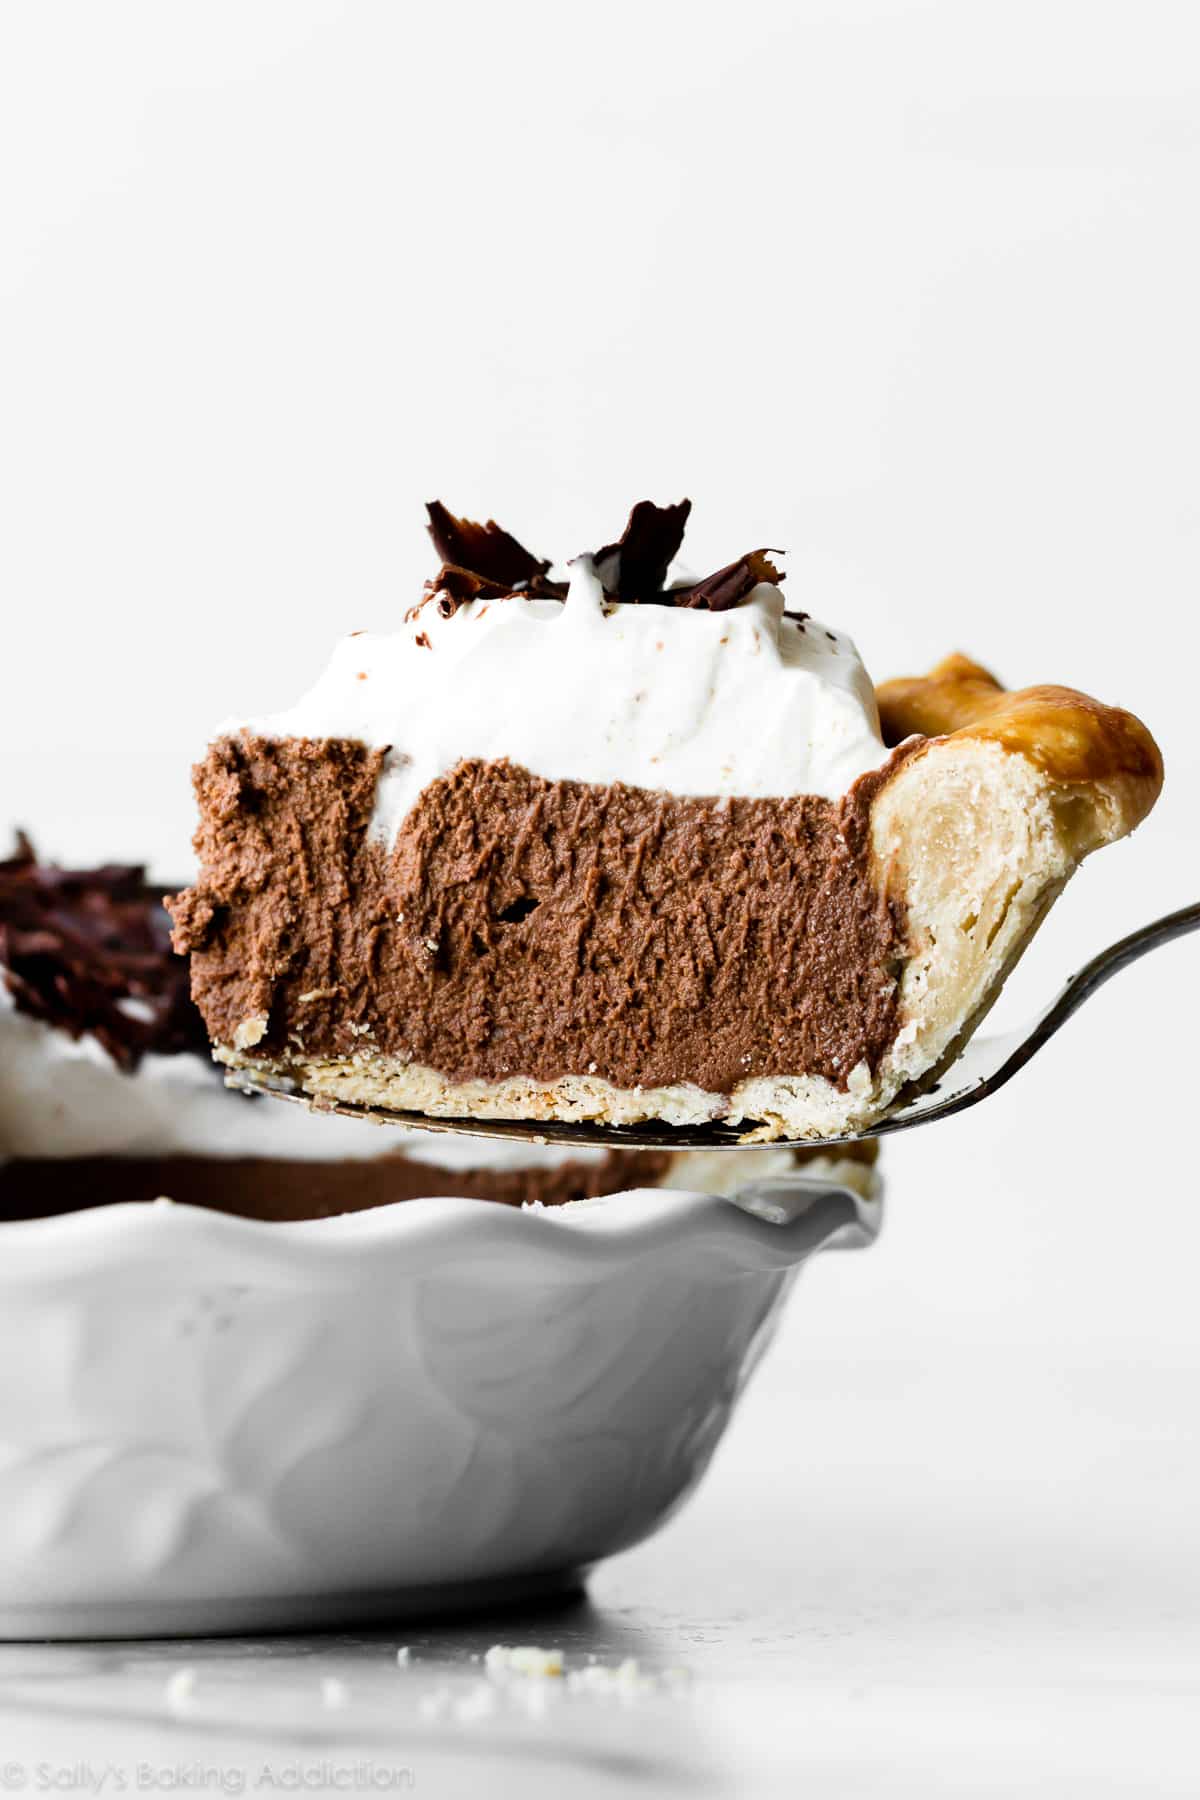
This creamy and indulgent French silk pie combines my best flaky pie crust, smooth-as-silk chocolate filling, and fresh whipped cream on top. This recipe uses cooked eggs, so you don’t have to worry about consuming raw eggs.
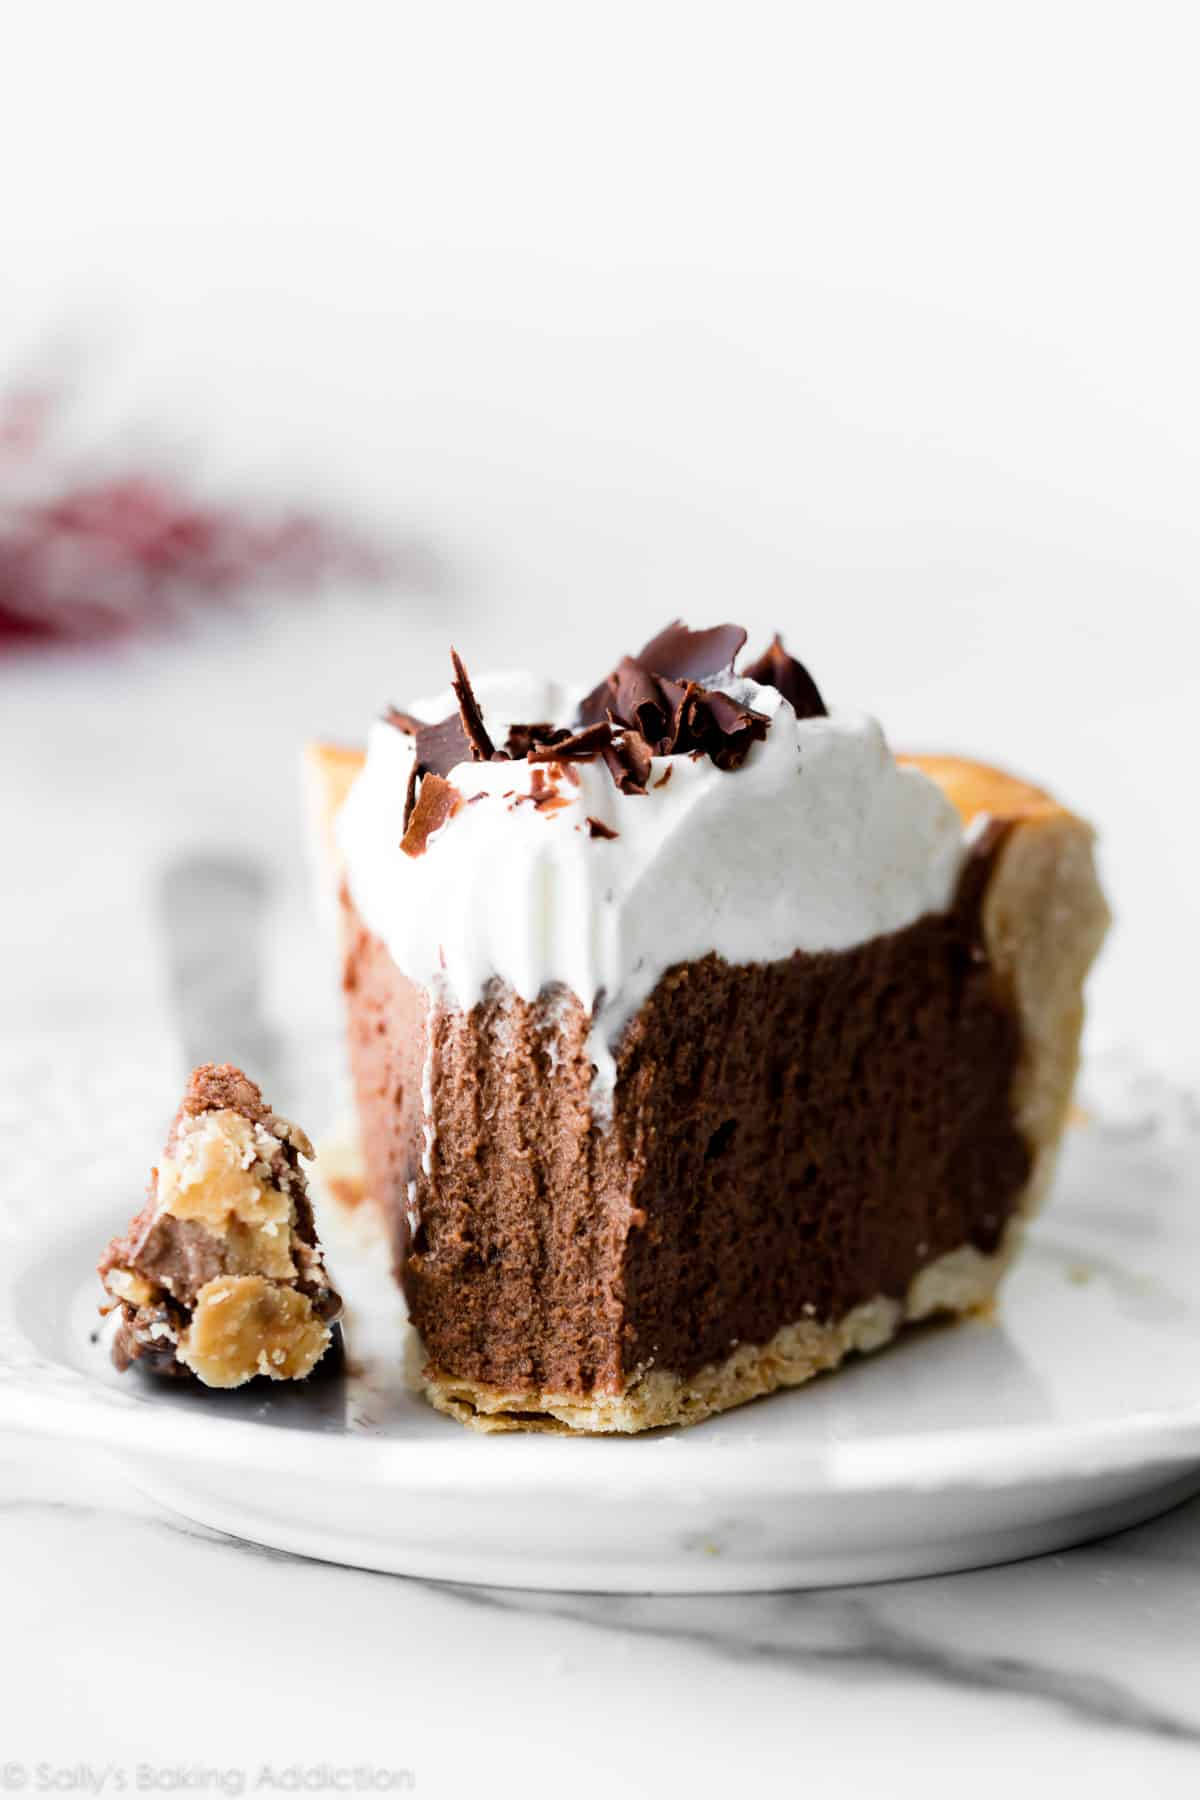
After many requests, I’m unveiling a favorite French silk pie recipe. I’ve tried a lot of French silk pies and have made several in my own kitchen, but this is definitely my best one yet and I’m thrilled for you to finally try it! Perhaps you’ll even consider adding it to your menu of Thanksgiving pies… alongside your apple pie and pumpkin pie, of course 🙂
Why This Is My Best French Silk Pie
- Uses my tried-and-true flaky pie crust
- Light as mousse, but much smoother
- Unlike other recipes, there’s no raw eggs
- Filling sets up perfectly
- Garnished with my favorite fresh whipped cream
No Raw Eggs
This characteristic is definitely worth highlighting. Most French silk pie recipes call for raw eggs, but I gently cook them first. This requires an extra step on the stove, but it cancels out any worries of serving raw eggs. Even with this step, we still have the same smooth-as-silk texture—nothing is compromised! So if you’re looking for a classic French silk pie recipe without raw eggs, this is it.
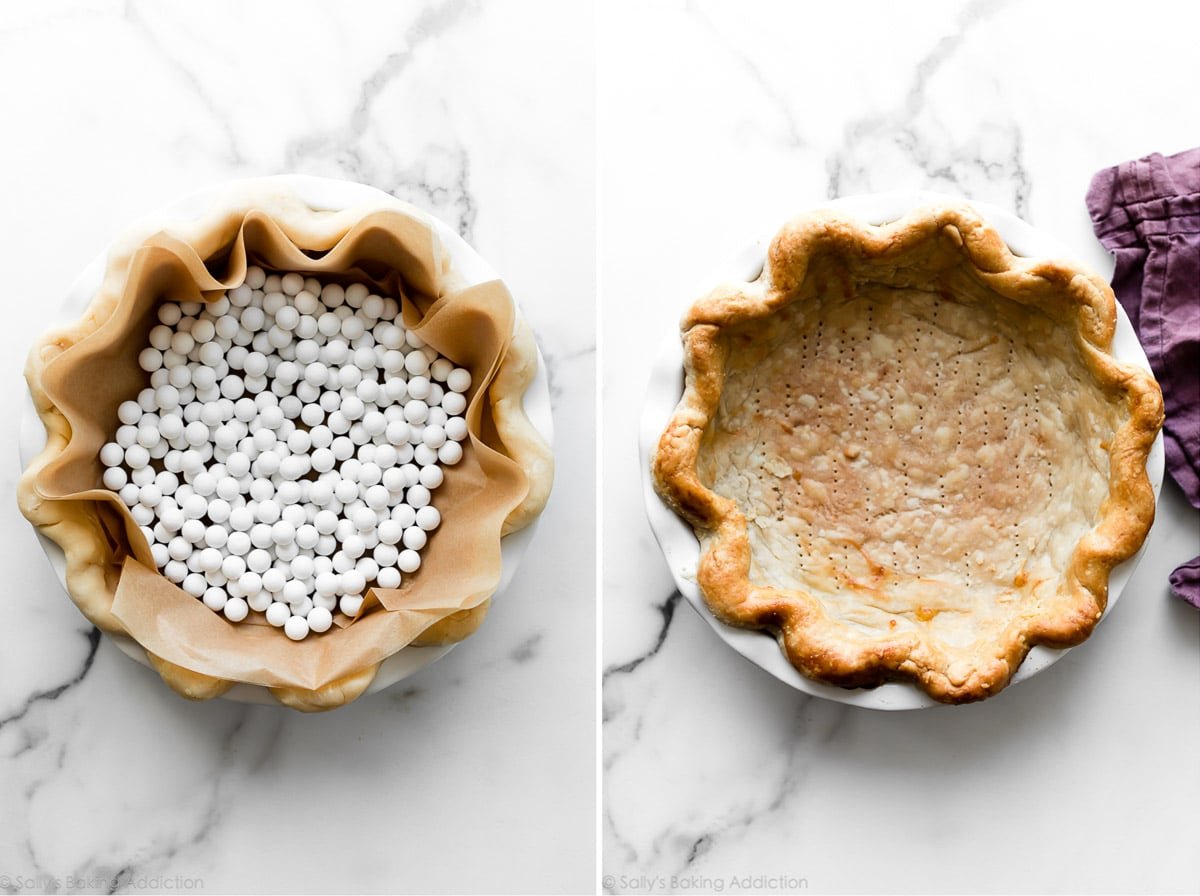
How to Fully Blind Bake Pie Crust
Like my banana cream pie and coconut cream pie, this French silk pie filling isn’t baked, so it requires a fully baked pie crust. “Blind baking” means that we bake a pie crust without a filling inside. Do you know how to blind bake pie crust? Let’s review:
- Make pie dough ahead of time, then refrigerate or freeze until you’re ready to make the pie. Pie dough must chill for at least 2 hours before rolling out. You can use my favorite pie crust or my all-butter pie crust recipe. I prefer the shortening/butter blend in my pie crust, because the shortening promises that prized flaky texture. If needed, you can use a graham cracker crust or even an Oreo cookie crust instead. See recipe Note.
- Roll the dough out, then fit into a 9-inch pie dish. Crimp or flute the edges. Want to know my trick for beautiful pie crust edges? Don’t trim the excess pie dough. See step 2 in the recipe below. My how to crimp and flute pie crust tutorial is helpful, too.
- To prevent shrinking, chill the shaped pie crust for at least 30 minutes. Remember that pie dough must be cold when it hits the oven. You can do this before or after you fill with pie weights (next step).
- Fill with pie weights. As the pie dough bakes, its fat will melt. The melting fat causes the pie crust to shrink down the sides of the pie dish. To prevent the pie dough from completely losing its shape, weigh it down with pie weights. Carefully line the pie dough with parchment paper first, then pour in pie weights or even dry beans. (Note: 2 packs of these pie weights is needed.)
- Bake until the edges are relatively set, about 15 minutes.
- Remove pie weights and parchment, dock the crust with a fork, and then return to the oven until the crust is golden brown (about another 15 minutes). See photo on the right below.
- Cool completely before adding the filling.
Some recipes, like my pumpkin pie and lemon meringue pie, require a partially blind-baked pie crust—this means that the filling is baked, but the crust requires a pre-bake.
4 Parts to Chocolate Pie Filling
Let’s make the chocolate filling as the blind-baked pie crust cools. There’s a few different things going on here. You need 4 separate bowls for different components.
- Heavy Cream: Whip heavy cream into stiff peaks.
- Melted Chocolate: Use two 4-ounce bars of pure chocolate in this recipe. Do not use chocolate chips, which don’t melt into the proper consistency. I prefer and recommend semi-sweet chocolate, but you can use bittersweet or unsweetened chocolate for a darker flavor.
- Eggs + Sugar: I like to whip the cream and melt the chocolate first, so both are ready as I need them. For the eggs, whisk them with the sugar and gently cook them on the stovetop. Use a double boiler or a heatproof bowl over a pot of simmering water. While constantly whisking, cook until they reach 160°F (71°C), a temperature that kills all possible bacteria. You need an instant-read thermometer for this step. Let this cool for 10 minutes, then stir in the melted chocolate.
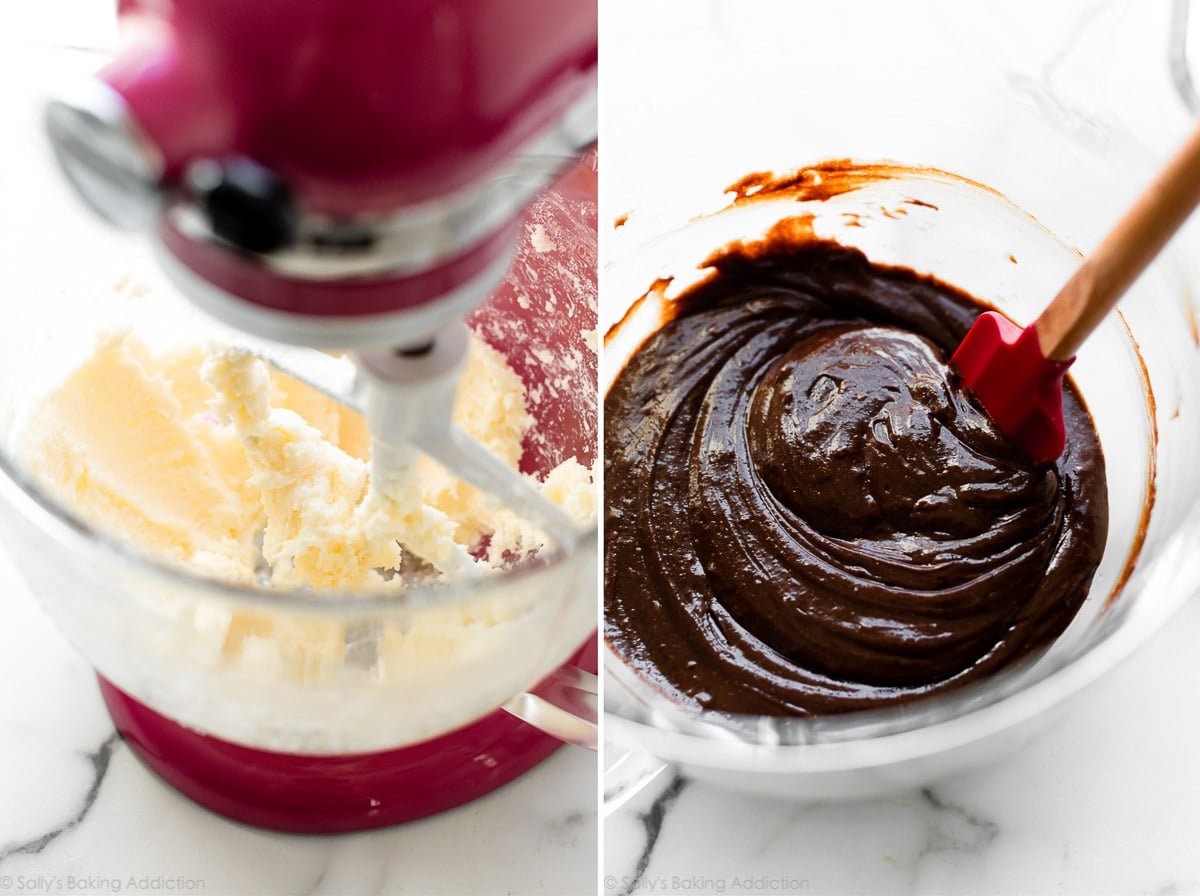
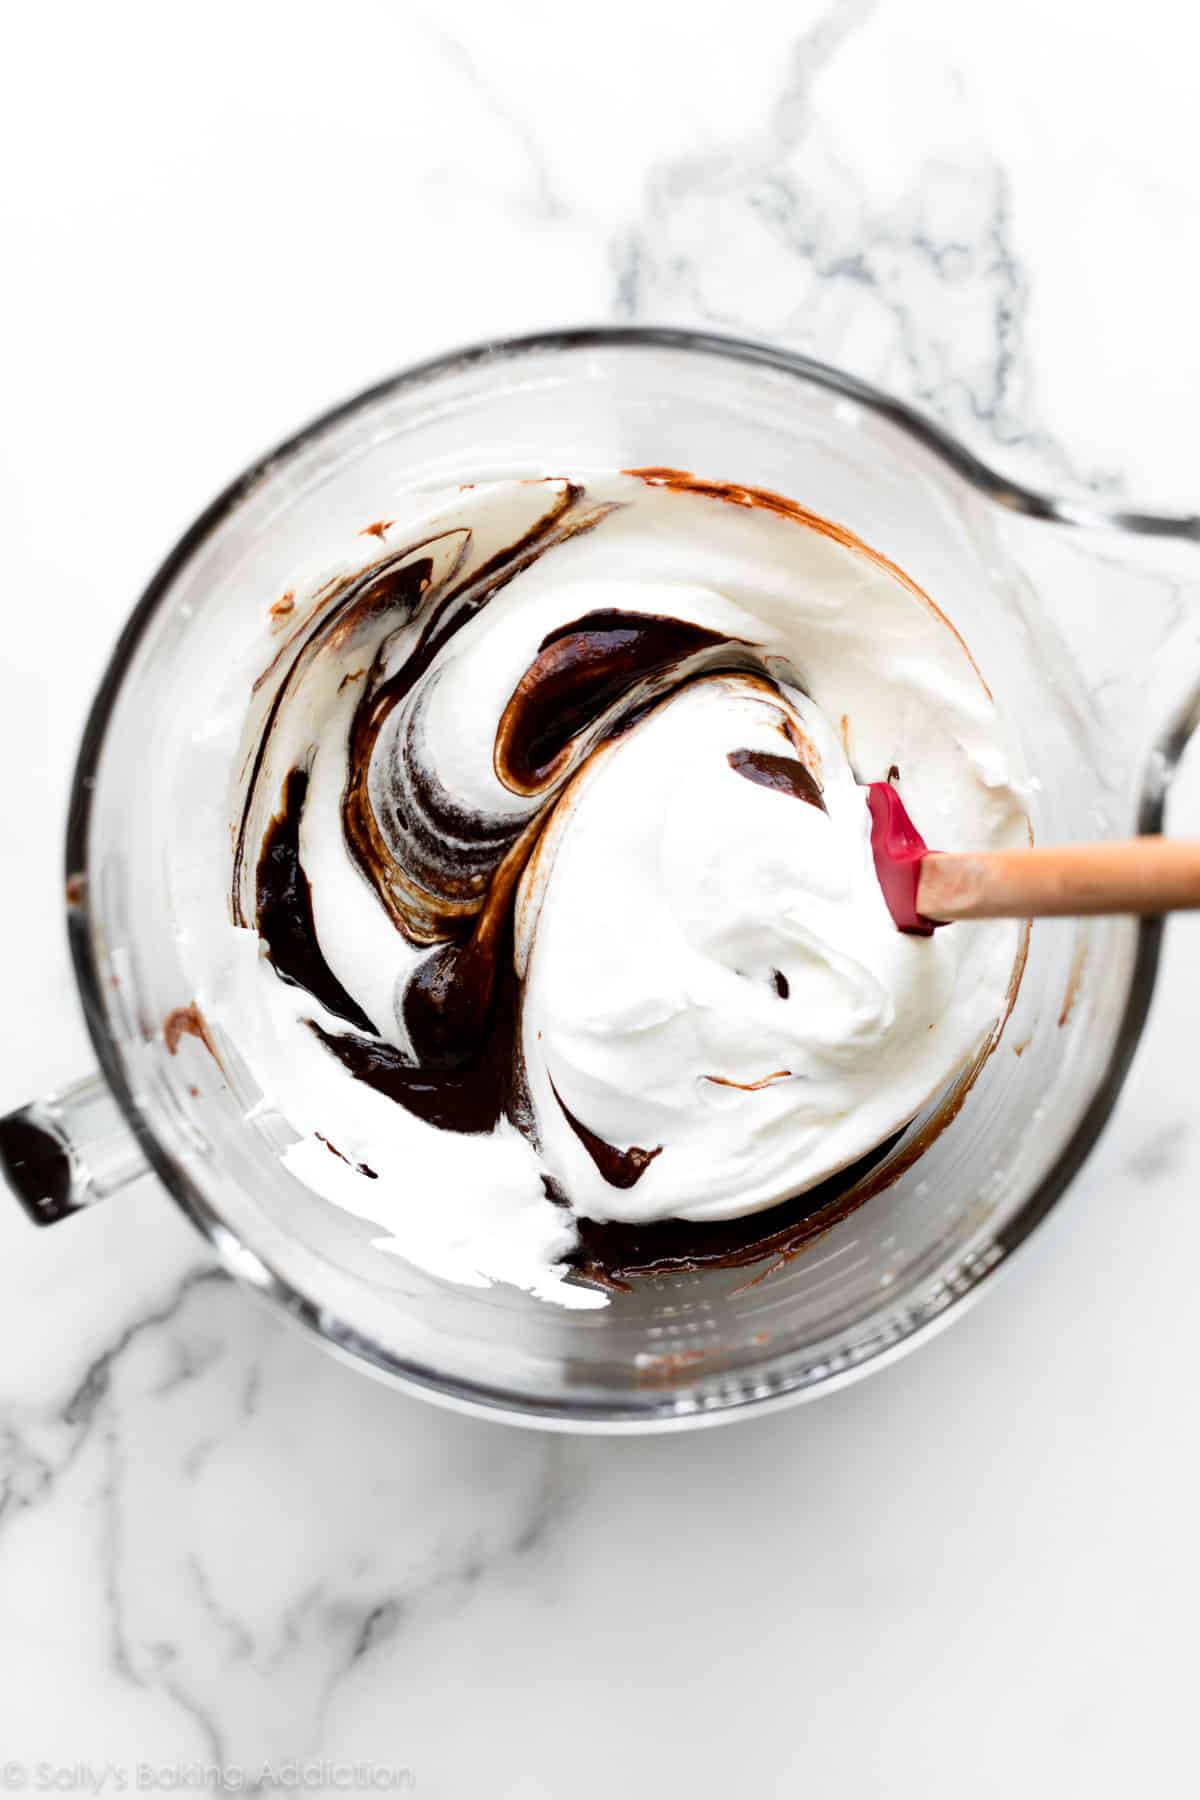
- Creamed Butter: Finally, cream room-temperature butter for a couple minutes with a mixer. While this is the last part listed, it’s actually the base of the entire filling. Mix vanilla extract into the creamed butter, then add the chocolate/egg mixture to the bowl, and beat for 3 minutes. Turn off the mixer and gently fold in the unsweetened whipped cream with a spatula.
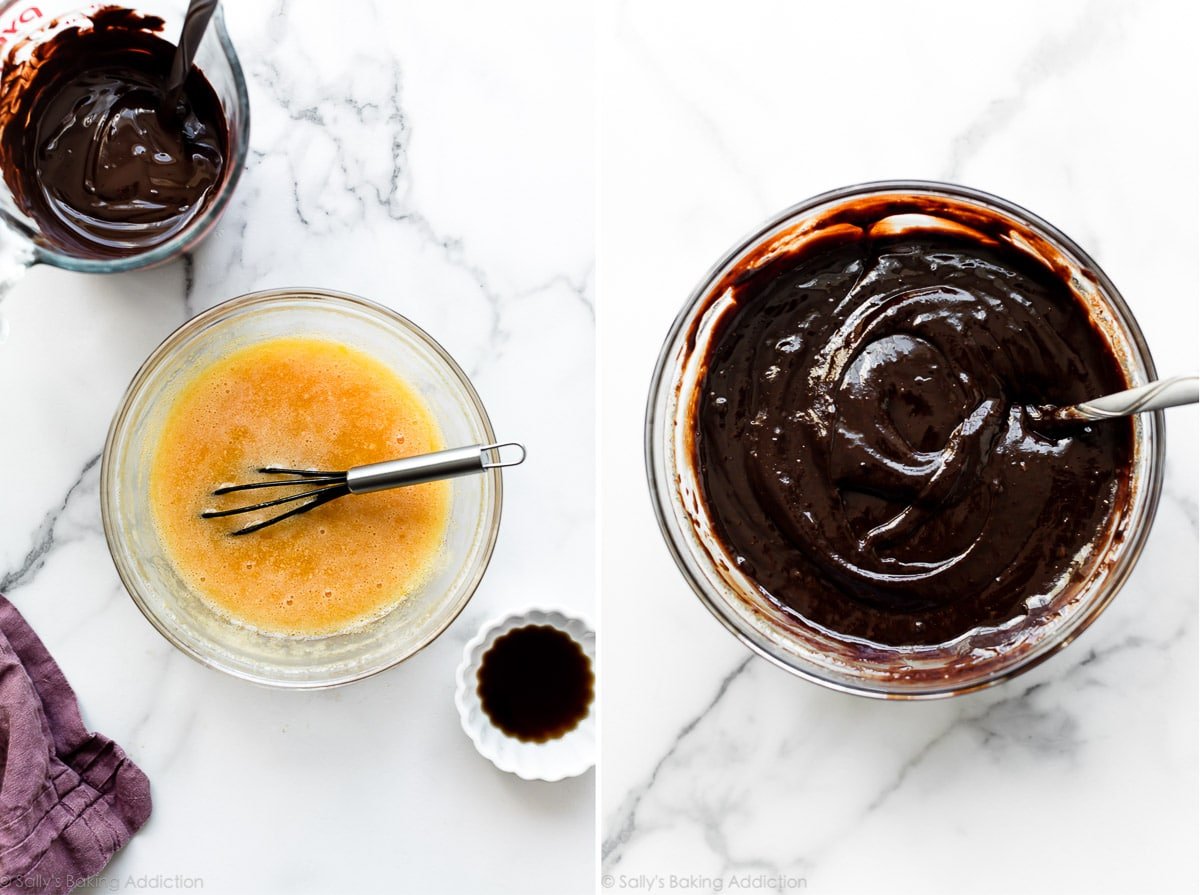
Above left: cooked eggs + sugar. Above right: combined melted chocolate and eggs.
Below left: creamed butter. Below right: creamed butter with the chocolate/eggs.
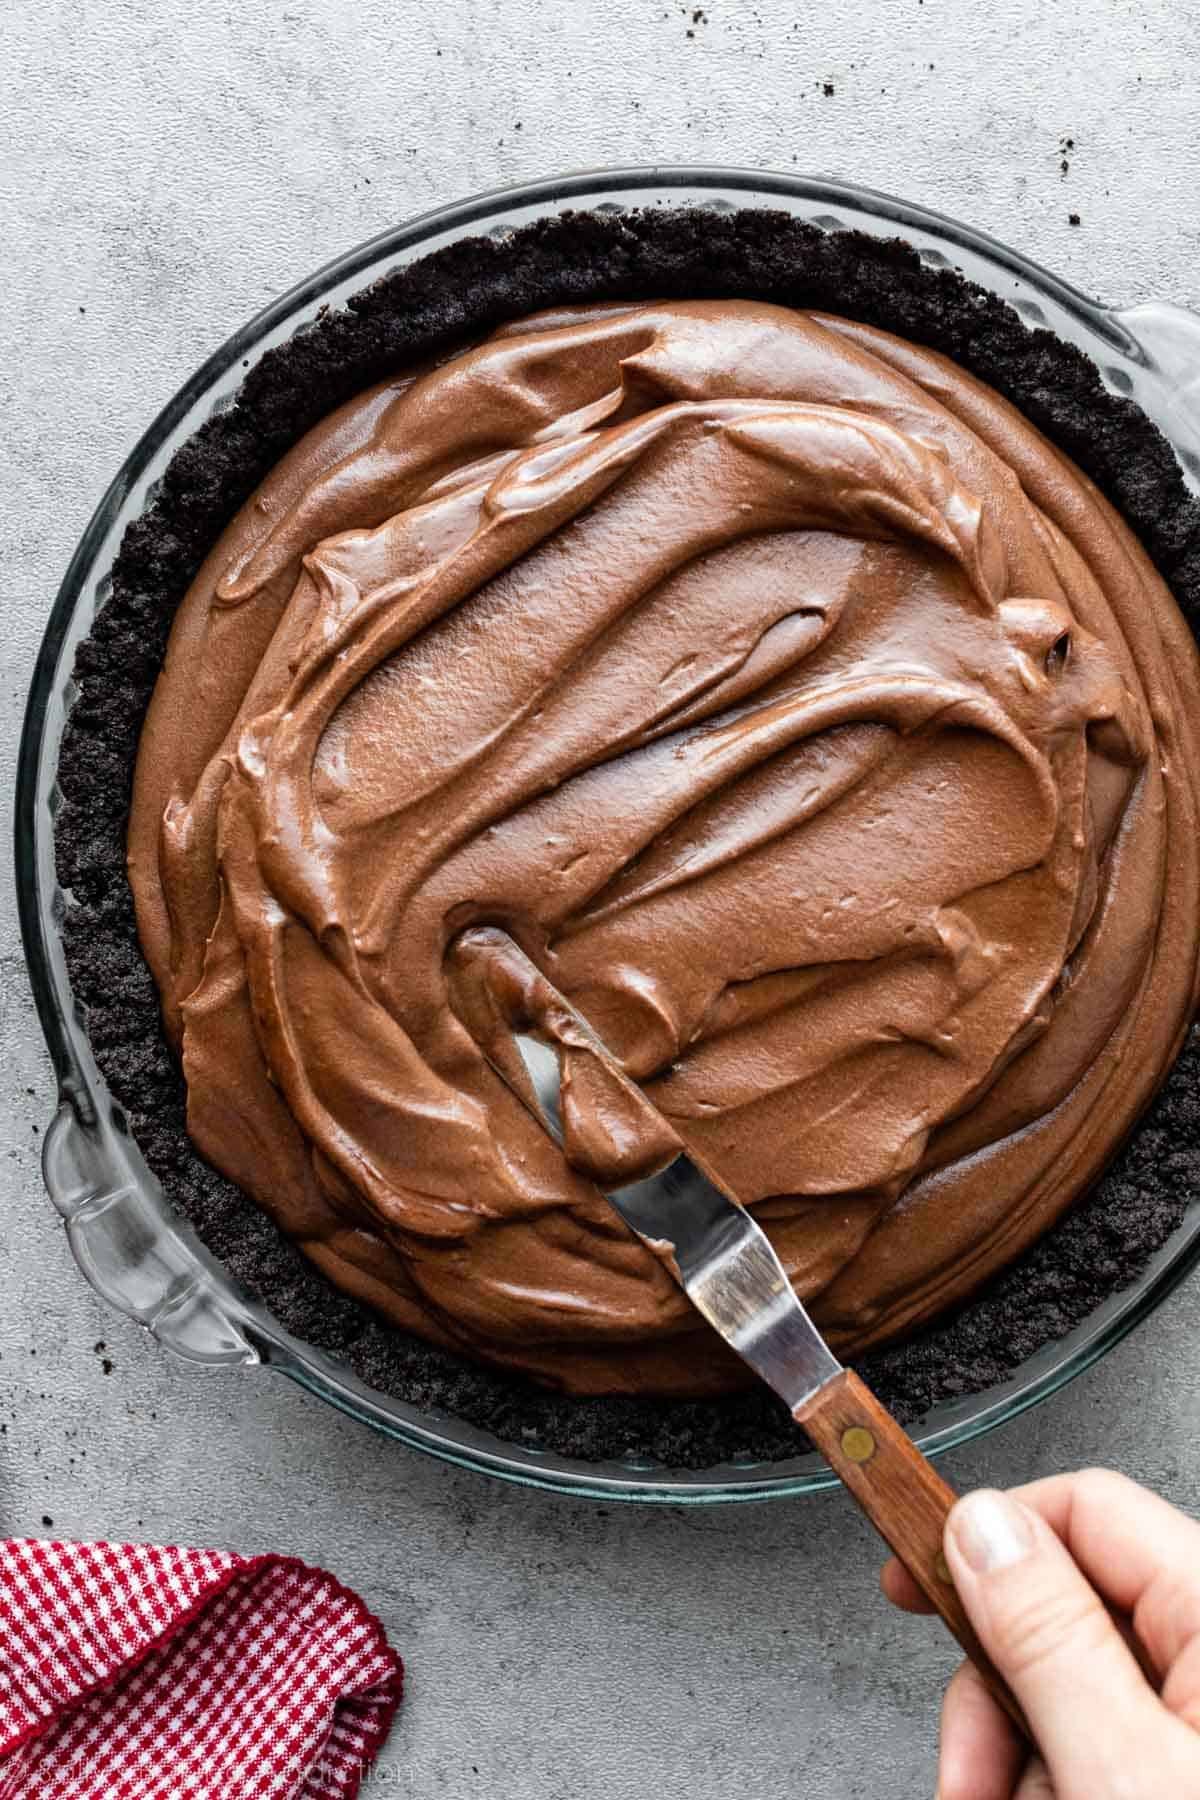
Finally, fold in the unsweetened whipped cream and spread into the cooled pie crust. Place the pie in the refrigerator and chill until the filling sets, about 4–6 hours.
This is an excellent pie to make a day ahead of time!
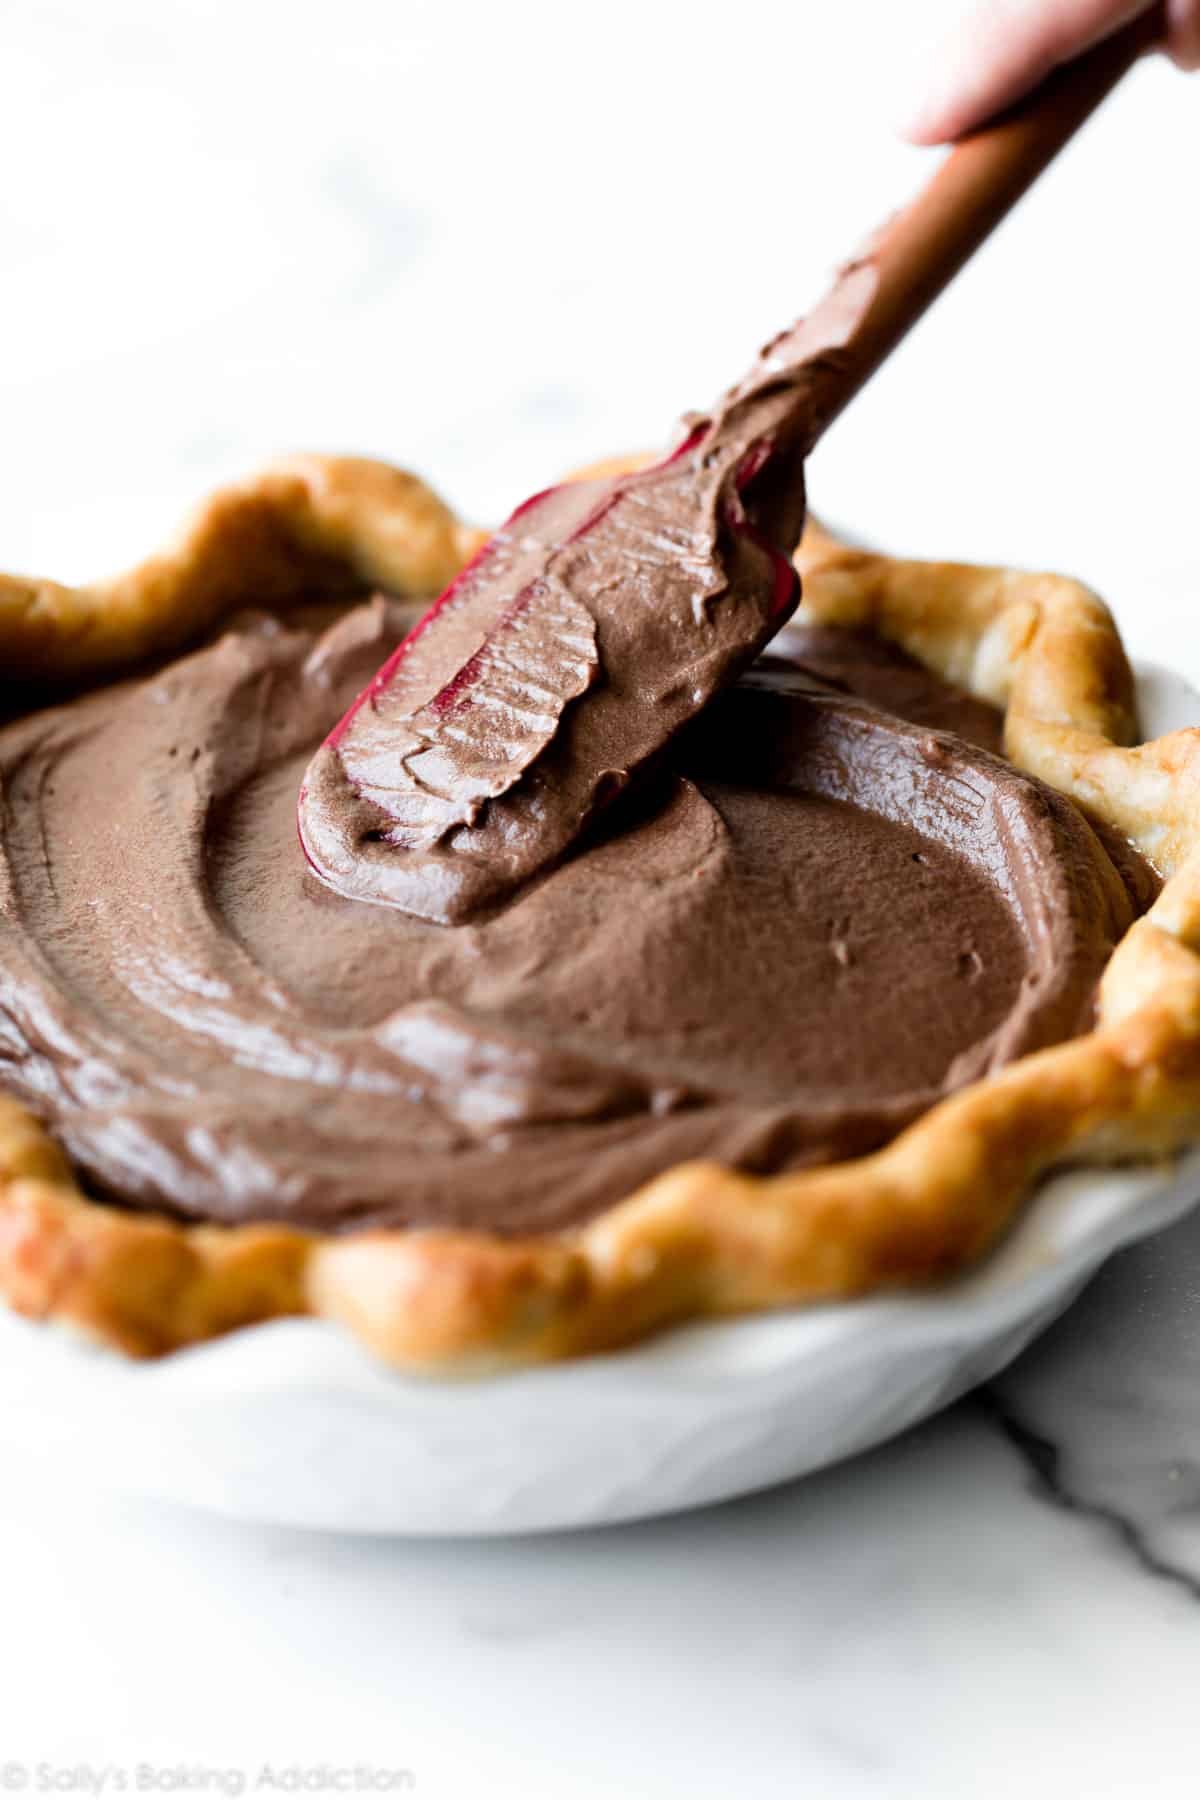
While I have a chocolate mousse pie recipe in my archives, I wanted to share a classic French silk pie. What’s the difference? The mousse pie sits in a delicious Oreo cookie crust and has a sky-high, super thick, airy mousse filling. This French silk pie, however, is served in a traditional pie crust and has a much richer, smoother filling. (Truthfully though… you can’t go wrong with either chocolate pie!)
Use Heavy Cream Again for Whipped Cream Topping
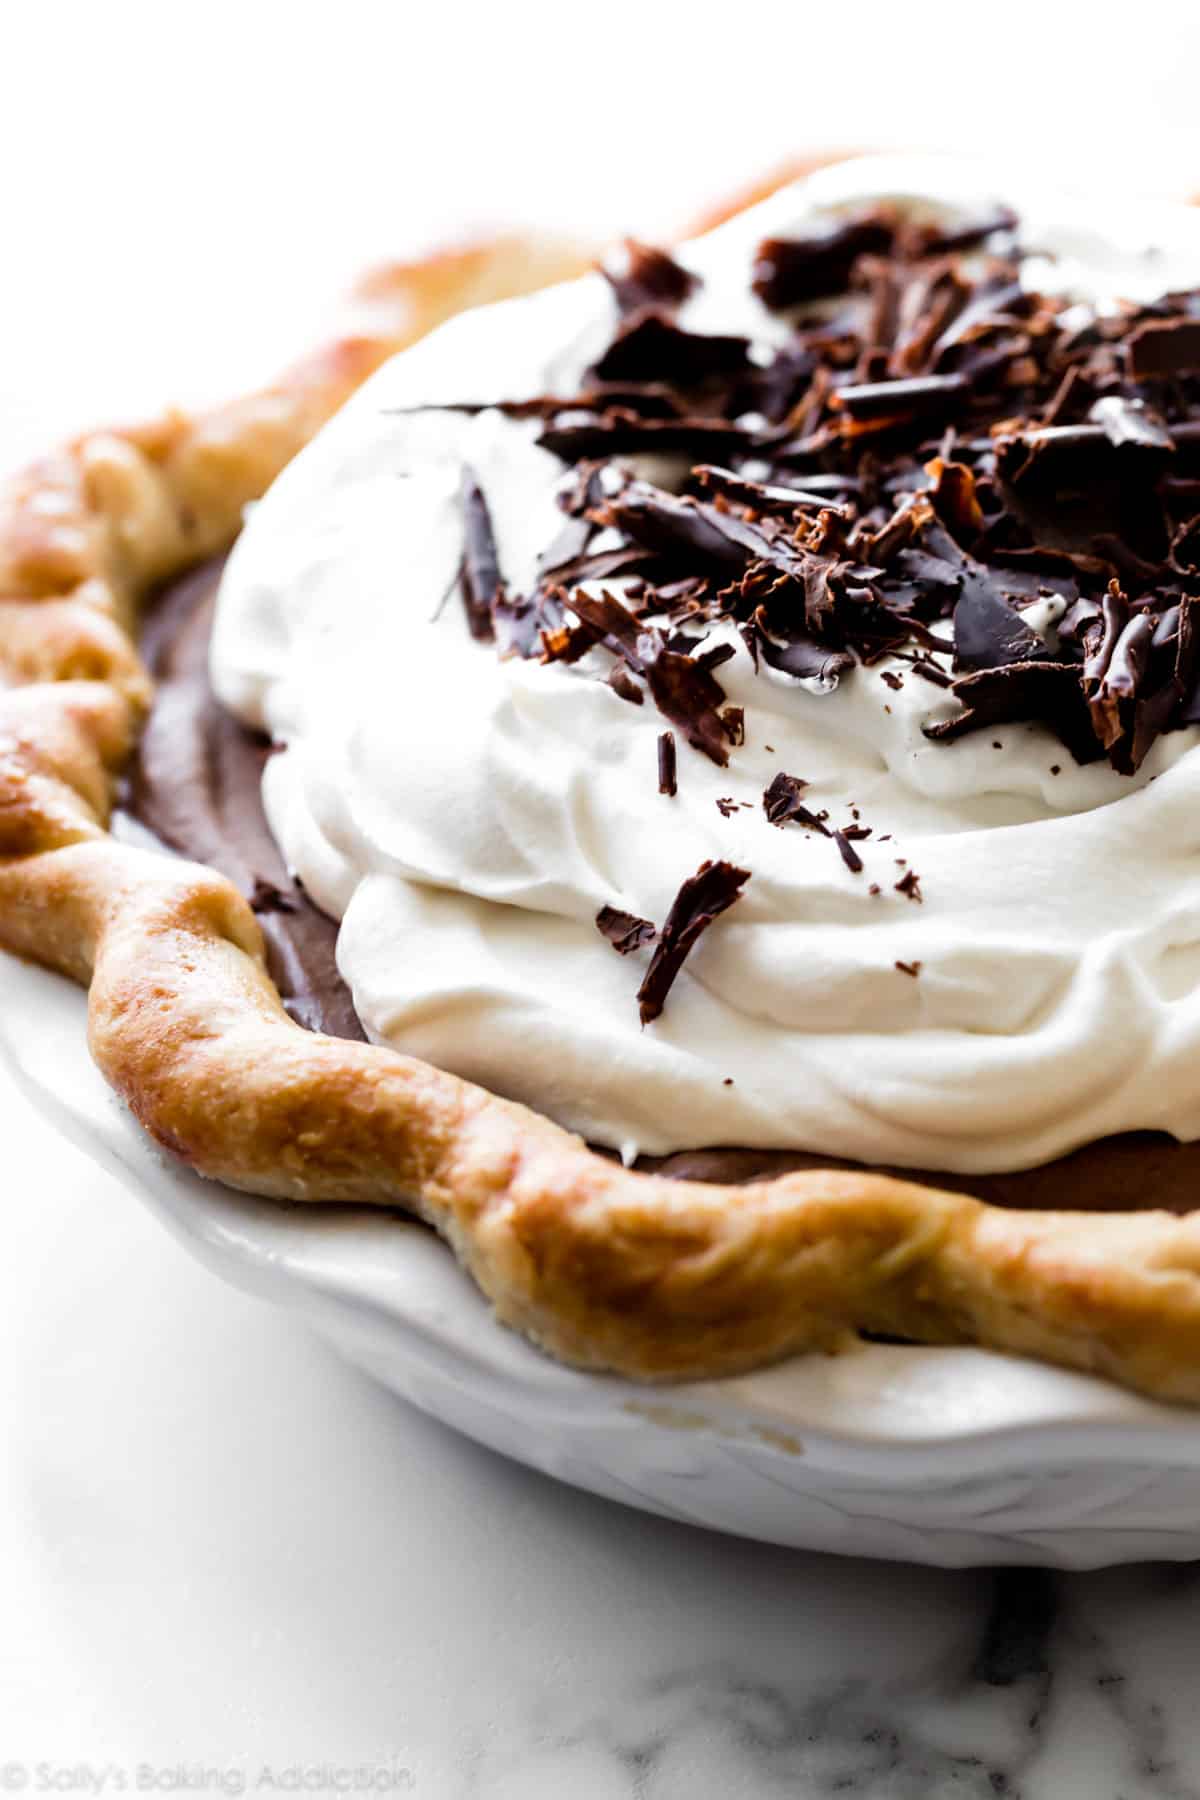
You need heavy cream for the filling AND the whipped cream garnish on top. Pick up a pint of heavy cream or heavy whipping cream and use 1 cup for the filling and 1 cup for the whipped cream on top. (We’re using my favorite vanilla whipped cream!) Finish it off with chocolate curls, mini chocolate chips, or even toasted coconut.
Success Tips
- Review the recipe and notes: Since there’s a few different steps, my #1 success tip is to review the written instructions and recipe notes before you begin. Take your time with each step and you’ll be rewarded with chocolate pie perfection.
- Maintain a smooth filling: Make sure the egg mixture cools down before stirring in the chocolate. Then, make sure the chocolate/egg mixture cools down before mixing into the creamed butter. If these ingredients are still warm, the filling could curdle.
- No substitutions: To ensure the filling sets up properly and maintains the silky texture, I do not recommend any ingredient substitutions.
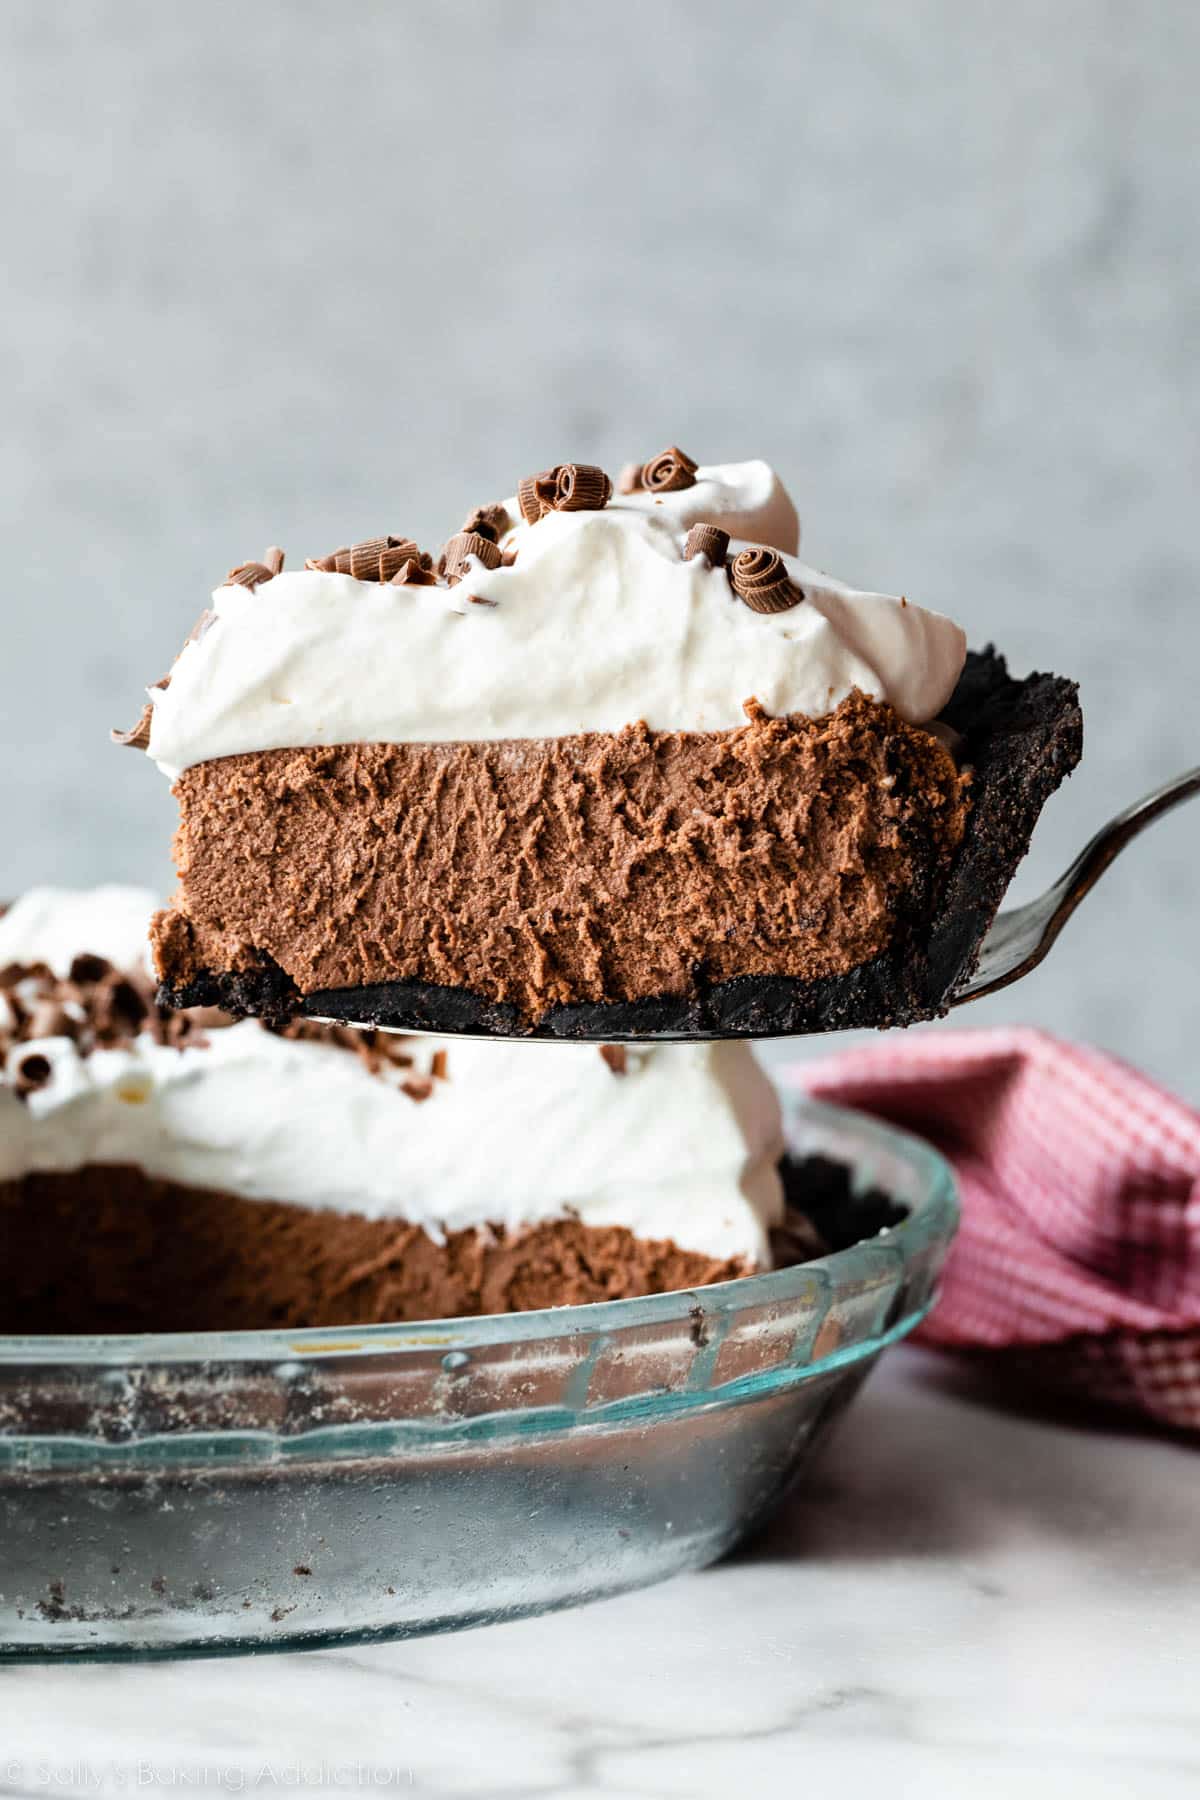
Or Try This With an Oreo Cookie Crust
Swap the pie dough for an Oreo cookie crust. No pie weights required! See recipe Note below for specific instructions.
This recipe is part of Sally’s Pie Week, an annual tradition where I share a handful of new recipes that fit into the pie/crisp/tart category. Join the community below!
Print
French Silk Pie
- Prep Time: 4 hours (includes dough)
- Cook Time: 40 minutes
- Total Time: 8 hours (includes chilling)
- Yield: one 9-inch pie
- Category: Desserts
- Method: Baking
- Cuisine: American
Description
This French silk pie features my perfectly flaky pie crust, a smooth chocolate filling, and whipped cream on top. Read through the recipe and helpful notes before beginning.
Ingredients
Crust
- 1 unbaked Flaky Pie Crust (what I used) or All Butter Pie Crust*
- egg wash for pie crust: 1 large egg beaten with 1 Tablespoon milk or heavy cream
Filling
- 1 cup (240ml) heavy cream or heavy whipping cream
- two 4-ounce quality bittersweet or semi-sweet chocolate bars (113g each), finely chopped*
- 4 large eggs
- 1 cup (200g) granulated sugar
- 3/4 cup (12 Tbsp; 170g) unsalted butter, softened to room temperature
- 1 and 1/2 teaspoons pure vanilla extract
Topping
- 1 cup (240ml) heavy cream or heavy whipping cream
- 2 Tablespoons confectioners’ sugar or granulated sugar*
- 1/2 teaspoon pure vanilla extract
- optional for garnish: chocolate curls*
Instructions
- Pie crust: I like to make sure my pie dough is prepared before I begin making this pie. Make pie dough the night before because it needs to chill in the refrigerator for at least 2 hours before rolling out and blind baking.
- Roll out the chilled pie dough: On a floured work surface, roll out one of the discs of chilled dough (use the 2nd pie crust for another recipe!). Turn the dough about a quarter turn after every few rolls until you have a circle 12 inches in diameter. Carefully place the dough into a 9-inch pie dish. Tuck it in with your fingers, making sure it is completely smooth. To make a lovely thick edge, I do not trim excess dough around the edges. Instead, fold the excess dough back over the edge and use your hands to mold the edge into a nice thick rim around the pie. Crimp the edges with a fork or use your fingers to flute the edges. (Review my how to crimp and flute pie crust tutorial if you need extra help with this step.) Chill the dough in the refrigerator or freezer for at least 30 minutes—this helps prevent the crust from shrinking.
- Preheat oven to 375°F (191°C).
- Blind bake the crust: Line the chilled pie crust with parchment paper. (Crunch up the parchment paper first so that you can easily shape it into the crust.) Fill with pie weights or dried beans. (Note that you will need at least 2 standard sets of pie weights to fit.) I like to push the weights up against the sides of the pie crust to help ensure the sides don’t shrink down. Bake until the edges of the crust are starting to brown, about 15–16 minutes. Remove pie from the oven and carefully lift the parchment paper (with the weights) out of the pie. Prick holes all over the bottom crust with a fork. If desired for a shiny golden crust, brush egg wash on edges. Return pie crust to the oven and bake for 14–15 minutes, or until bottom has browned. Remove from the oven, and cool on a wire rack completely before filling. You can blind bake the crust up to 3 days ahead of time. Cover cooled crust tightly and refrigerate until ready to fill. (Review this how to par-bake pie crust page if you need extra help with this blind-baking step.)
- Start the filling: Using a hand mixer or a stand mixer fitted with a whisk attachment, whip the heavy cream on medium-high speed until stiff peaks form, about 4 minutes. Stiff peaks hold their peak shape and do not droop. Set whipped cream in the refrigerator (covered or uncovered, doesn’t matter) until step 8. Melt the semi-sweet chocolate. You can melt it in a double boiler or the microwave. If using the microwave: place the chopped chocolate in a medium microwave-safe bowl. Microwave in 20-second increments, stopping and stirring after each increment until completely melted and smooth. Set aside until the end of the next step.
- Cook the eggs: Whisk eggs and sugar together in a heatproof bowl or the top piece of a double boiler. Place over a pot of simmering water (or the bottom part of your double boiler) on medium heat. Do not let the surface of the simmering water touch the bottom of the heatproof bowl. Whisking constantly, cook the egg mixture until it reaches 160°F (71°C) on an instant-read thermometer, about 10–11 minutes. Do not stop whisking or the eggs may solidify. If the steam gets too hot over your hand, use an oven mitt. Carefully remove from heat and allow to cool for 10 minutes. After cooling, slowly stir in the melted chocolate. To prevent curdling, cool for another 10 minutes before using in the next step.
- Using a handheld or a stand mixer fitted with a paddle attachment, beat the butter on medium-high speed until creamy, about 1–2 minutes. Add the vanilla and beat on medium-high speed for 30 seconds. Scrape down the sides and up the bottom of the bowl. With the mixer running on low speed, pour in the chocolate/egg mixture and then increase to medium-high speed and beat for 3 minutes. With a silicone spatula, fold in the whipped cream until combined.
- Spread filling into cooled pie crust. (A small offset spatula is helpful for this.) Cover tightly with plastic wrap and refrigerate for at least 4–6 hours or overnight, until chilled and thickened. Pie may be refrigerated for up to 2 days before serving.
- For the whipped cream topping: Using a handheld or a stand mixer fitted with a whisk attachment, whip the heavy cream, sugar, and vanilla extract on medium-high speed until medium peaks form, about 3–4 minutes. Medium peaks are between soft and stiff peaks, and are the perfect consistency for topping and piping on desserts. Pipe or spread the whipped cream on top. Garnish with chocolate curls (see Notes), if desired. Serve immediately, or chill the pie uncovered for up to a few hours.
- Cover leftovers and store in the refrigerator for up to 5 days.
Notes
- Make Ahead & Freezing Instructions: The pie dough can be prepared ahead of time and stored in the refrigerator for up to 5 days or in the freezer for up to 3 months. There are plenty of ways to make this recipe ahead of time. See end of steps 5 and 9. You can also freeze the pie after step 8. Cover with an extra layer of plastic wrap before freezing. Freeze for up to 3 months. Thaw in the refrigerator prior to topping with whipped cream and serving.
- Special Tools (affiliate links): Rolling Pin | 9-inch Pie Dish | Parchment Paper | Pie Weights | Pastry Brush | Cooling Rack | Electric Mixer (Handheld or Stand) | Double Boiler | Whisk | Instant Read Thermometer | Silicone Spatula | Small Offset Spatula
- Update in 2022: This recipe used to call for 1 cup of butter as well as creaming half of the sugar with the butter. After further testing and feedback from readers, the recipe now uses 3/4 cup (170g) butter in the filling and all of the sugar is now cooked with the eggs.
- Pie Crust: Both linked pie crust recipes make 2 crusts. You only need 1 crust for this pie, so freeze the 2nd half for another use. If using store-bought pie dough, you still need to blind-bake it. If needed, you can use a graham cracker crust or Oreo cookie crust instead of traditional pie crust. Pre-bake either cookie crust at 350°F (177°C) for 12 minutes. No need for pie weights if using a cookie crust. Cool completely before filling.
- Chocolate: Filling will only set if the correct chocolate is used. I recommend using pure chocolate baking bars. You can find them right next to the chocolate chips in the baking aisle. They are sold in 4-ounce bars. I like Baker’s or Ghirardelli brands. I use and recommend semi-sweet chocolate, but you can use bittersweet or even unsweetened chocolate for a darker flavor.
- Sugar in whipped cream: Some bakers swear by granulated sugar in whipped cream; others swear by confectioners’ sugar. If you’re only working with a couple Tablespoons of sugar as listed in the recipe above, it doesn’t really make a difference. Use either.
- Garnish: You can leave the whipped cream on top plain or sprinkle with chocolate curls or shavings, mini chocolate chips, or chocolate sprinkles. To make chocolate curls, run a vegetable peeler down the side of a Hershey’s milk chocolate bar (or similar chocolate bar).


How do I keep my pie from sticking to the ceramic pie dish? Can I use parchment paper?
Hi Faiqua, Are you using one of my pie crust recipes? If so they both contain enough butter that they should not stick to the bottom of your pie dish. However, linking the bottom of your dish with parchment paper should be fine.
I made a GF version with a pre-made crust and it turned out amazing! I’d made a single pie the first time and only got one piece when my family devoured it, so this time I doubled it and it worked great. In fact, with the size of these tiny crusts, I think I could have filled a third, which is what I’ll probably do next time!
Assuming I can keep my son out of the second one, what’s the best way to freeze this? Does it require any special preparation?
Hi Beth! So glad this pie was a hit! See my freezing instructions. I wrap it in a couple layers of plastic wrap, then a layer of aluminum foil. It’s the best way (I’ve found) to freeze cream pies and maintain their texture/taste. I usually wait to decorate it with whipped cream on top until after thawing.
I made the pie this weekend – actually twice! It was delicious!
I used Trader Joe’s dark chocolate bar in one pie and Ghiradelli Semisweet bars in the other one and they both turned out well
I used an Oreo cookie crust ( 10 oz crushed Oreos and 5 oz melted, Salted Butter)
Your directions were very thorough and the pies turned out great.
Thanks so much!
Omg!!! This was such a delicious dessert for Easter!! We always order a French Silk Pie from a restaurant. But, I wanted to make my own this time. Your recipe was amazing! I used your blind baked shell and it held up perfectly! I was nervous when the filing seemed grainy initially. But, it just need to set in the refrigerator to fix that! It was firm and perfect! I added chocolate curls and it looked just like I bought it!! Thank you!!
Wow. This is amazing. I didn’t make the crust because I already had some in my freezer to use up but the filling is perfect. It’s somehow both light/airy and yet completely decadent at the same time. I kind of wish I didn’t make this because I don’t have enough self control to resist it!
My Daughter and Husband’s favorite dessert is french silk pie. I have made it the traditional way with uncooked eggs tons of times. I was a bit nervous trying this recipe for my husbands birthday this week. But Oh My Gosh! This is Soo good! Still taste like French Silk Pie but just smoother and more dense maybe? I also didn’t have to fight the grainy sugar to dissolve or put the bowl in the freezer repeatedly. Totally sold on this recipe!!
So my pie turned out kind of buttery tasting. It’s texture was good just tasted like I was eating chocolate butter. I did mess up my egg and sugar I accidentally added all the sugar while cooking the egg so I just creamed the butter alone. Could that have caused it maybe??
The sugar in my filling is grainy. I really hope that smooth out as it sits. I’m going to be really sad if my pie is gross.
Cheryl,
Did it ever smooth out? Mine is setting right now and I’m worried about the same thing
I had the exact same problem. Hoping after it chills the sugar dissolves a bit. It’s from beating the sugar with the butter – it didn’t get a chance to dissolve.
Next time I think I’m going to leave the second half cup of sugar out to avoid that.
If you don’t completely cream the butter and sugar that can happen. My mom taught me to make French Silk, and she always let her butter/sugar mix for closer to 5 minutes. It should be noticeably smoother and lighter in color. If that doesn’t work, try the extra fine sugar which is a bit hard to find in my metro area due to covid, but that always made a huge difference to my pie.
I tried it and it turned out perfect. I did make a few adjustments though. I made a chocolate cookie crust, added 6oz semisweet chocolate instead of 4oz, 1/4c cocoa powder, and a tbsp cornstarch. It seemed like it wouldn’t be chocolaty or dark enough without the extra chocolate and cocoa, but maybe that’s just me. I added the cornstarch to ensure it would be thick enough, as the last pie filling recipe I tried (not from this site) was too thin. It was a good about of work, but worth it. The people who tried it seemed very impressed.
I made this and got rave reviews from family. Thanks for the recipe and all the detailed instructions. Next time I’ll break it up into a multi-day process, as it was quite a bit of work for one day, but well worth the results!
I’m so glad it was hit with your family, Leah! Next time see the make ahead tips in the recipe notes for lots of options on how to make it ahead of time.
My filling doesn’t seem nearly as dark as yours does, I checked and re-checked before adding ingredients, so I know I didn’t mess up! Have any idea what the cause could’ve been?
Also, would I be able to add more chocolate next time to get a richer flavor? Or would that mess up the whole thing?
(I’m just waiting on the pie to set in the fridge, I can’t wait to try it!! I did taste the filling and it is just scrumptious. )
Hi Aubrey, The filling color can be from the color of our ingredients – my butter might be more yellow, my vanilla a darker brown, etc. or it could just be the lighting in the photo! If it tastes great and sets up properly then you did everything right! I use and recommend semi-sweet chocolate, but you can use bittersweet or even unsweetened chocolate for a darker flavor.
Thank you so much for getting back to me! It turned out perfectly, but I will try it with unsweetened chocolate as I like a more rich chocolate flavor. 😀
Can you describe what the texture of the filling should be? Mine is ending up hard… If I serve it right out of the fridge, it is actually a bit crumbly. Even if I sit it out for a while, it never gets creamy or like a mousse. I’ve never had a French silk pie before, so maybe my expectation is off?
Thanks!
Thick and creamy– not crumbly. Did you perhaps over-beat the whipped cream or use a different chocolate product? Did you make any substitutions by chance?
I didn’t make any substitutions, but I’m wondering now if I folded the whipped cream in too much? I folded it until there were no traces of white… maybe I mixed the air out of it?
I made this recipe, but used Oreo cookie crust. It was Wonderful! I have always loved French Silk, but never imagined that I could make a filling like that. It definitely won’t be my last! Next one will be in the flakey pastry crust.
Thank you, Sally!
What am I doing wrong? Every time I use a pie recipe from this site I never have as much pie dough as in the video. Not even close. I have 9 in pyrex pie plates and I barely make it up the edges with crust that is rolled to less than 1/4 inch. Is the crust recipe really for two crusts?
Hi Kelly, Are you using a deep dish pie plate? If so it will require a bit more than half of the crust recipe to reach all the way up the sides.
I made this pie for Thanksgiving and it was a big hit! I specifically used your recipes since my two toddlers would be having small slices and I wanted a chocolate pie with eggs that were cooked. I can’t wait to make this pie again. Thanks for your recipes and the videos that accompany them make it fool proof. Happy Holidays!
Made this for Thanksgiving along with (your Pumpkin cheesecake and your Cranberry Apple Lattice Pie) My sister told me this tasted like HEAVEN, she has always been the smartest of our bunch ( . : Thank you Sally!
I made this for Thanksgiving this year (2019) and it was/is DIVINE! Holy cow it is delicious, I will make it again, thank you for sharing it! This is the first recipe for french silk pie that I’ve seen that doesn’t have raw eggs in it, and I was feeding some elderly folks and wasn’t going to do anything with raw eggs in it. Thank you again, I could eat bowls full of this delicious filling alone!
Your recipe is very easy to follow, well written, and well organized in breaking down a bunch of steps into a logical order. And – it makes a fantastic, delicious pie! I took it to a Thanksgiving party and all of my cousins said it was the best french silk pie they ever had. The chocolate filling is soooooo delicious. I left the whipped cream off until we served it.
Made this pie for Thanksgiving and it was delicious!! I used a store bought pecan crust and made the chocolate filling the day before. Let it set in the fridge overnight and then topped it with the whipped cream and chocolate shavings just before serving. The filling was smooth, creamy and just decadent. Home run!
This pie turned out great! Many steps, but ultimately worthwhile. My crust sides fell, but I will try to fix that next time with more pie weights, etc.
My three year old requested chocolate pie for thanksgiving so I’ll be making this in addition to pumpkin! What brand chocolate bars do you recommend??
Hi Ellen! I like Bakers or Ghirardelli brands. I use and recommend semi-sweet chocolate, but you can use bittersweet or even unsweetened chocolate for a darker flavor. 🙂 Happy baking!
This pie is AMAZING! An instant favorite. I subbed the traditional pie crust for oreo crust and it paired perfectly. I also added a teeny bit of instant espresso to the chocolate layer for depth. I agree with the other commenter- the chocolate part made so much that I actually had enough for two full pies. I used a normal 9 inch pie dish- maybe you’re supposed to use deep dish in this recipe? But I froze one and it kept really well- just added the whipped cream after it thawed. The chocolate seemed a little gritty at first but after you let it set that completely goes away and its smooth.
Hi Allie! A 9×2 inch pie pan is perfect for this. I know some pans are closer to 1.5 inches or even smaller if you’re using a disposable pan. Either way, the addition of instant espresso sounds incredible! So glad you tried this French Silk Pie and loved it. 🙂
This looks ah-mazing! Can you use pasteurized eggs and skip the cooking step? Thanks Sally!
Absolutely!
I want to make this pie this weekend, but reading through the recipe I am worried it will have a grainy texture since you mix in a half a cup of granulated sugar with the butter at the end. Does that sugar dissolve somehow? Or does it leave a slightly grainy texture?
Hi Chery, the sugar and butter cream together. After adding the remaining ingredients and the fluffy whipped cream, there’s no sugar granule to detect. Never had that issue!
I had dough for a single pie crust in my freezer that I decided to use so I can make and freeze pie crust dough for the holidays (starting with your cheddar cheese pie dough). It was also my birthday the next day and I was having some family over so I decided to make your French Silk Pie. I gotta say, this pie is THE BOMB! It is so delicious… not too sweet, not a mousse or chiffon pie, more substantial but one of those pies where you want to scrape up every streak of chocolate on the plate. I also love that the eggs are cooked. Well done Sally.
Hi Sally!
I made this yesterday for dessert. Though the pie WAS tasty, it was a bit rich for me…I couldn’t finish my sliver! I’ll for sure make it again and use something a little less sweet than semi sweet to cut the sweetness down. I had never had French Silk…let alone made one, so it was a fun new experience! Thank you for another lovely Pie Week! Next up…Cookie Palooza! 😀
Hi Sally! I made this tonight and it is still setting, but so far, the filling is delicious! I am wondering, however, about the amount of filling. I filled my crust to the heaping top (and beyond), and still ended up with well over two cups extra filling. I ended up just putting the extras into bowls to chill and eat on their own, but I’m trying to figure out if I did something wrong somewhere along the line.
Any thoughts? I am pretty sure my pie pan was 9″ (though I measured the top, should I have measured the bottom?) Is this normal to have so much extra? Thanks!
Hi Julie! I’m so so glad you loved this French Silk Pie! Yes, measure the bottom of the pie dish. A 9×2 inch pie dish (or my 9×1.8 inch pie dish linked in the notes) is always large enough without having extra filling.
I have not made this yet but it looks delicious. Do you think I can use a crumb and nut press in crust? Half my Thanksgiving guests claim they have to be gluten free for various reasons, and they will not eat the crust anyway.
Hi Elaine! I haven’t tried it, but you definitely can. The pie slice may not be as neat.
Would there be a difference between semi sweet chocolate bar and chocolate chips?
Yes. I recommend pure baking chocolate (see recipe note). Chocolate chips do not melt properly for this filling.
Could you use store bought pie crust for this? Still blind bake it the same way…
Absolutely!
exelente receta gracias me encantan tus tips son muy utiles gracias